A digital signage screen is a display used to show dynamic content such as videos, images, menus, or information that can be updated and managed remotely in real time.
On this page, you’ll learn how to add, configure, and manage digital signage screens from the EasySignage management console.
Add a digital signage screen
- Install the player app on your device. For device-specific steps, see Installation .
- Open the player app. It shows an ID on the screen. You use this ID to add the screen to your account.
- In the management console, select Screens in the left sidebar, then click Add Screen.
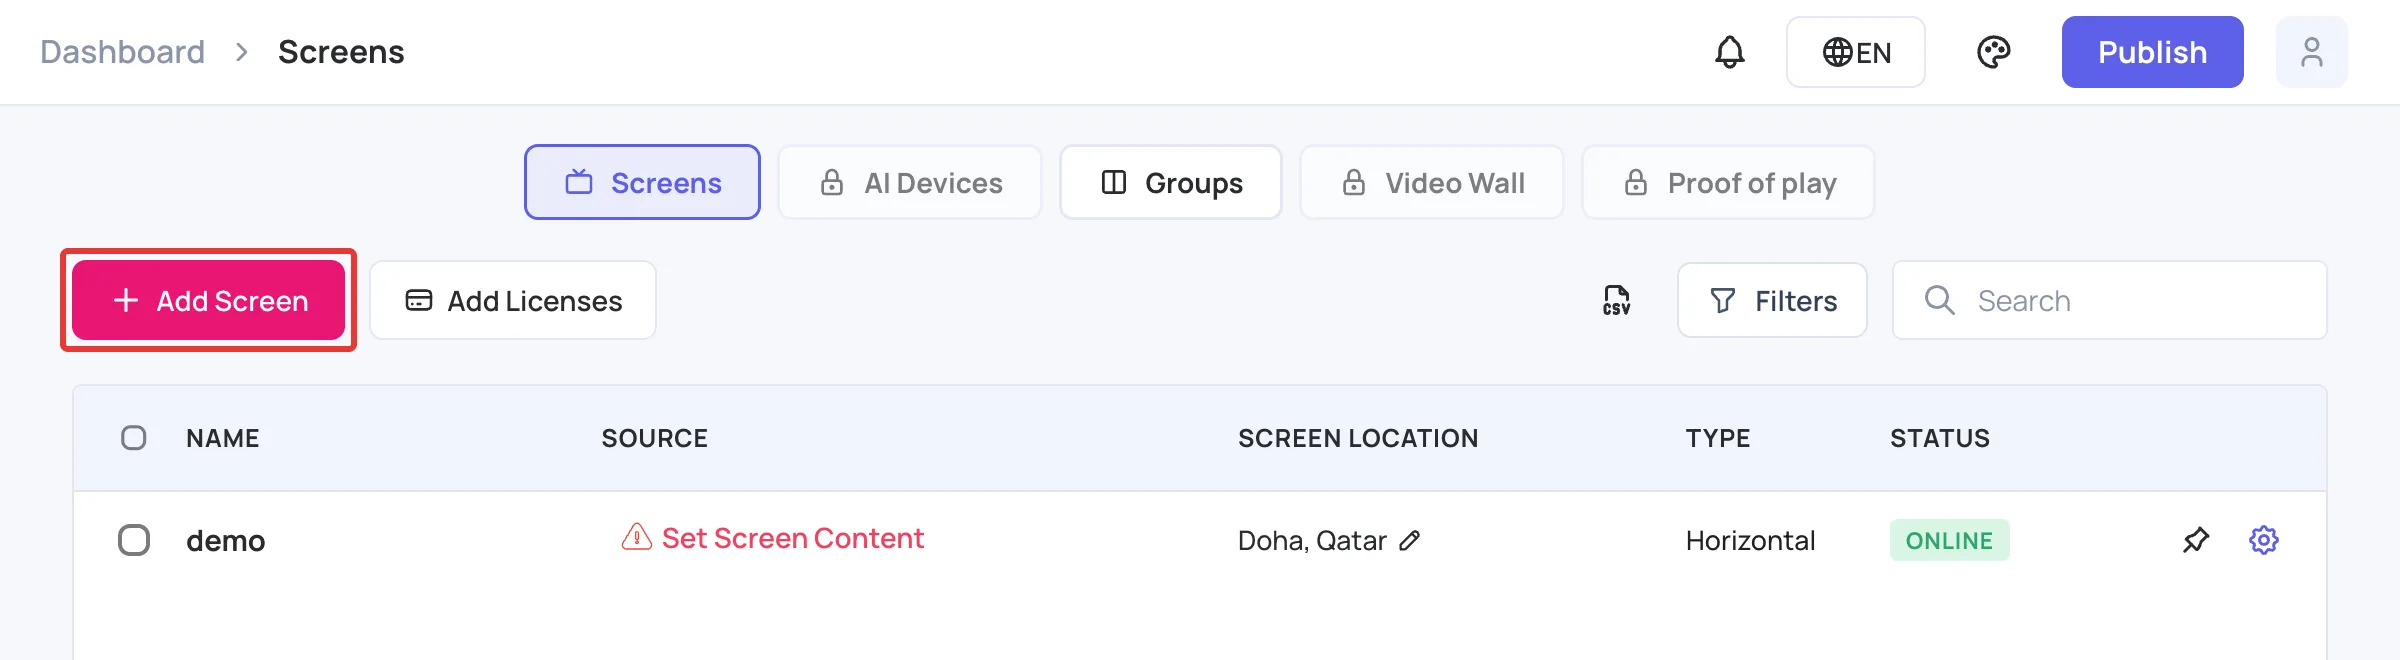
Note: If all your screen licences are in use, Add Screen opens the licence purchase steps instead of the Add new screen window. Add a licence first; see Licences and Billing .
- In the Add new screen window, fill in:
- Enter the ID displayed on the screen. The ID is case-sensitive.
- Screen Name, for example “Reception TV”.
- Screen Location, for example “Reception”.
- Click Add Screen. The screen appears in the list.
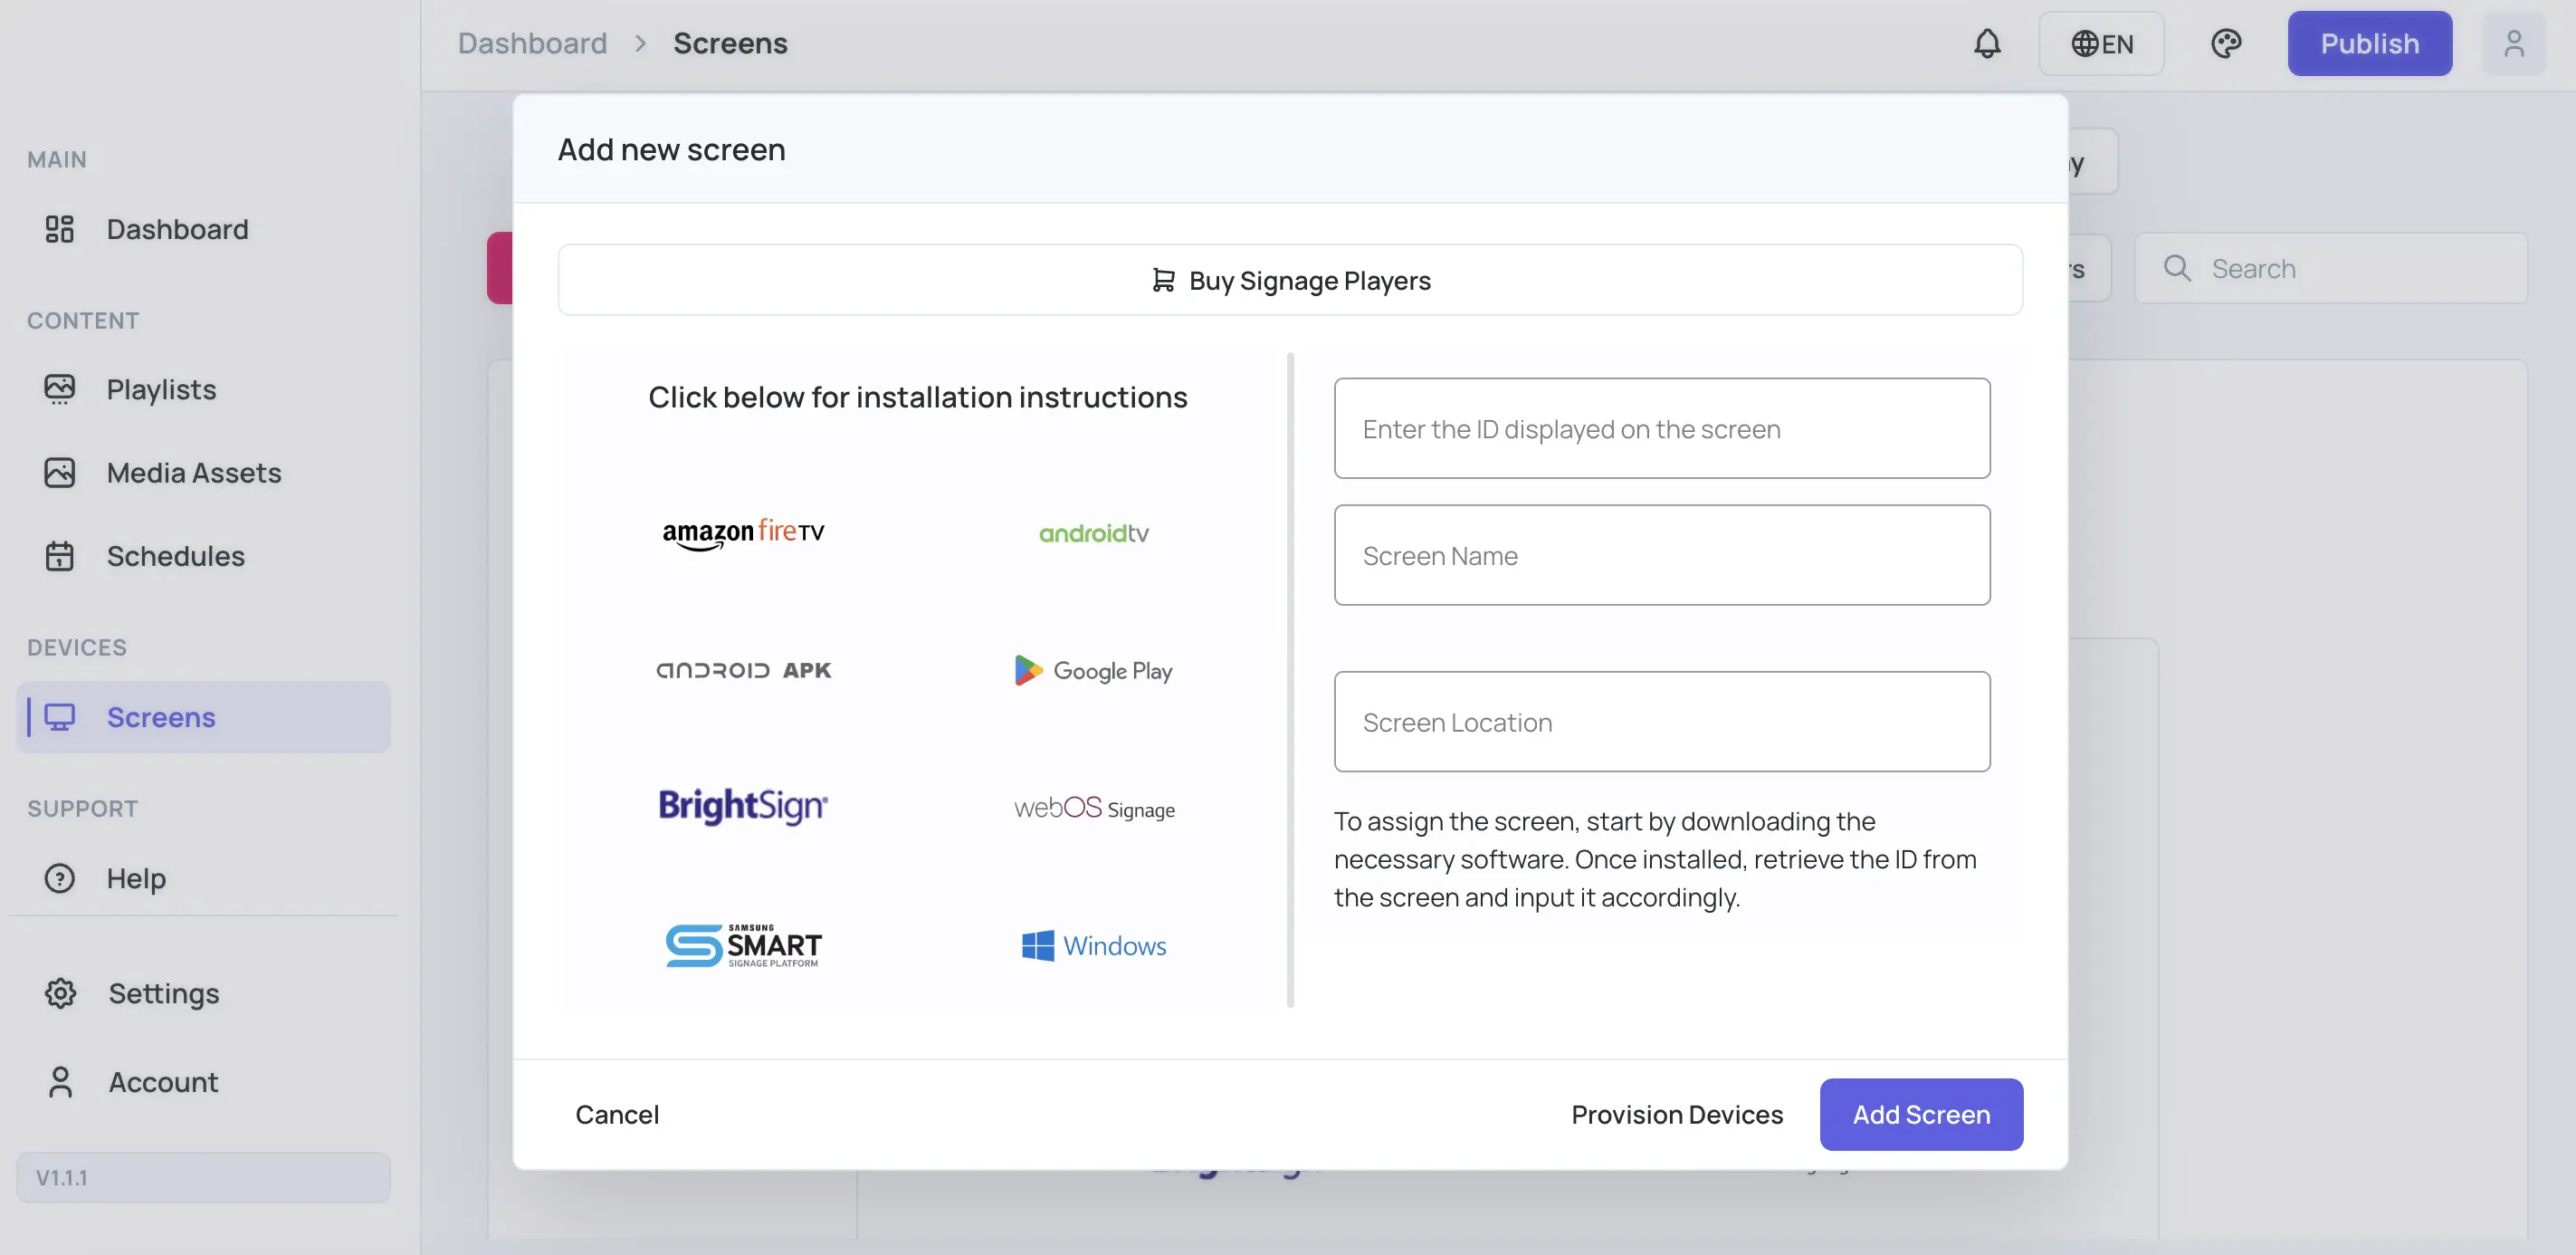
In the Add new screen window you can also:
- Click a device under Click below for installation instructions to open its installation guide.
- Click Buy Signage Players if you don’t have a device yet.
- Click Provision Devices to set up many devices at once. See Pre-Provision Devices .
The screens list
Each row shows a screen’s Name, Source, Screen Location, Type (horizontal or vertical) and Status (online or offline).
- To rename a screen or change its location, open its Screen Details (gear icon). See Screen details .
- To keep a screen at the top of the list, click its Pin screen icon. Click it again to unpin.
- If a screen collects audience data, its name shows two figures: total views (eye icon) and median attention time per view (clock icon), both for the last 30 days.
Set screen content
Screens can play a playlist, a channel, a group or a schedule.
- On the screen’s row, click Set Screen Content (or its current source).
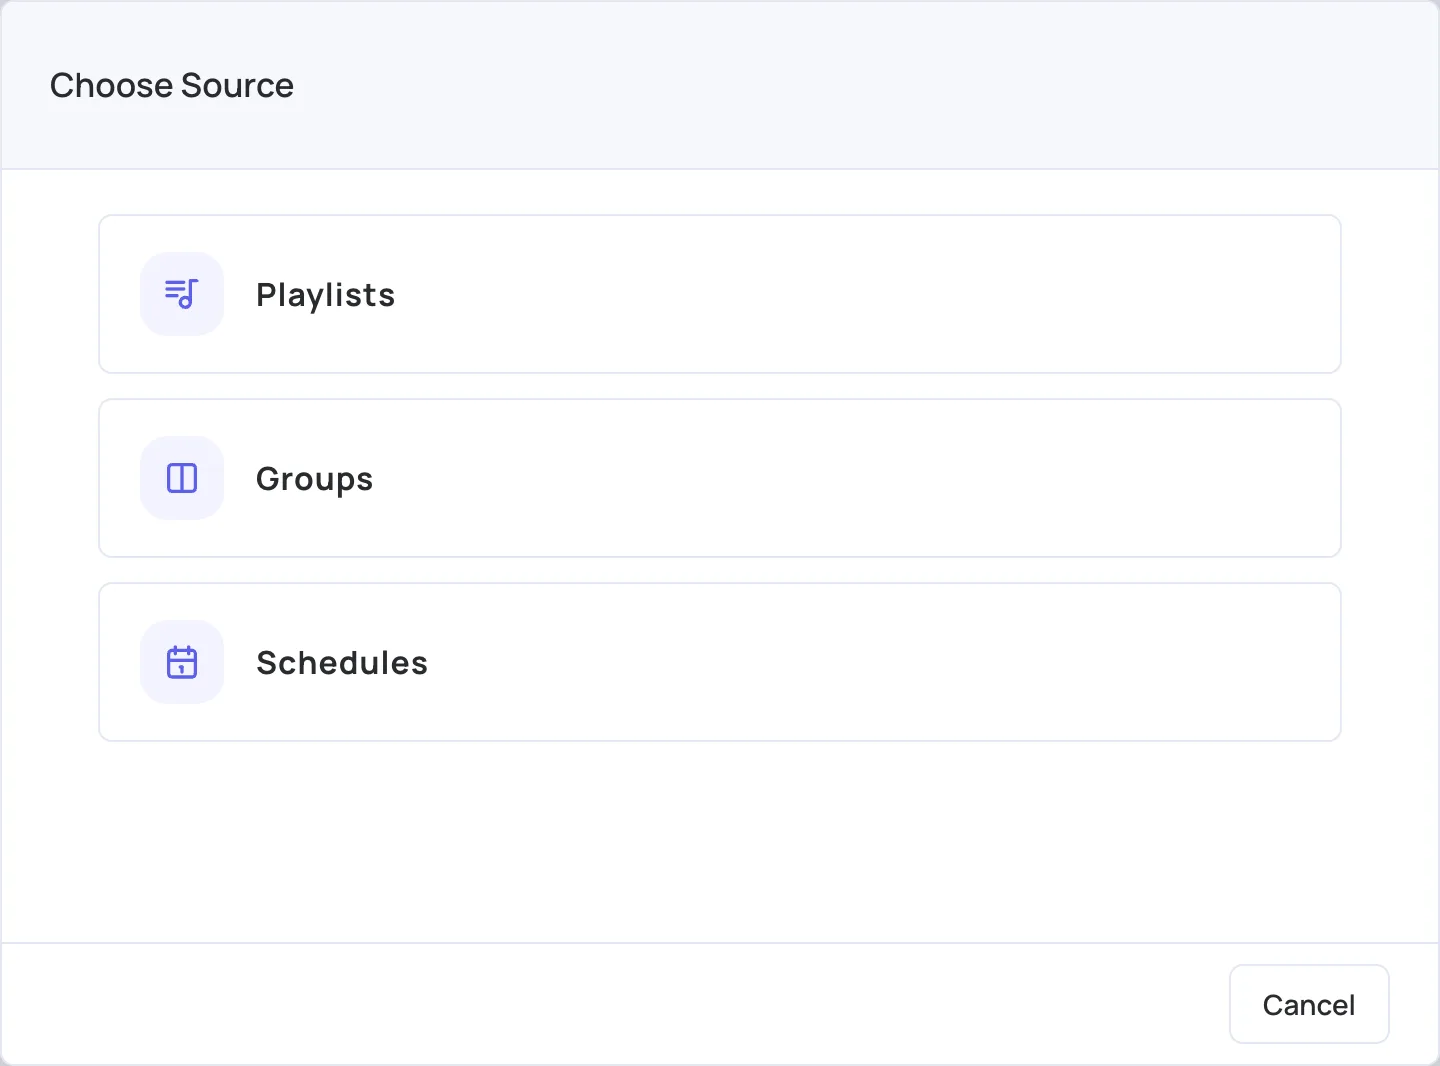
- In Choose Source, choose Playlists, Channels, Groups or Schedules.
- Click the playlist (or channel, group or schedule) you want. Type in Search to filter the list.
- To create a new playlist and assign it straight away, click Set to New Playlist.
- To pick a different source type, click Change source type.
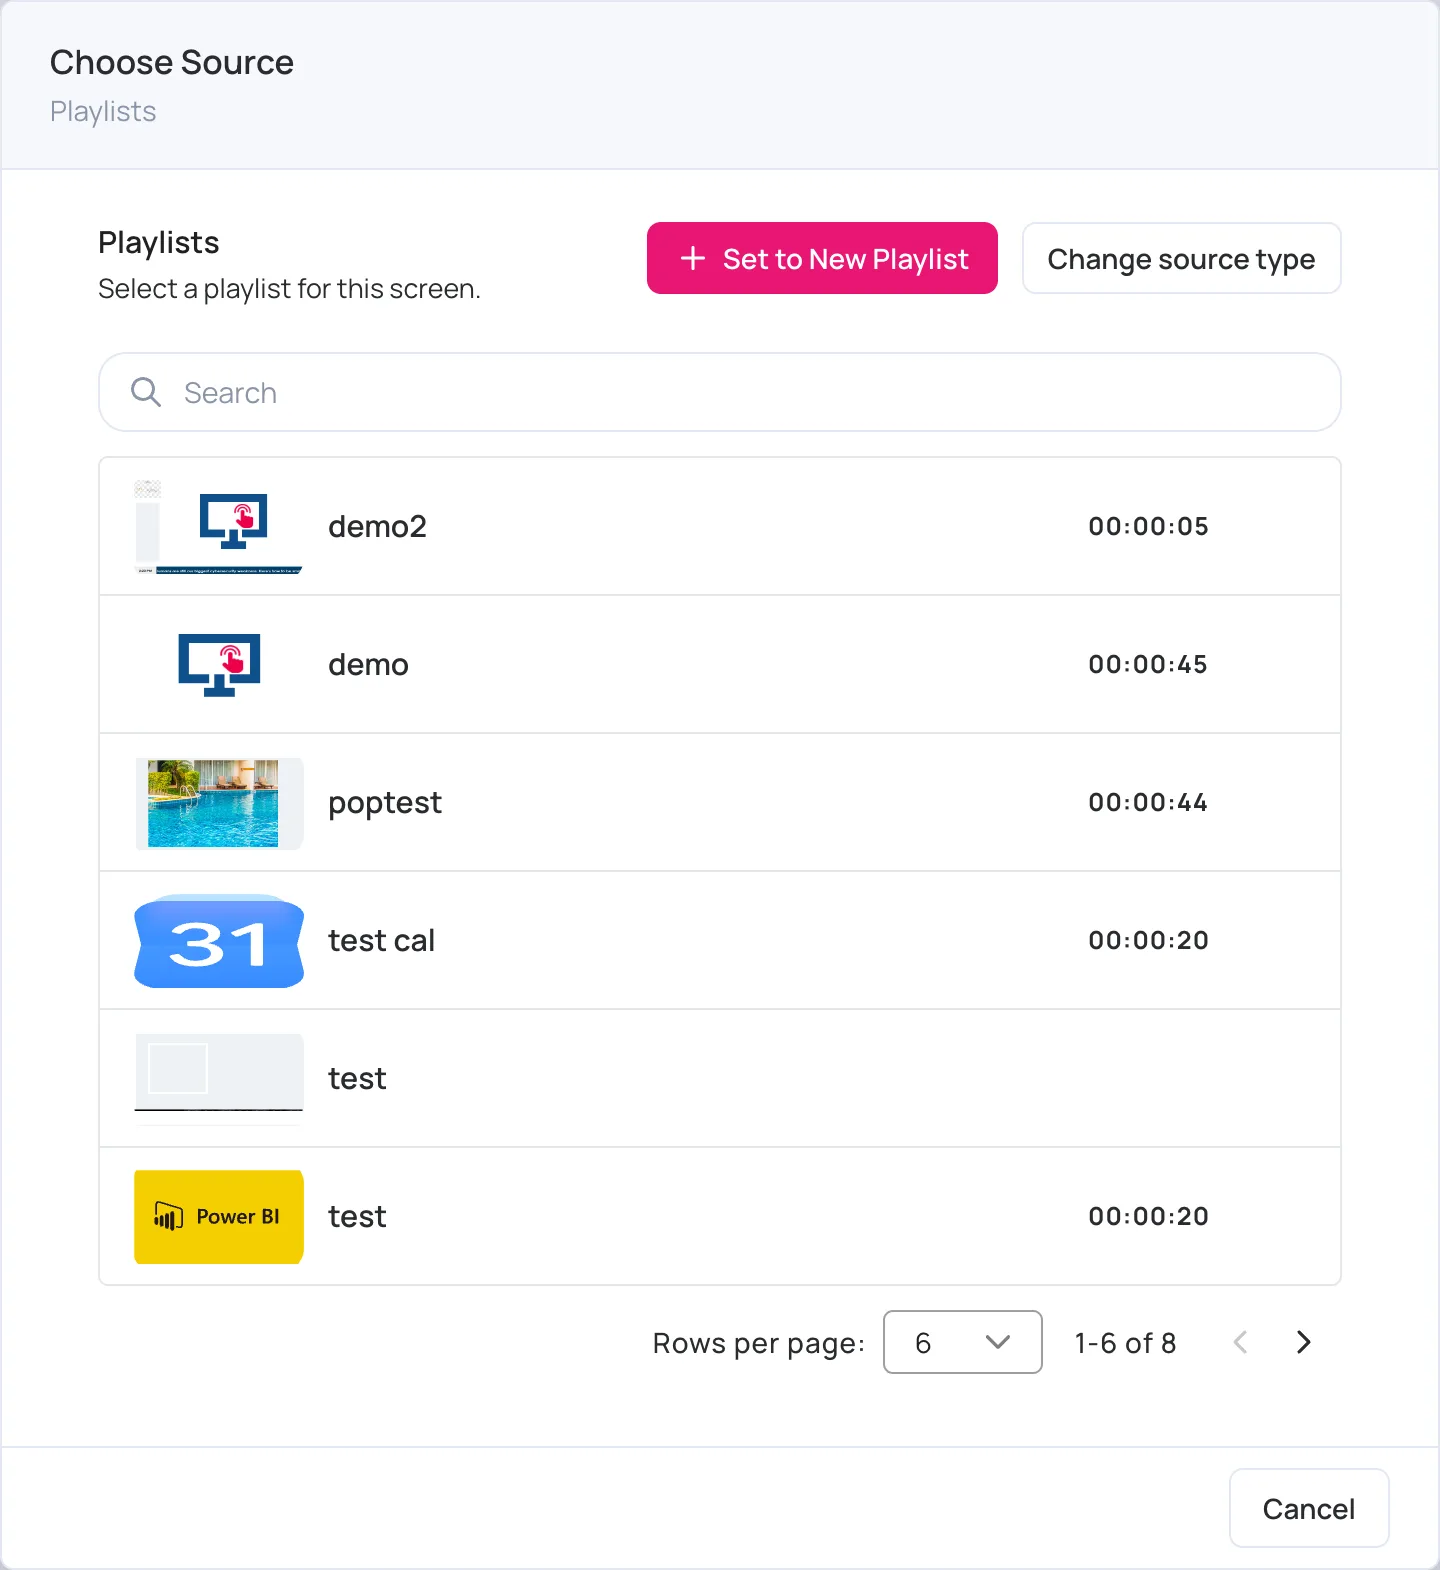
Note: A horizontal screen only lists horizontal playlists, and a vertical screen only lists vertical playlists.
Tag or publish several screens at once
Select screens in the list to add or remove tags on all of them, or to publish to all of them, in one step.
Select screens
- Select the checkbox next to each screen you want.
- To select every screen in the list, select the checkbox in the Name column heading. This selects every screen that matches your current search and filters, including screens on other pages of the list.
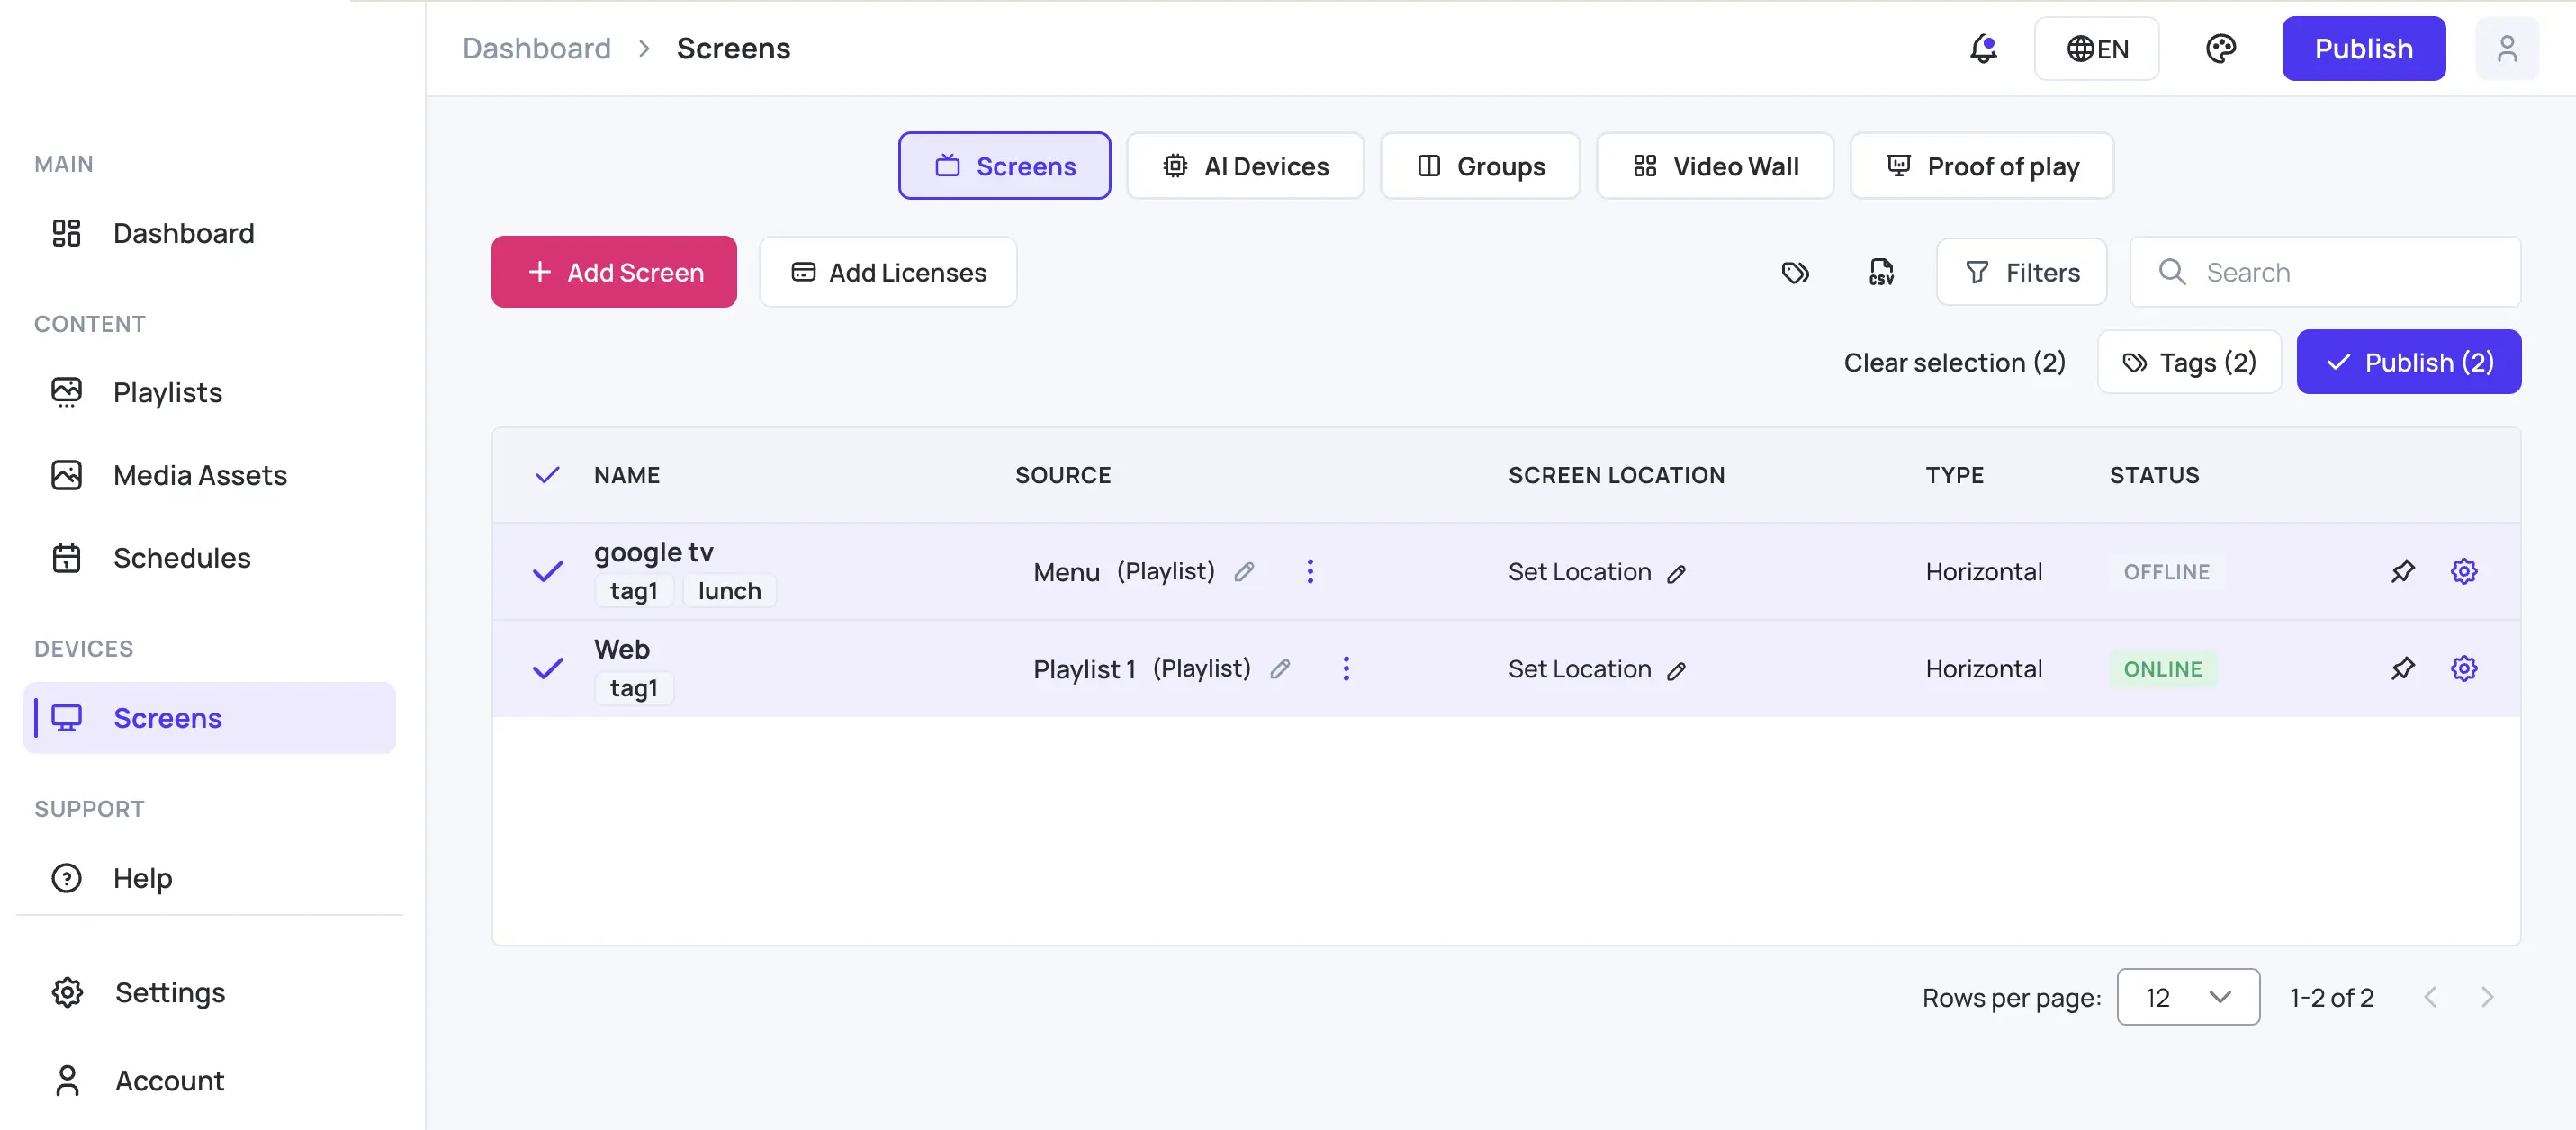
- To clear the selection, select Clear selection.
The selection clears when you change the search, a filter, or the tab.
Note: Checkboxes appear only if you can manage screens and your access isn’t read-only. Selecting screens isn’t available on the AI Devices tab.
Add or remove tags on selected screens
- Select the screens.
- Select Tags. The button shows how many screens are selected.
- Select Add or Remove.
- Enter or choose one or more tags.
- Select Save.
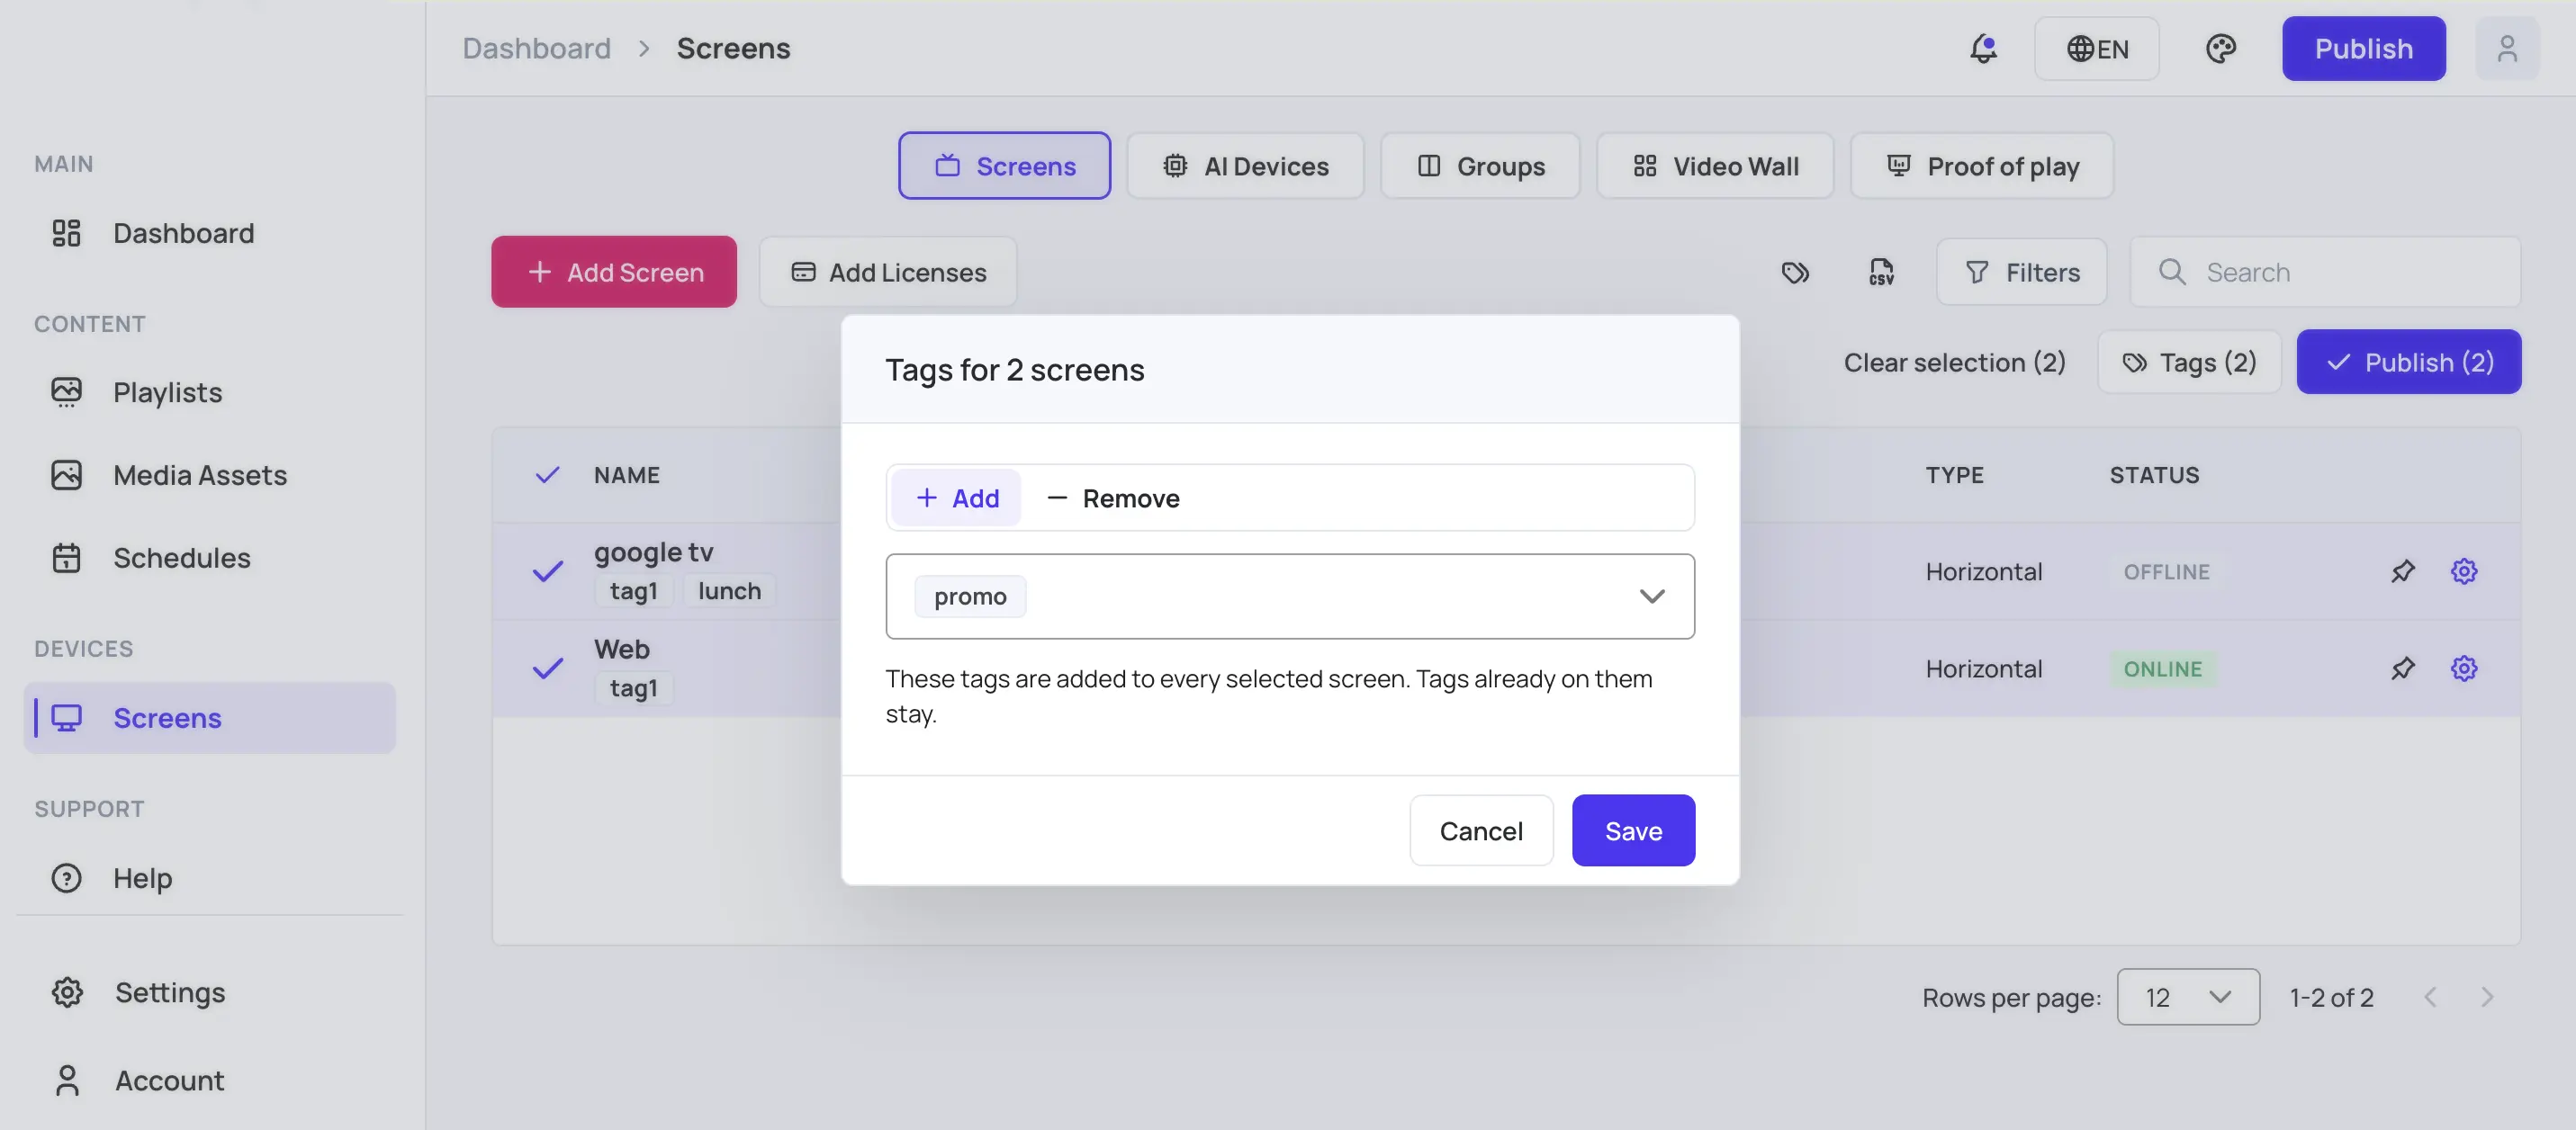
Add: adds the tags to every selected screen. Tags already on the screens stay.
Remove: takes only these tags off every selected screen. Other tags stay. Capitalisation doesn’t matter here: removing
lobbyalso removesLobby.
Each screen’s tags appear under its name in the list.
Warning: Removing a tag from a screen stops tag-restricted media with that tag from playing on it, and teams limited to that tag no longer see the screen. If your own access is limited to that tag, removing it hides these screens from you. The dialog warns you in both cases.
Screens pick up tag changes on their next publish. The screens stay selected after you save, so you can publish them straight away.
If some screens can’t be updated, a message shows how many failed. The screens stay selected so you can try again.
Publish to selected screens
- Select the screens.
- Select Publish. The button shows how many screens are selected.
- Select Yes to confirm.
Only the selected screens are published. Publish appears only if you have permission to publish. If your access is limited to screens with certain tags, only the selected screens that carry those tags are published.
Screen details
To open a screen’s details, click the Screen Details (gear) icon on its row.
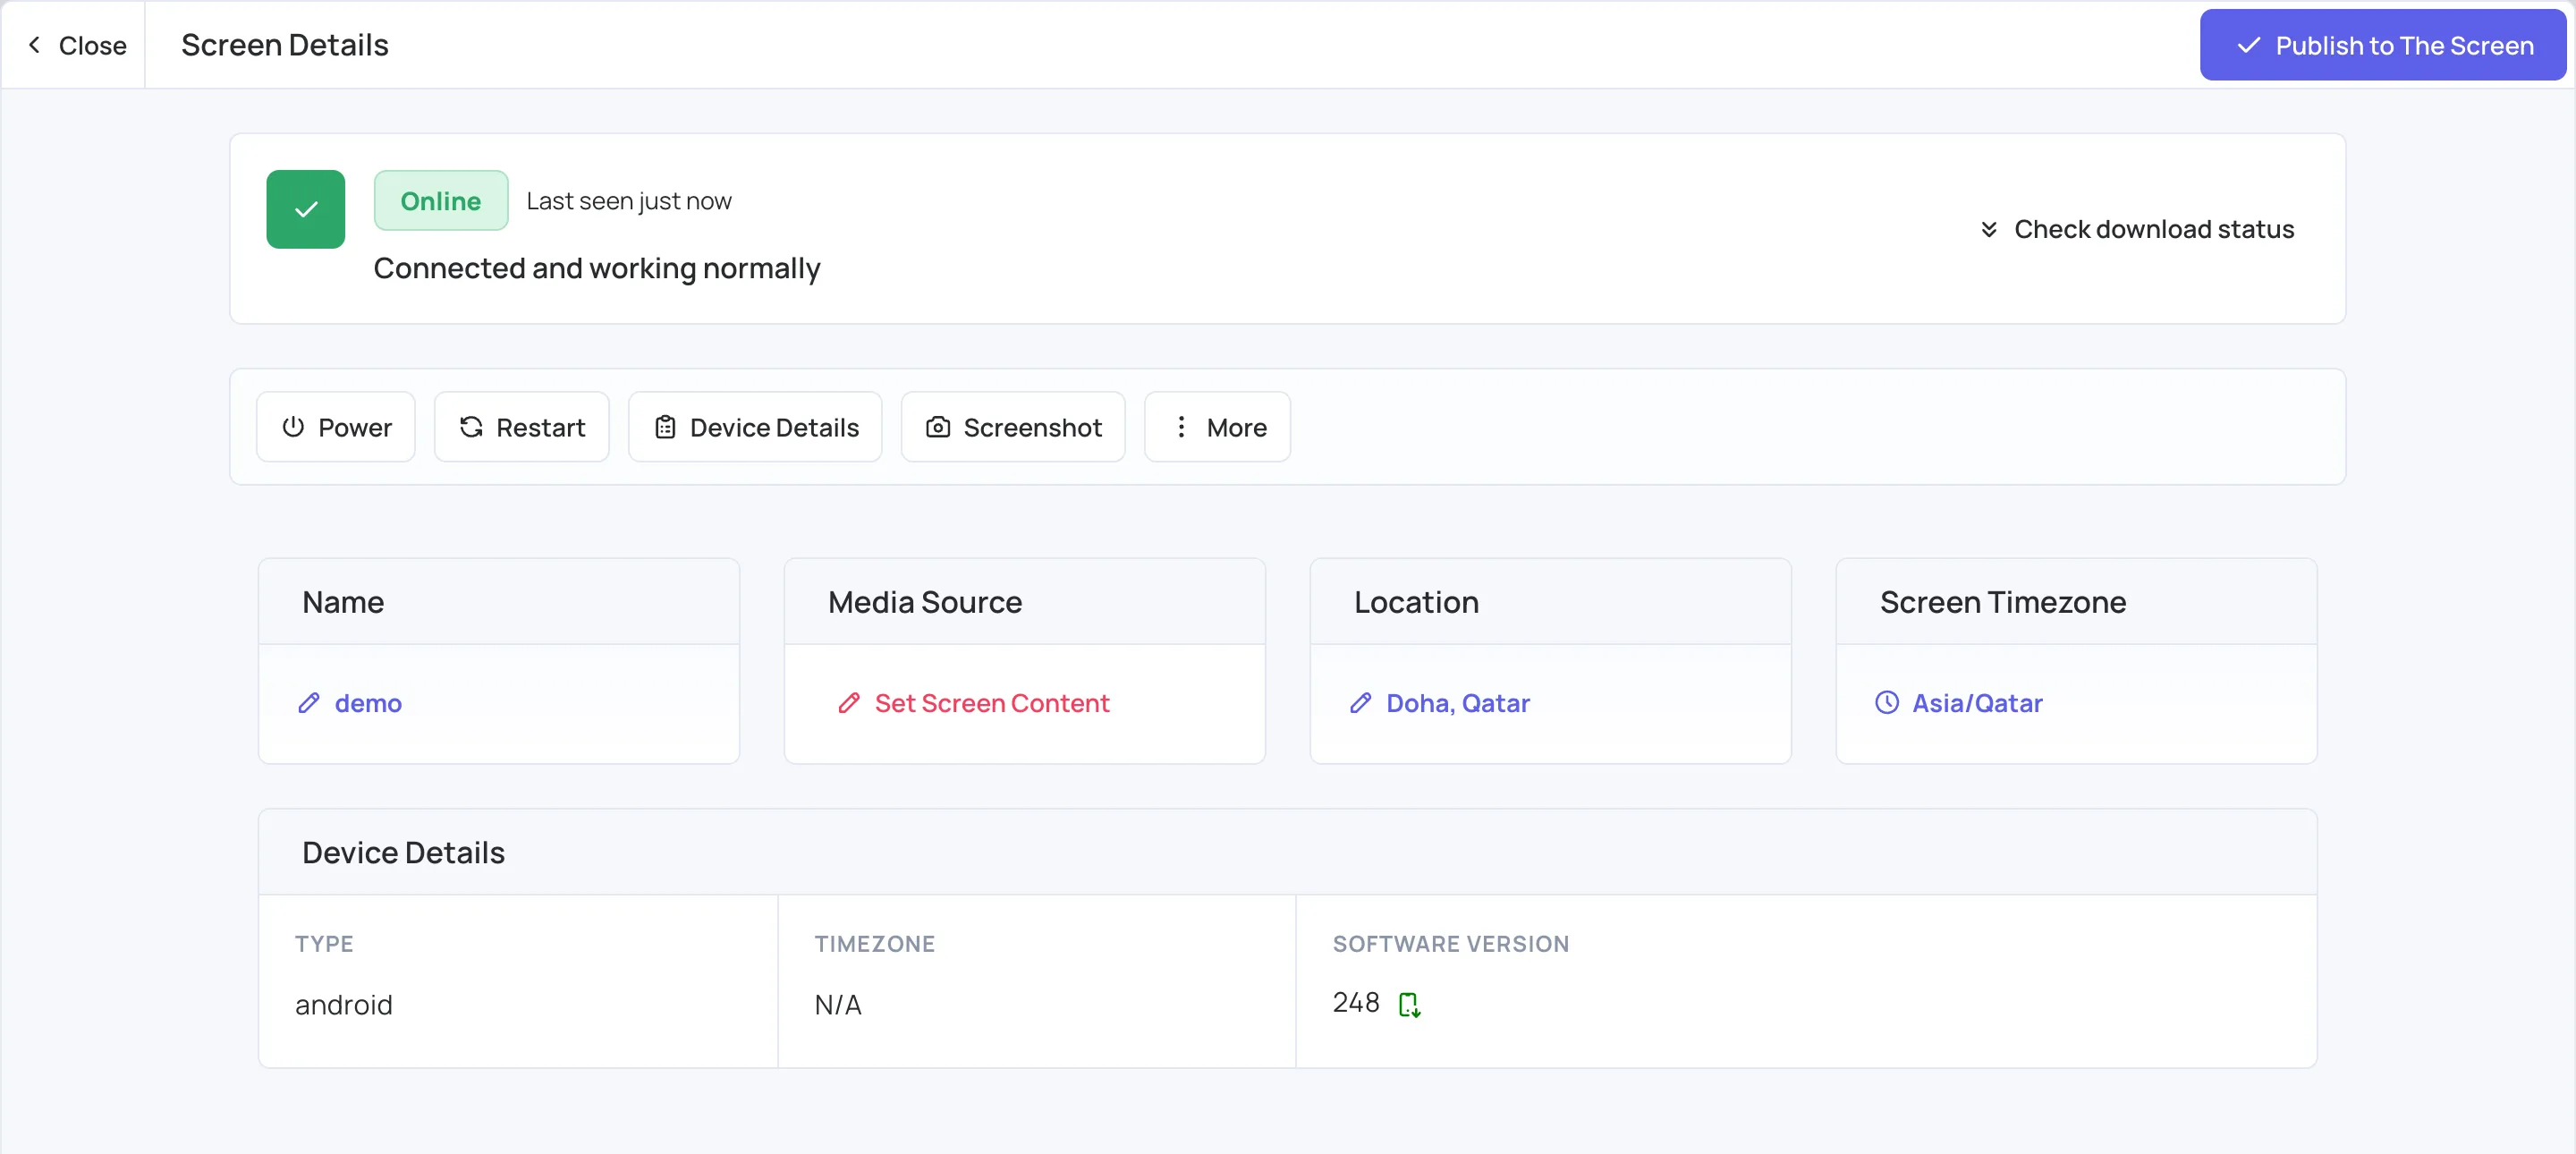
At the top you see whether the screen is Online or offline and when it was last seen. Click Check download status to see how far the screen is with downloading its media, and Publish to The Screen to send your latest changes to it. Click Close to go back to the list.
The cards below let you change the screen’s settings:
- Name: click the name to rename the screen.
- Media Source: click it to choose what the screen plays. See Set screen content .
- Location: click Set Location to enter the screen’s address. You can also select Enable auto-update location using the device’s GPS; make sure location permission is enabled on the device. See Live Screen Location .
- Screen Timezone (rooted Android screens only): click Set timezone to set the screen’s clock without changing its location. This is useful when the location is a name rather than an address, such as “Floor 1”. After saving, click Publish, wait a few seconds, then restart the screen for the new timezone to take effect.
The Device Details panel shows the screen’s type, timezone and software version.
If the screen is offline, the status shows Device is not reporting to the dashboard with a Troubleshooting tip: check power, network connectivity, and player health. Click Help in the tip to open Player Showing Offline on Dashboard .
Screen actions
Use the buttons under the status to control the screen. Some are under More. Screenshot, Restart and Rotate are only available while the screen is online.
- Power: turn the screen on or off, or schedule it. See Power Management .
- Restart: reboots the screen. Requires a rooted device. Confirm with Yes.
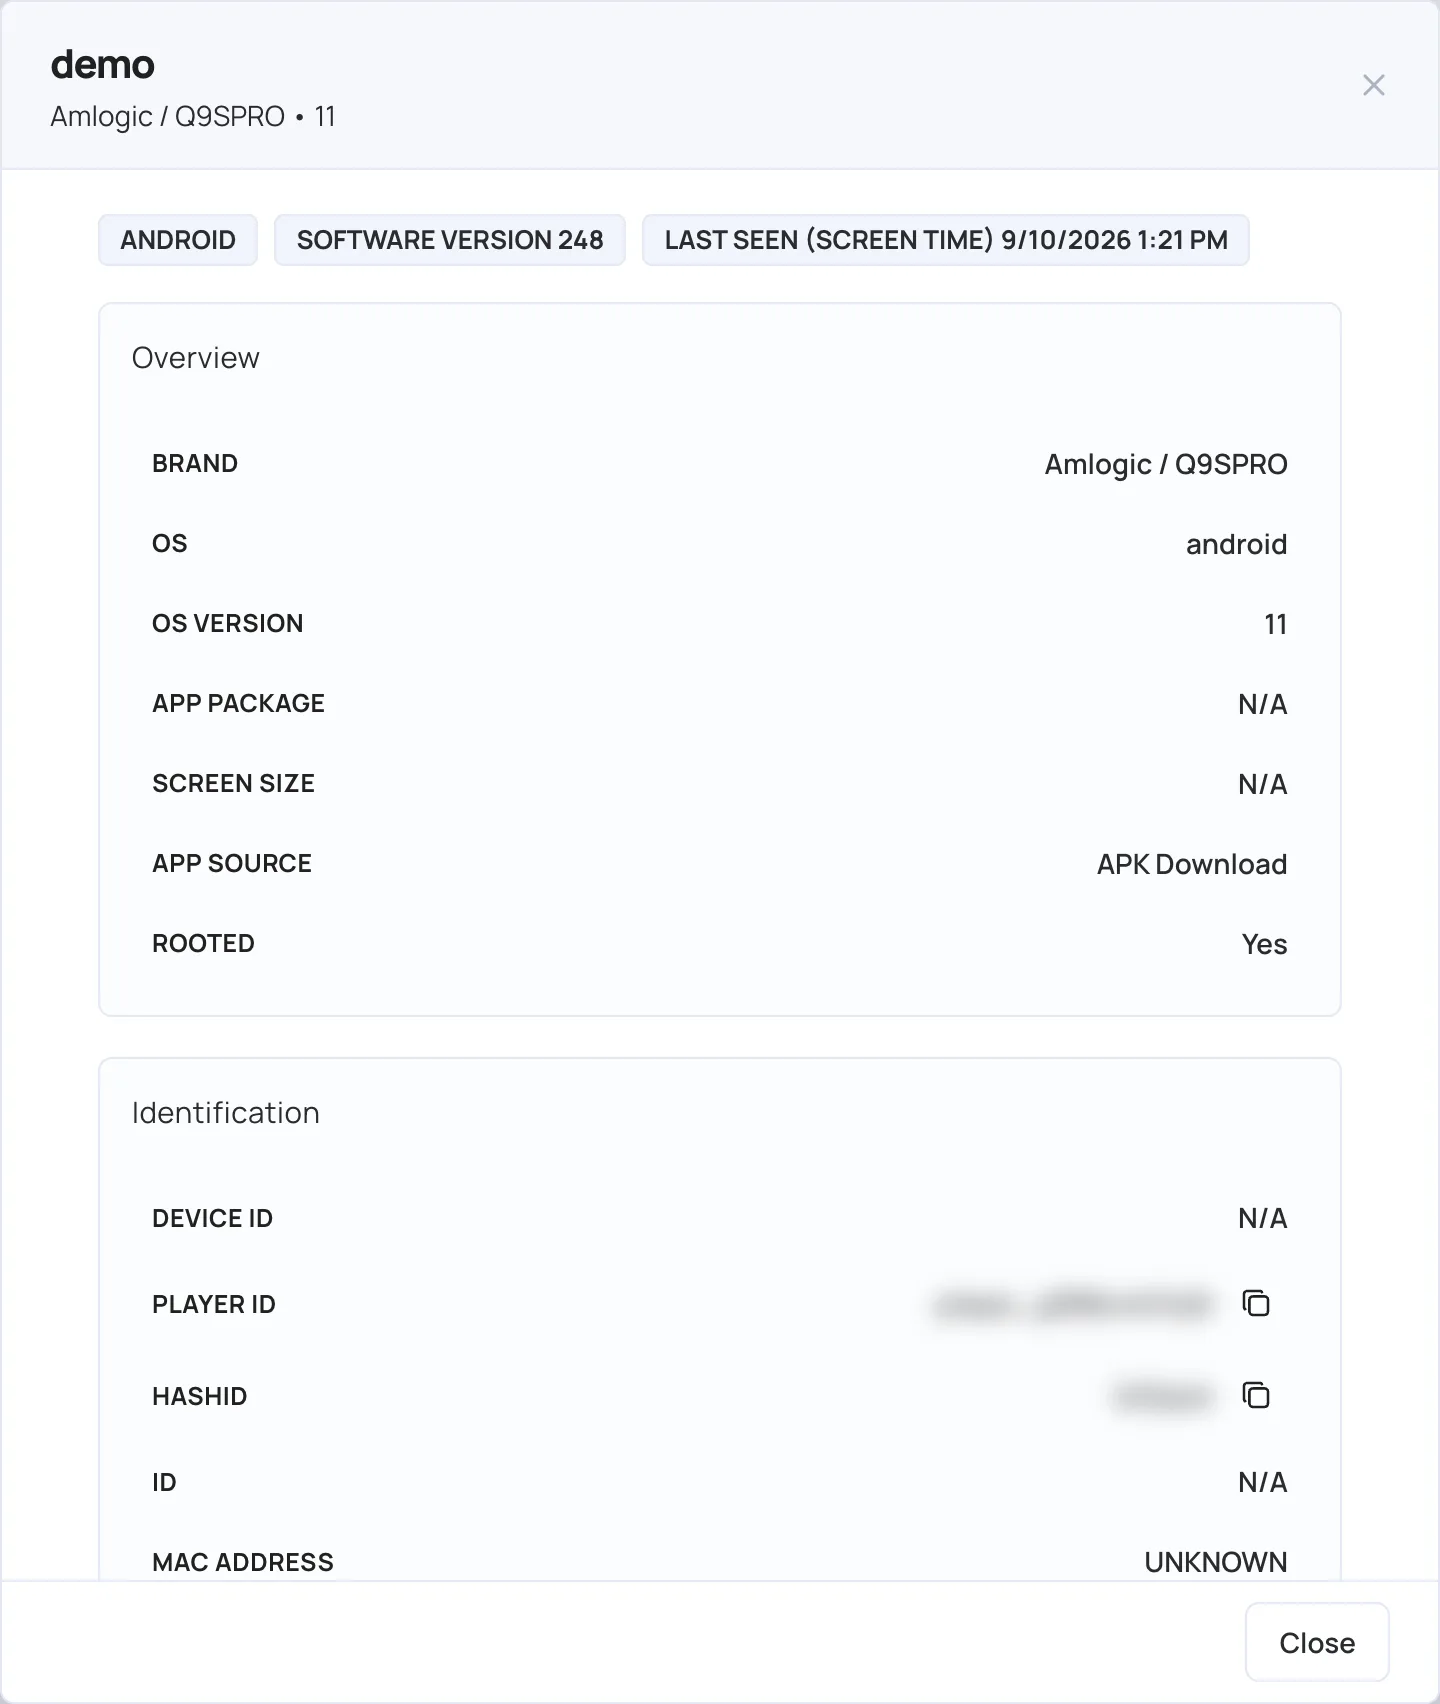
- Device Details: shows hardware and software details, such as the brand, OS version, storage, memory, network and when the screen was last seen.
- Screenshot: click Take a new screenshot and wait a few seconds to see what the screen is showing right now.
- More → Brightness: see Brightness Management .
- More → Rotate: see Rotate a Digital Signage Screen .
- More → Tags: choose tags for the screen, then click Save.
- More → Status History: a chart of when the screen was online and offline. Available to users who manage screens.
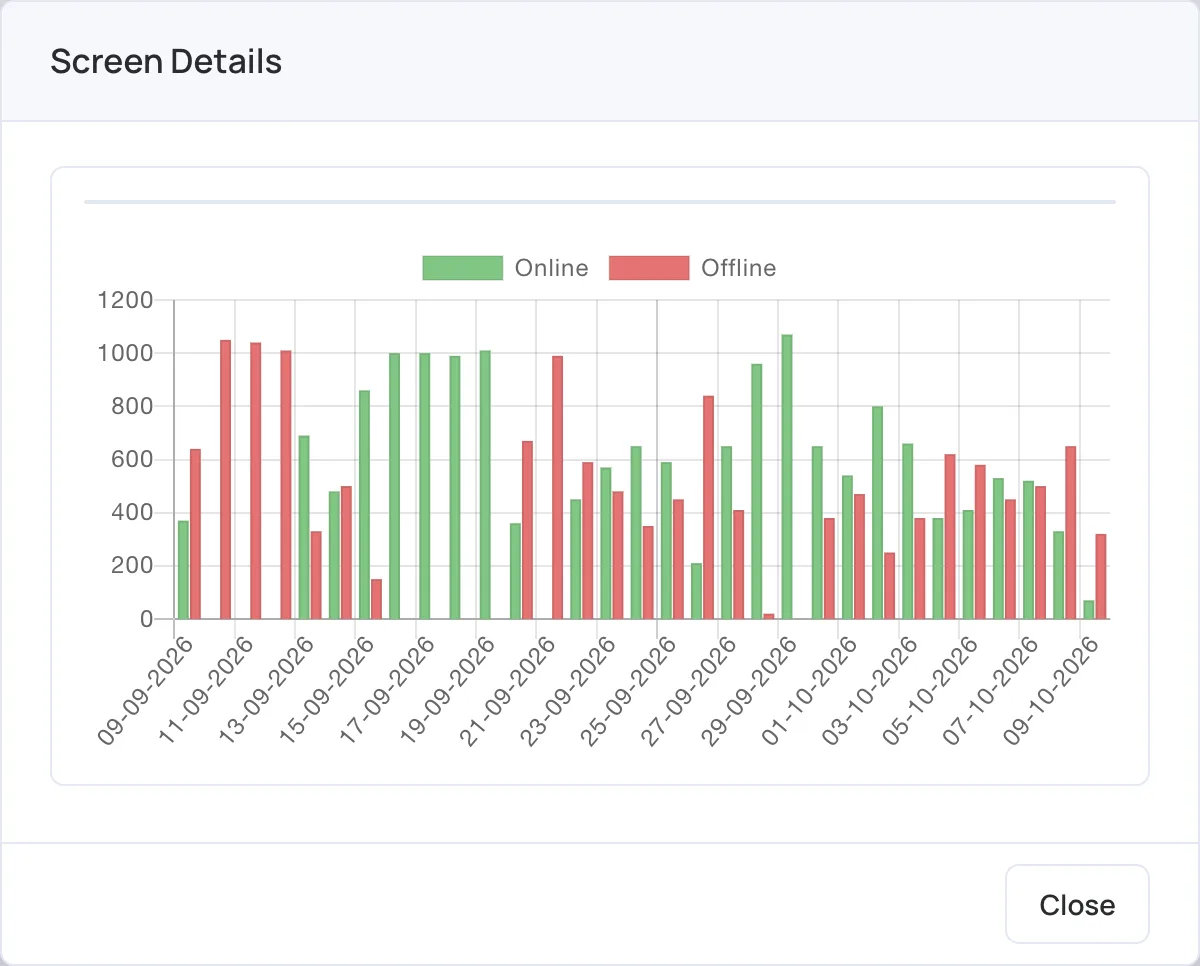
- More → Change Orientation: available on Android screens only.
- More → Camera: available on screens with a camera that can be controlled.
- More → Delete: removes the screen from your account. Confirm with Yes. Available to users who manage screens. The screen shows its ID again and can be added to another account. Its data and media files are removed from the screen.
Filter and search screens
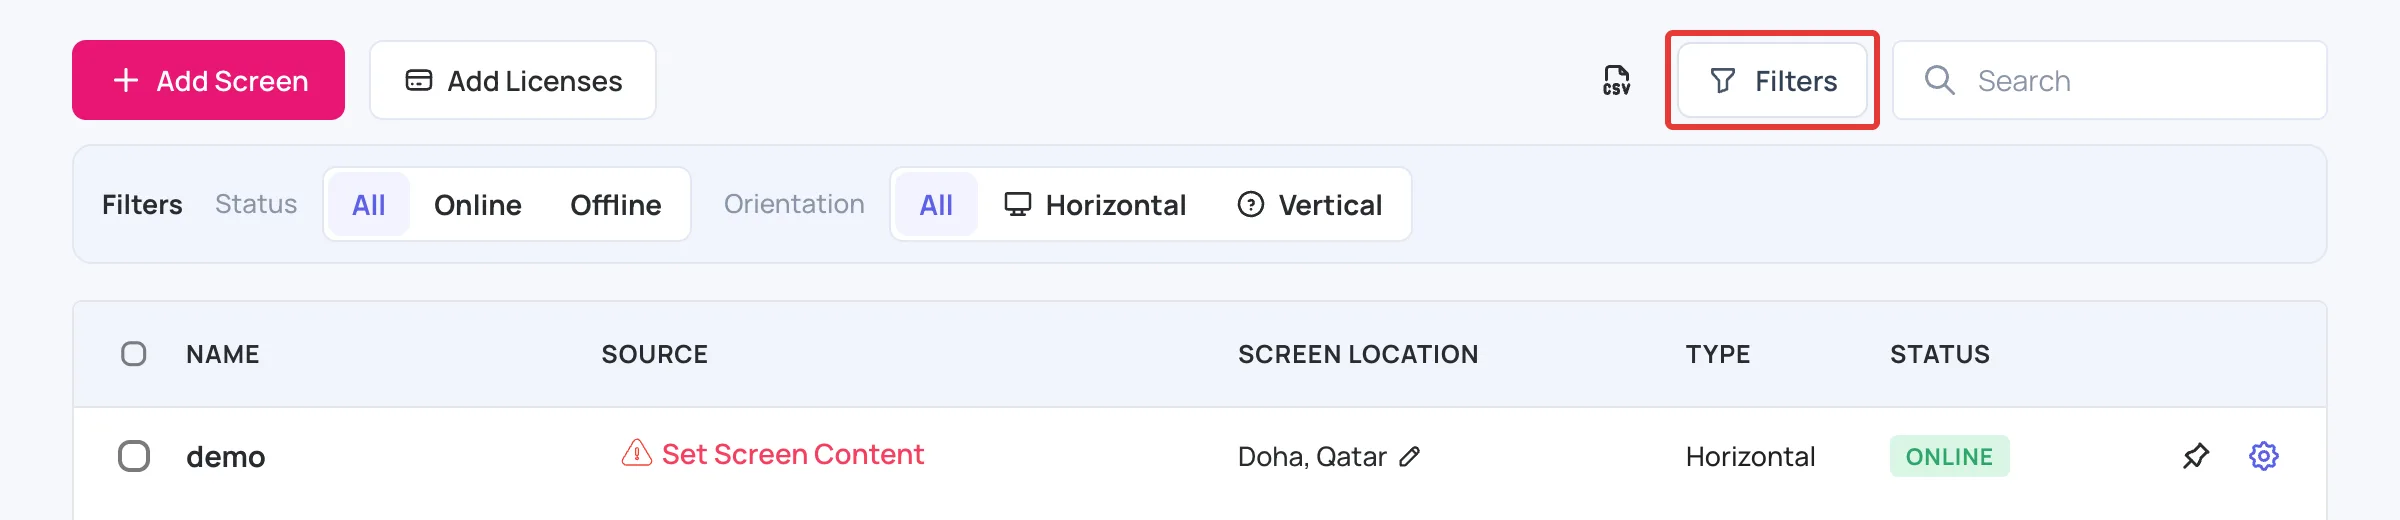
- Type a screen name in Search to find it in the list.
- Click Filters to filter by:
- Status: All, Online, Offline
- Orientation: All, Horizontal, Vertical
- Tags, if your account uses tags
- Click the CSV icon to export your screens’ details as a CSV file.
- To see and manage every tag in your account, click the Tag manager icon next to the CSV icon. If you filtered the list by one tag, the tag manager opens on that tag. The icon appears only if you have full access to the account. See Tag manager .
- To tag or publish the screens you’ve found, see Tag or publish several screens at once .