With Media approval, media from the teams you choose waits for an approver before it can play on your screens. Approvers see the waiting media on the Approvals page and approve or reject it. Media that isn’t approved isn’t sent to screens when you publish.
Note: Media approval is included on the Enterprise plan. Only members of the Administrators team can turn it on and choose who needs approval.
Turn on media approval
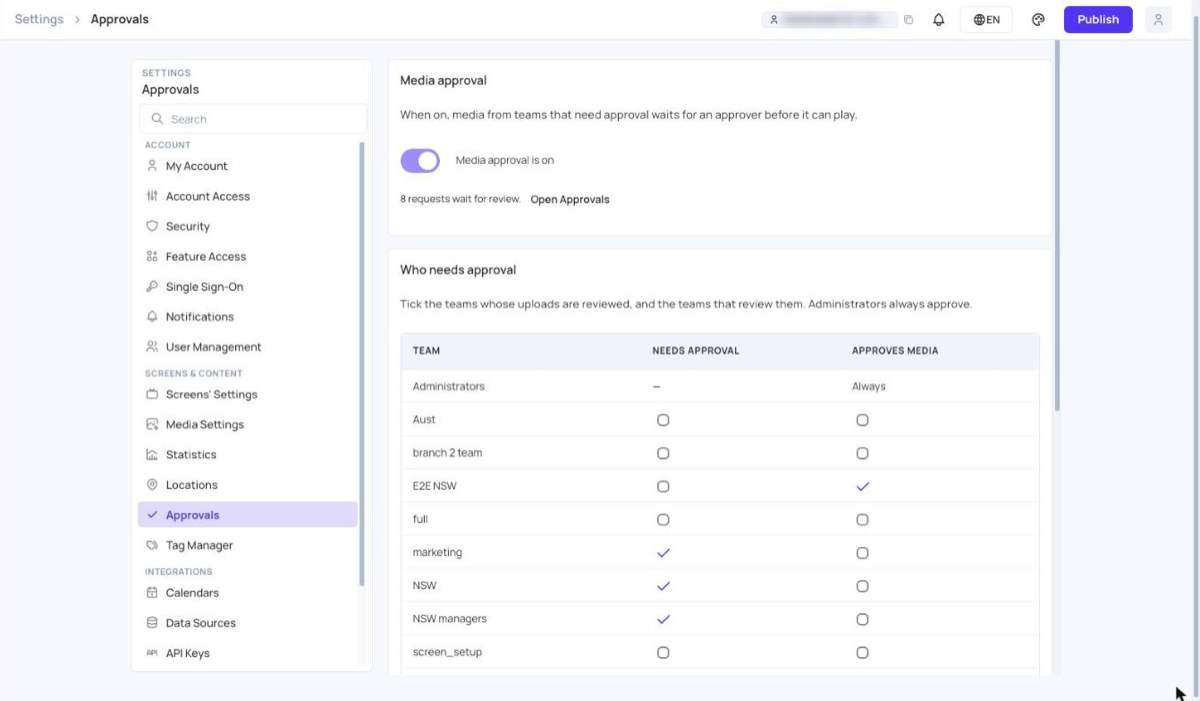
- Go to Settings > Approvals.
- Under Media approval, turn on the switch so it reads Media approval is on.
- Under Who needs approval, tick the teams:
- Needs approval: media this team creates waits for approval before it can play.
- Approves media: members of this team can approve or reject media waiting for review.
Each tick is saved straight away. The Administrators team always approves and never needs approval.
You can also set Needs approval and Approves media on the Media Assets row of a team’s Permissions tab. See Teams.
What uploaders see
When someone in a team that needs approval adds media, the item shows Waiting for approval in Media Assets and in the playlist editor. Hover over it to read “It won’t play until an approver approves it.”
- You can still add the item to playlists, but it isn’t sent to screens until it is approved.
- When you publish, a message tells you how many items wait for approval and weren’t sent.
- A rejected item shows Rejected. Hover over it to read the approver’s reason.
Media that existed before you turned on approval, and media added by the Administrators team, plays as usual.
Review requests
- Click Approvals in the menu on the left. The number next to it shows how many requests wait for you.
- Choose a tab: Waiting for approval, Rejected or Approved.
- Click a request to open it.
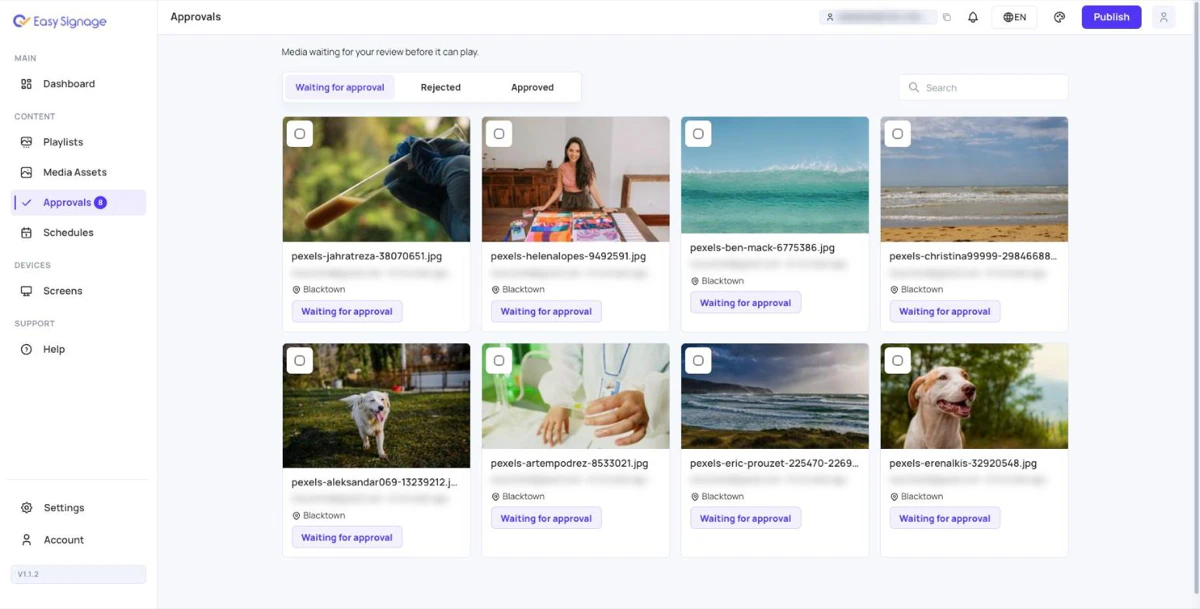
Each request shows a preview of the media, who requested it, the location the uploader’s team works at, when it was requested and its version.
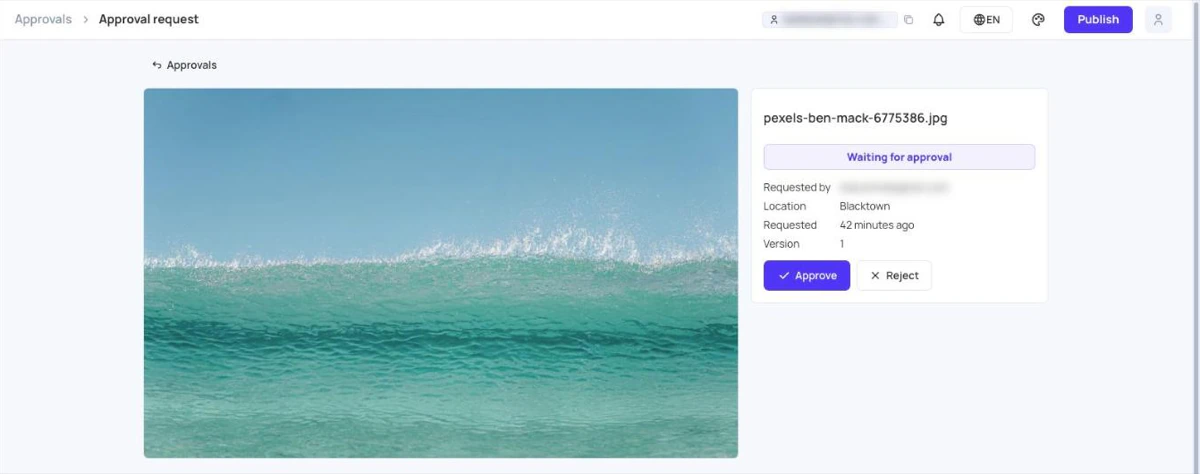
- To approve, click Approve. The media plays after the next publish. If you can publish, click Publish now to send it to your screens straight away.
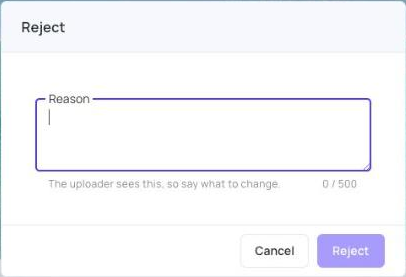
- To reject, click Reject, type a Reason, then click Reject. The uploader sees the reason, so say what to change.
You can’t approve or reject your own uploads. If the uploader changes the item while you have it open, a message asks you to check the new version first.
Approve or reject several requests
- On the Waiting for approval tab, tick the requests.
- Click Approve, or click Reject and type one reason for all of them.
Use Select All to tick every request shown, and Clear to untick them.
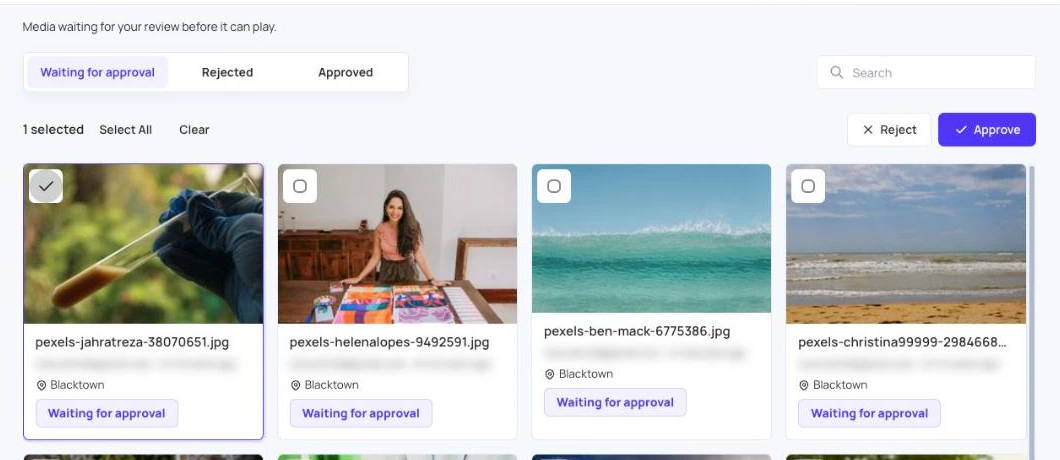
Find requests
- Search: find requests by media name, by who requested them, or by the rejection reason.
- Location: shown when requests come from more than one location. Choose a location to see only its requests.
Approvers see requests from the locations they cover. If you use Locations, limit approver teams to the locations they look after.
If your media was rejected
- Click Approvals and open the rejected request. The reason is shown under Reason for rejecting.
- Click Edit in Media to change the item, or click Send for review again to send it back unchanged.
Turn off media approval
- Go to Settings > Approvals.
- Turn off the switch, then click Turn off.
Items waiting for approval are released and play after the next publish. Rejected items stay off your screens.
Approval emails
Approvers get an email when media waits for review, and uploaders get an email when their media is approved or rejected. See Email Notifications.