This help page provides step-by-step instructions to install EasySignage on Android-based Philips digital signage screens, configuring settings, and making EasySignage the default playback app.
How to Install EasySignage on Philips Digital Signage
Step 1: Get the APK file
Download the latest APK from “Download APK”.
Copy it to a USB disk
Plug the USB disk into the TV
Press the power button to turn on the TV
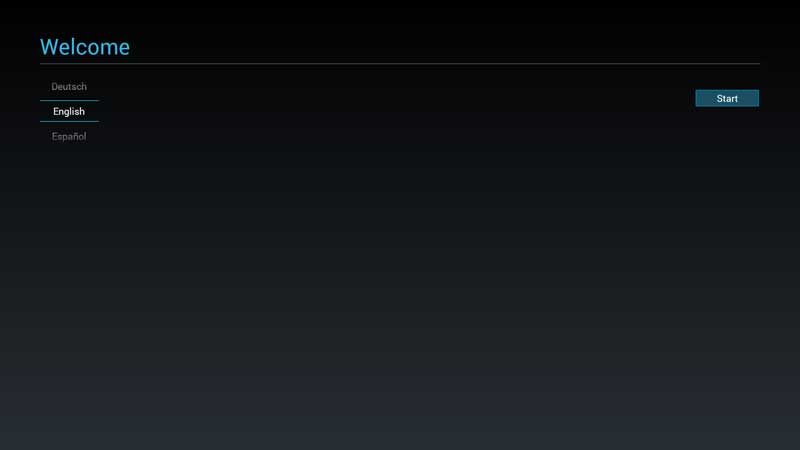
Step 2: Language
Choose the desired language using the remote control navigation keys
Press Start
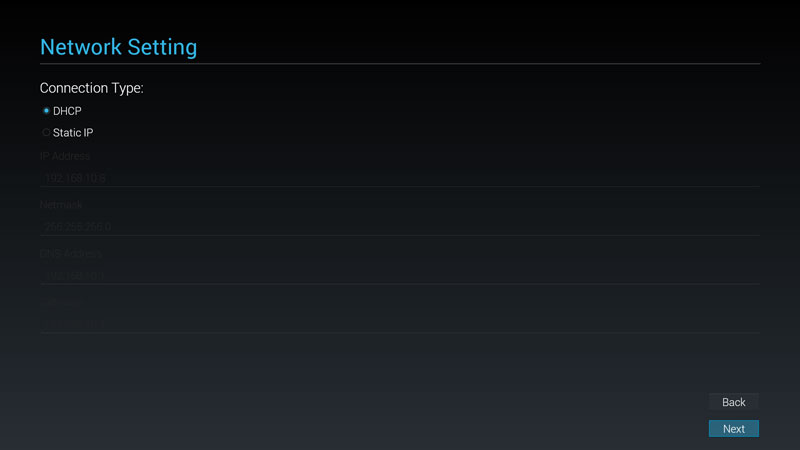
Step 3: Network Settings
Choose DHCP in the Connection Type
Press Next
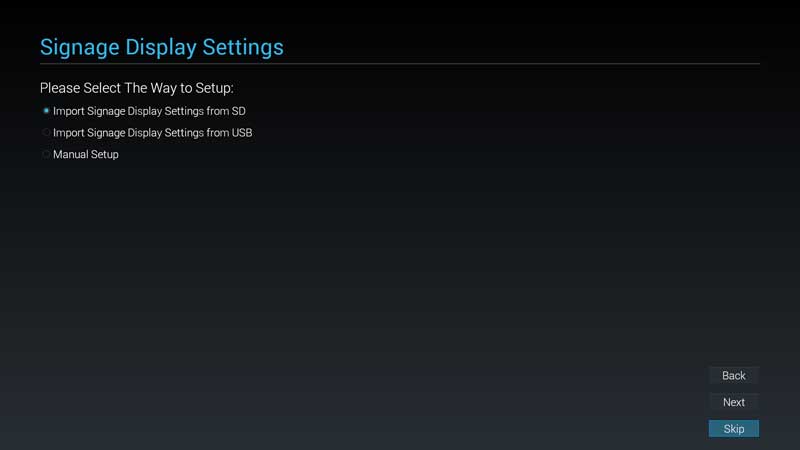
Step 4: Signage Display Settings
- Press Skip
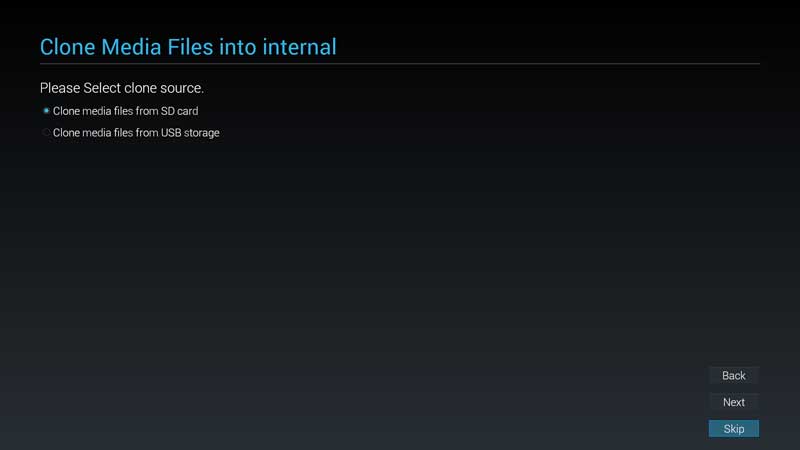
Step 5: Clone Media files into internal
- Press Skip
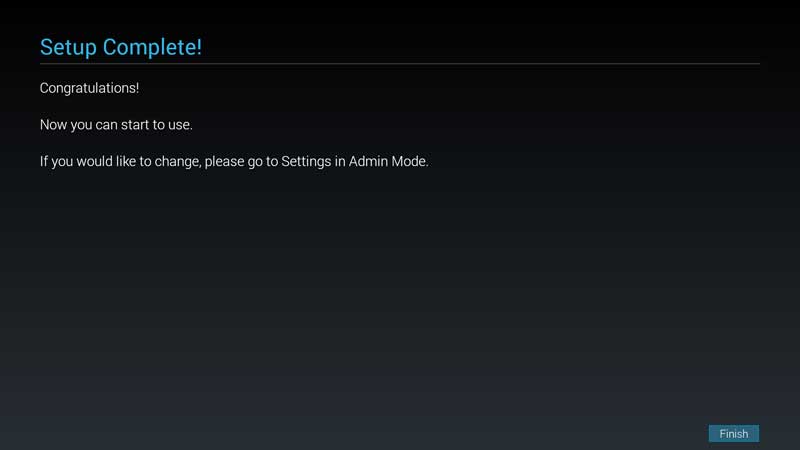
Step 6: Setup Complete
- Press Finish
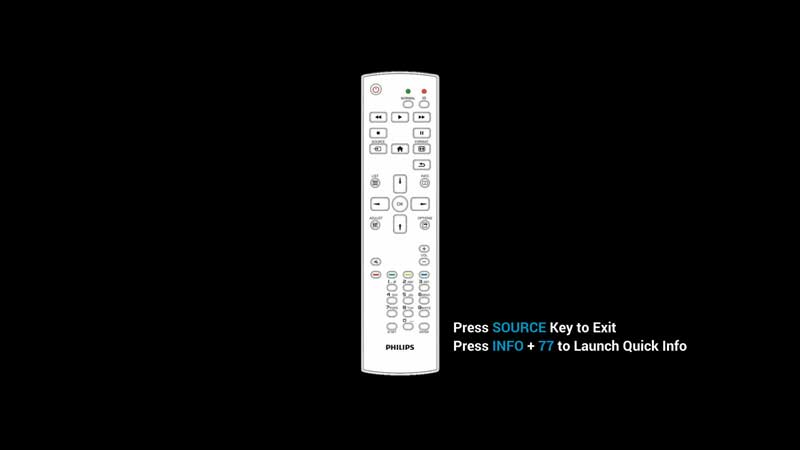
Step 7: Exit Setup Menu
- Press HOME then 1888 to open the settings page
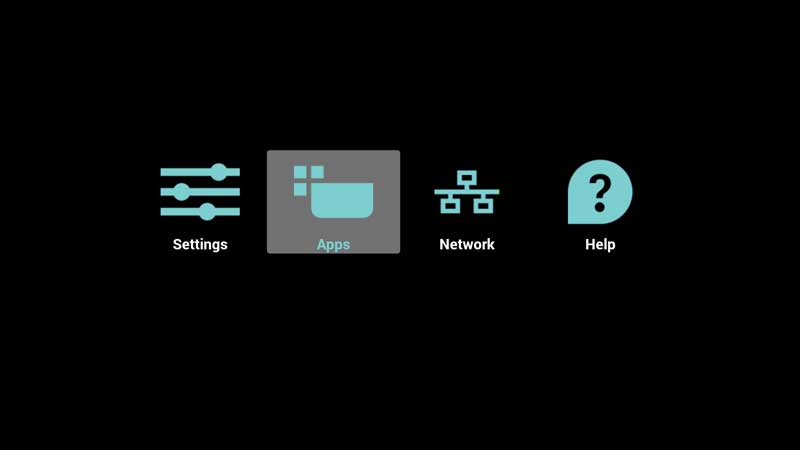
Step 8: Apps
- Choose Apps and Press OK
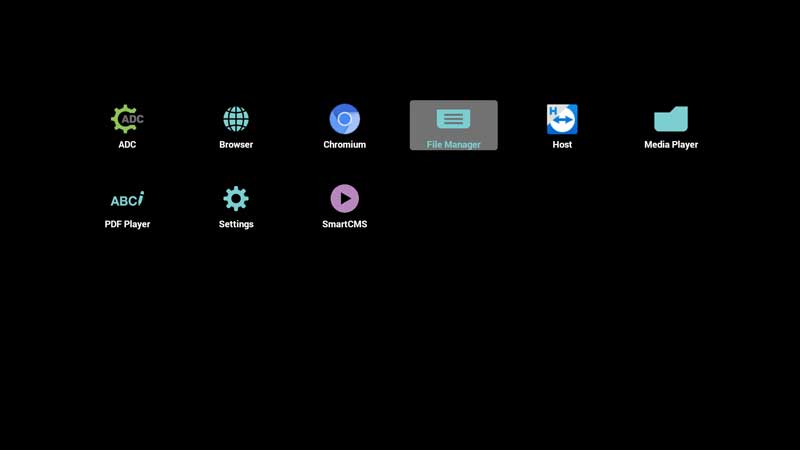
Step 9: File Manager
- Choose File Manager and Press OK
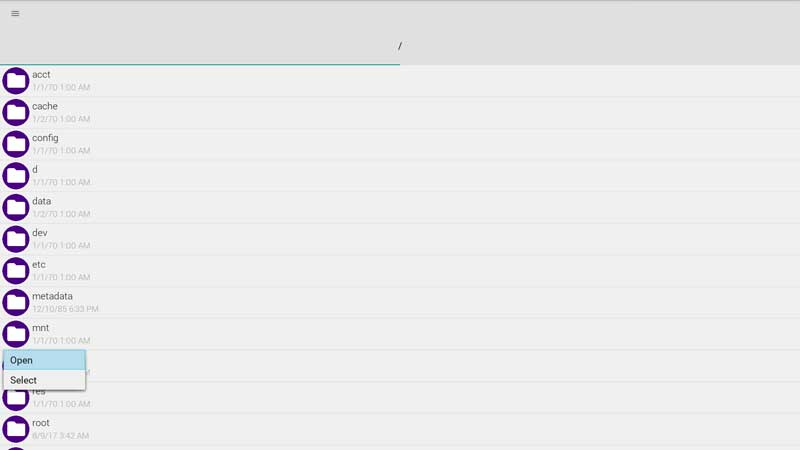
Step 10: mnt
Choose mnt folder and Press OK
Press on Open
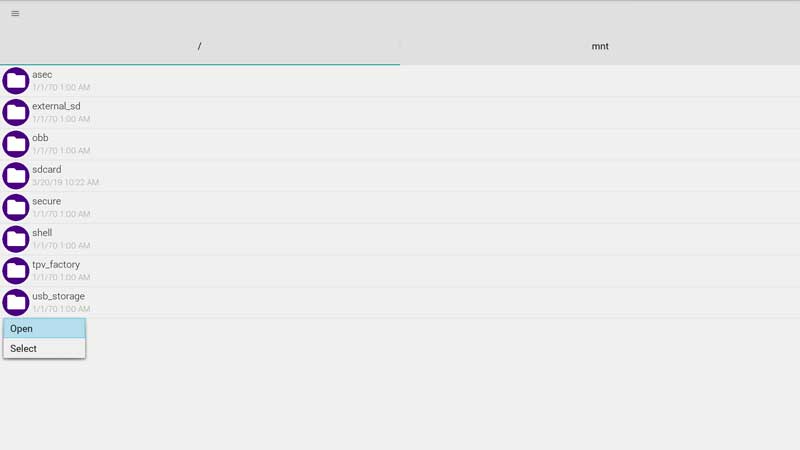
Step 11: usb_storage
Choose usb_storage folder and Press OK
Press on Open
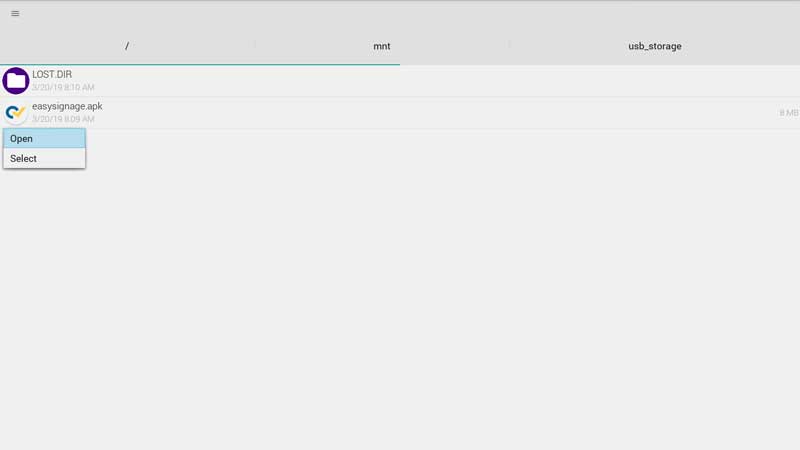
Step 12: easysignage.apk
Choose easysignage.apk and Press OK
Press on Open
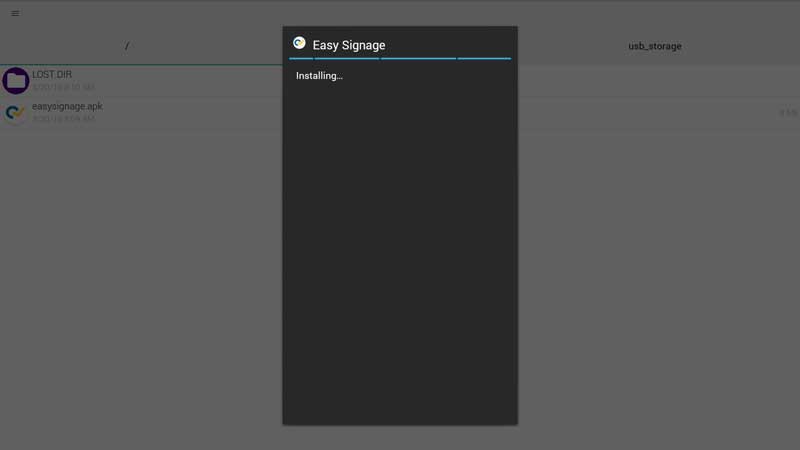
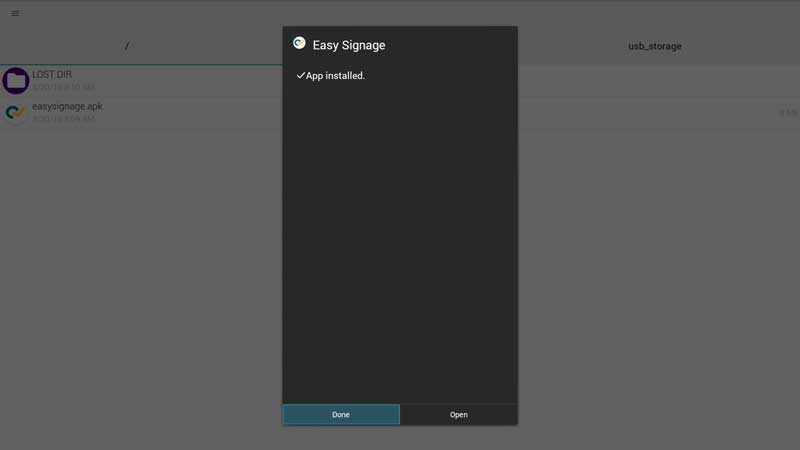
Step 13: Install easysignage.apk
- Press on Install
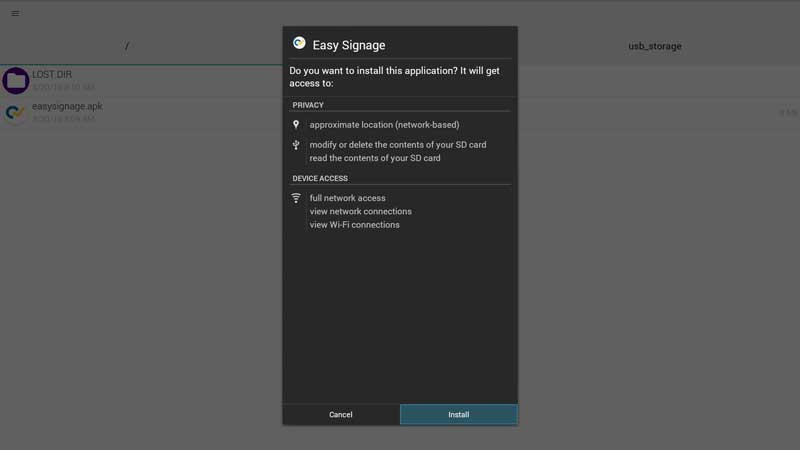
- Wait while the apk is installing
- The apk is installed. Press on Done
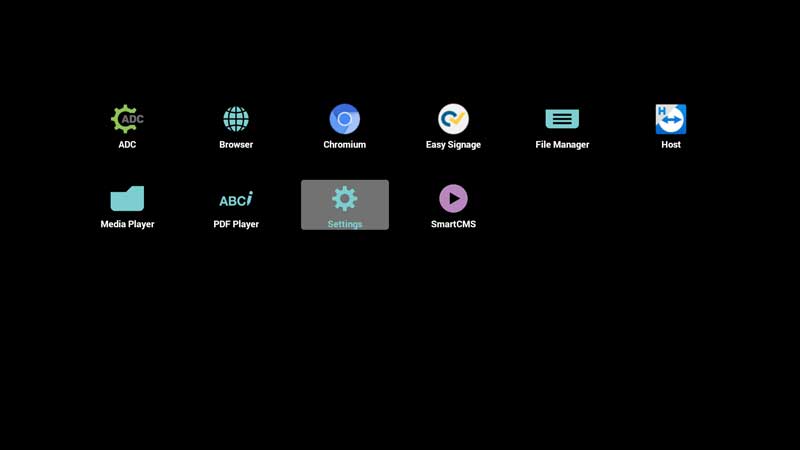
Step 14: Open Settings Page
- Press the back button to go back to the apps page
- In the apps menu, Press Settings
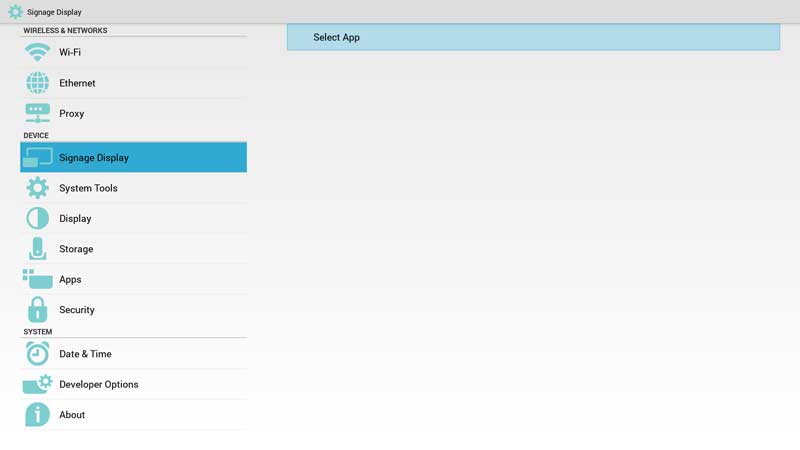
Step 15: Signage Display: Source Settings
- Navigate to Signage Display
- Under SOURCE SETTINGS, Press on Custom App
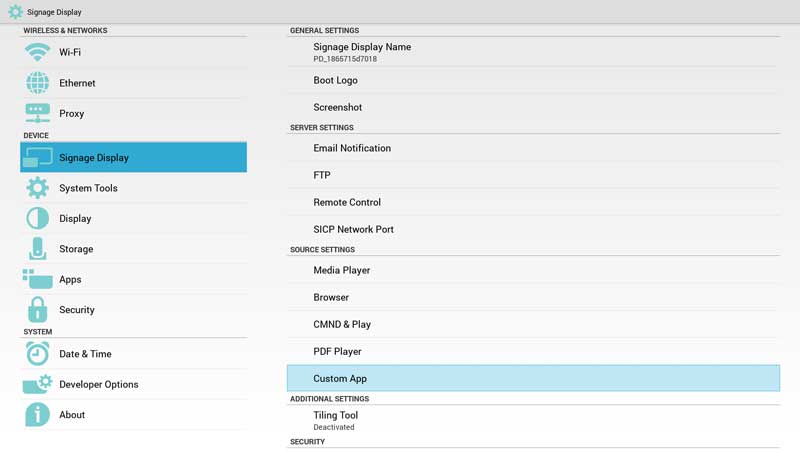
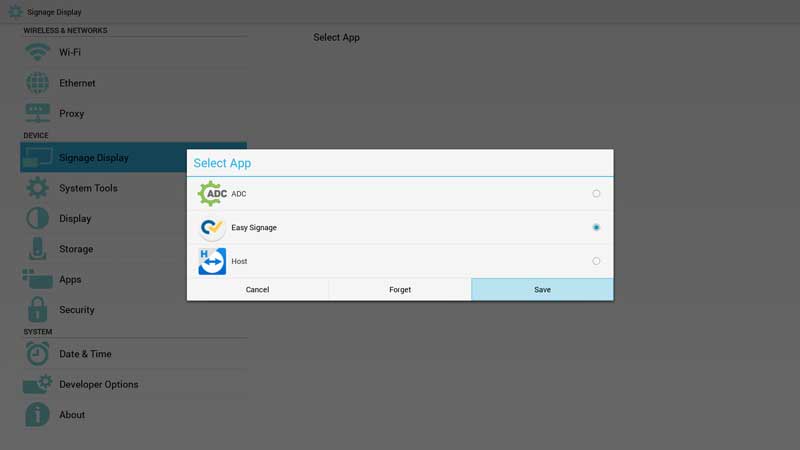
- Press on Select App
- Choose Easy Signage and Press Save
Step 16: Set the screen’s timezone
Using the remote control, press the home key.
Navigate to Advanced Options > Date and Time.
Set your timezone.
Step 17: Set Power Save
Using the remote control, press the home key.
Navigate to Advanced Options > Power Save.
Set your Power Save to Mode 4.
Step 18: Home App
Turn OFF the TV, then ON
This menu should appear
Choose Easy Signage as Home App
Press on Always
Step 19: Display Hash
Wait for a few seconds until this screen appears
Use the displayed hash to register the display on manage.easysignage.com
How to Fix the Black Screen between Videos on Philips Screens
Some Philips displays may show a brief black screen (around 1 to 2 seconds) when switching between videos. This is caused by how the internal player handles video transitions. You can eliminate this behaviour by following the steps below:
Update EasySignage
- Make sure the EasySignage app on the screen is updated to version 235 or newer.
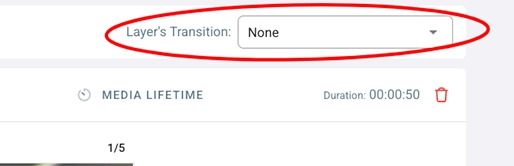
Disable transitions
- Open the playlist or layer settings.
- Set Transition to None.
- Republish the content
- Click Publish to apply the changes to the screen.
Once these steps are applied, videos will play back-to-back with no or minimal black screen in between.