Cloning the SD card of a configured Raspberry Pi can save time—but if not done properly, it can cause all your players to share the same Screen ID, which means they’ll be treated as the same device in EasySignage. This leads to unexpected behavior, including players not functioning correctly.
Follow the steps below to ensure each cloned Raspberry Pi generates a unique Screen ID and operates independently.
How to Fix Cloned Raspberry Pi Players
1. Prepare Your Raspberry Pi
Before cloning the SD card, make sure your Raspberry Pi is properly set up by following this guide:
Install EasySignage on Raspberry Pi
2. Add the Player to Your EasySignage Account
- Power on your Raspberry Pi and connect it to your EasySignage account.
- Ensure the device downloads the latest software version.
- You may need to restart the device after assigning it to your account to trigger the software update.
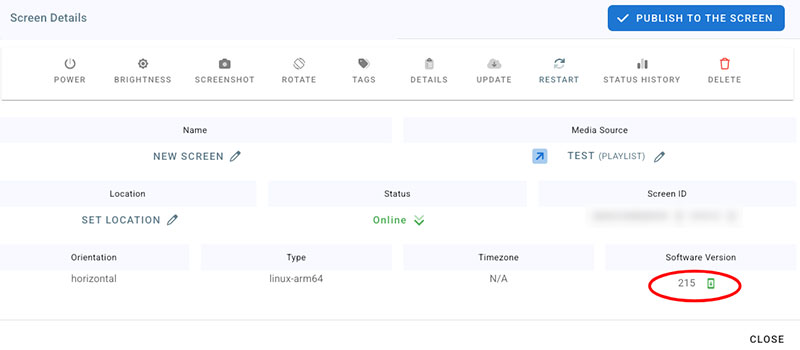
- Confirm the software version is 215 or higher before proceeding.

3. Delete the conf.txt File
Once the software is updated, open the terminal and navigate to the app directory:
cd ~/digital-signageCheck if a file named
conf.txtexists. If it does, delete it:rm conf.txtThis file contains the existing screen ID. Removing it ensures the cloned player will generate a new ID on first boot.
4. Shutdown and Clean Up Before Cloning
Shutdown the Raspberry Pi using:
sudo shutdown nowImportant: Delete the device from your EasySignage account and DO NOT turn it back on before cloning the SD card.
5. Clone the SD Card
- Now you can safely clone the SD card.
- Once a new Raspberry Pi boots from the cloned SD card:
- It will detect the missing
conf.txt. - It will generate a unique Screen ID.
- It may restart a few times automatically during this process.
- It will detect the missing
Once these steps are completed, each cloned Raspberry Pi will behave as an independent player in EasySignage with its own unique identity.
Need more help? Reach out to our support team anytime!