The Interactive Kiosk app lets you build multi-page interactive sites — such as product catalogs, information directories, or self-service menus — where viewers can navigate between pages directly on the screen.
What is the Digital Signage Interactive Kiosk?
The Interactive Kiosk app in digital signage is a built-in site builder that allows you to create multi-page interactive experiences for your digital signage screens. Unlike a standard playlist where content plays automatically, the kiosk app turns your screen into a self-service touchscreen where users can tap to navigate between pages.
Common use cases include:
- Product catalogs and showcases
- Information directories and wayfinding
- Restaurant menus and ordering kiosks
- Hotel concierge and guest information
- Exhibition and conference guides
- Retail self-service displays
How to Add an Interactive Kiosk to Your Playlist
- Go to the Management Console.
- Click on the playlist, then the layer where you want to add the kiosk.
- If the layer has no media, the apps dialog will open. Otherwise, click on Add New.
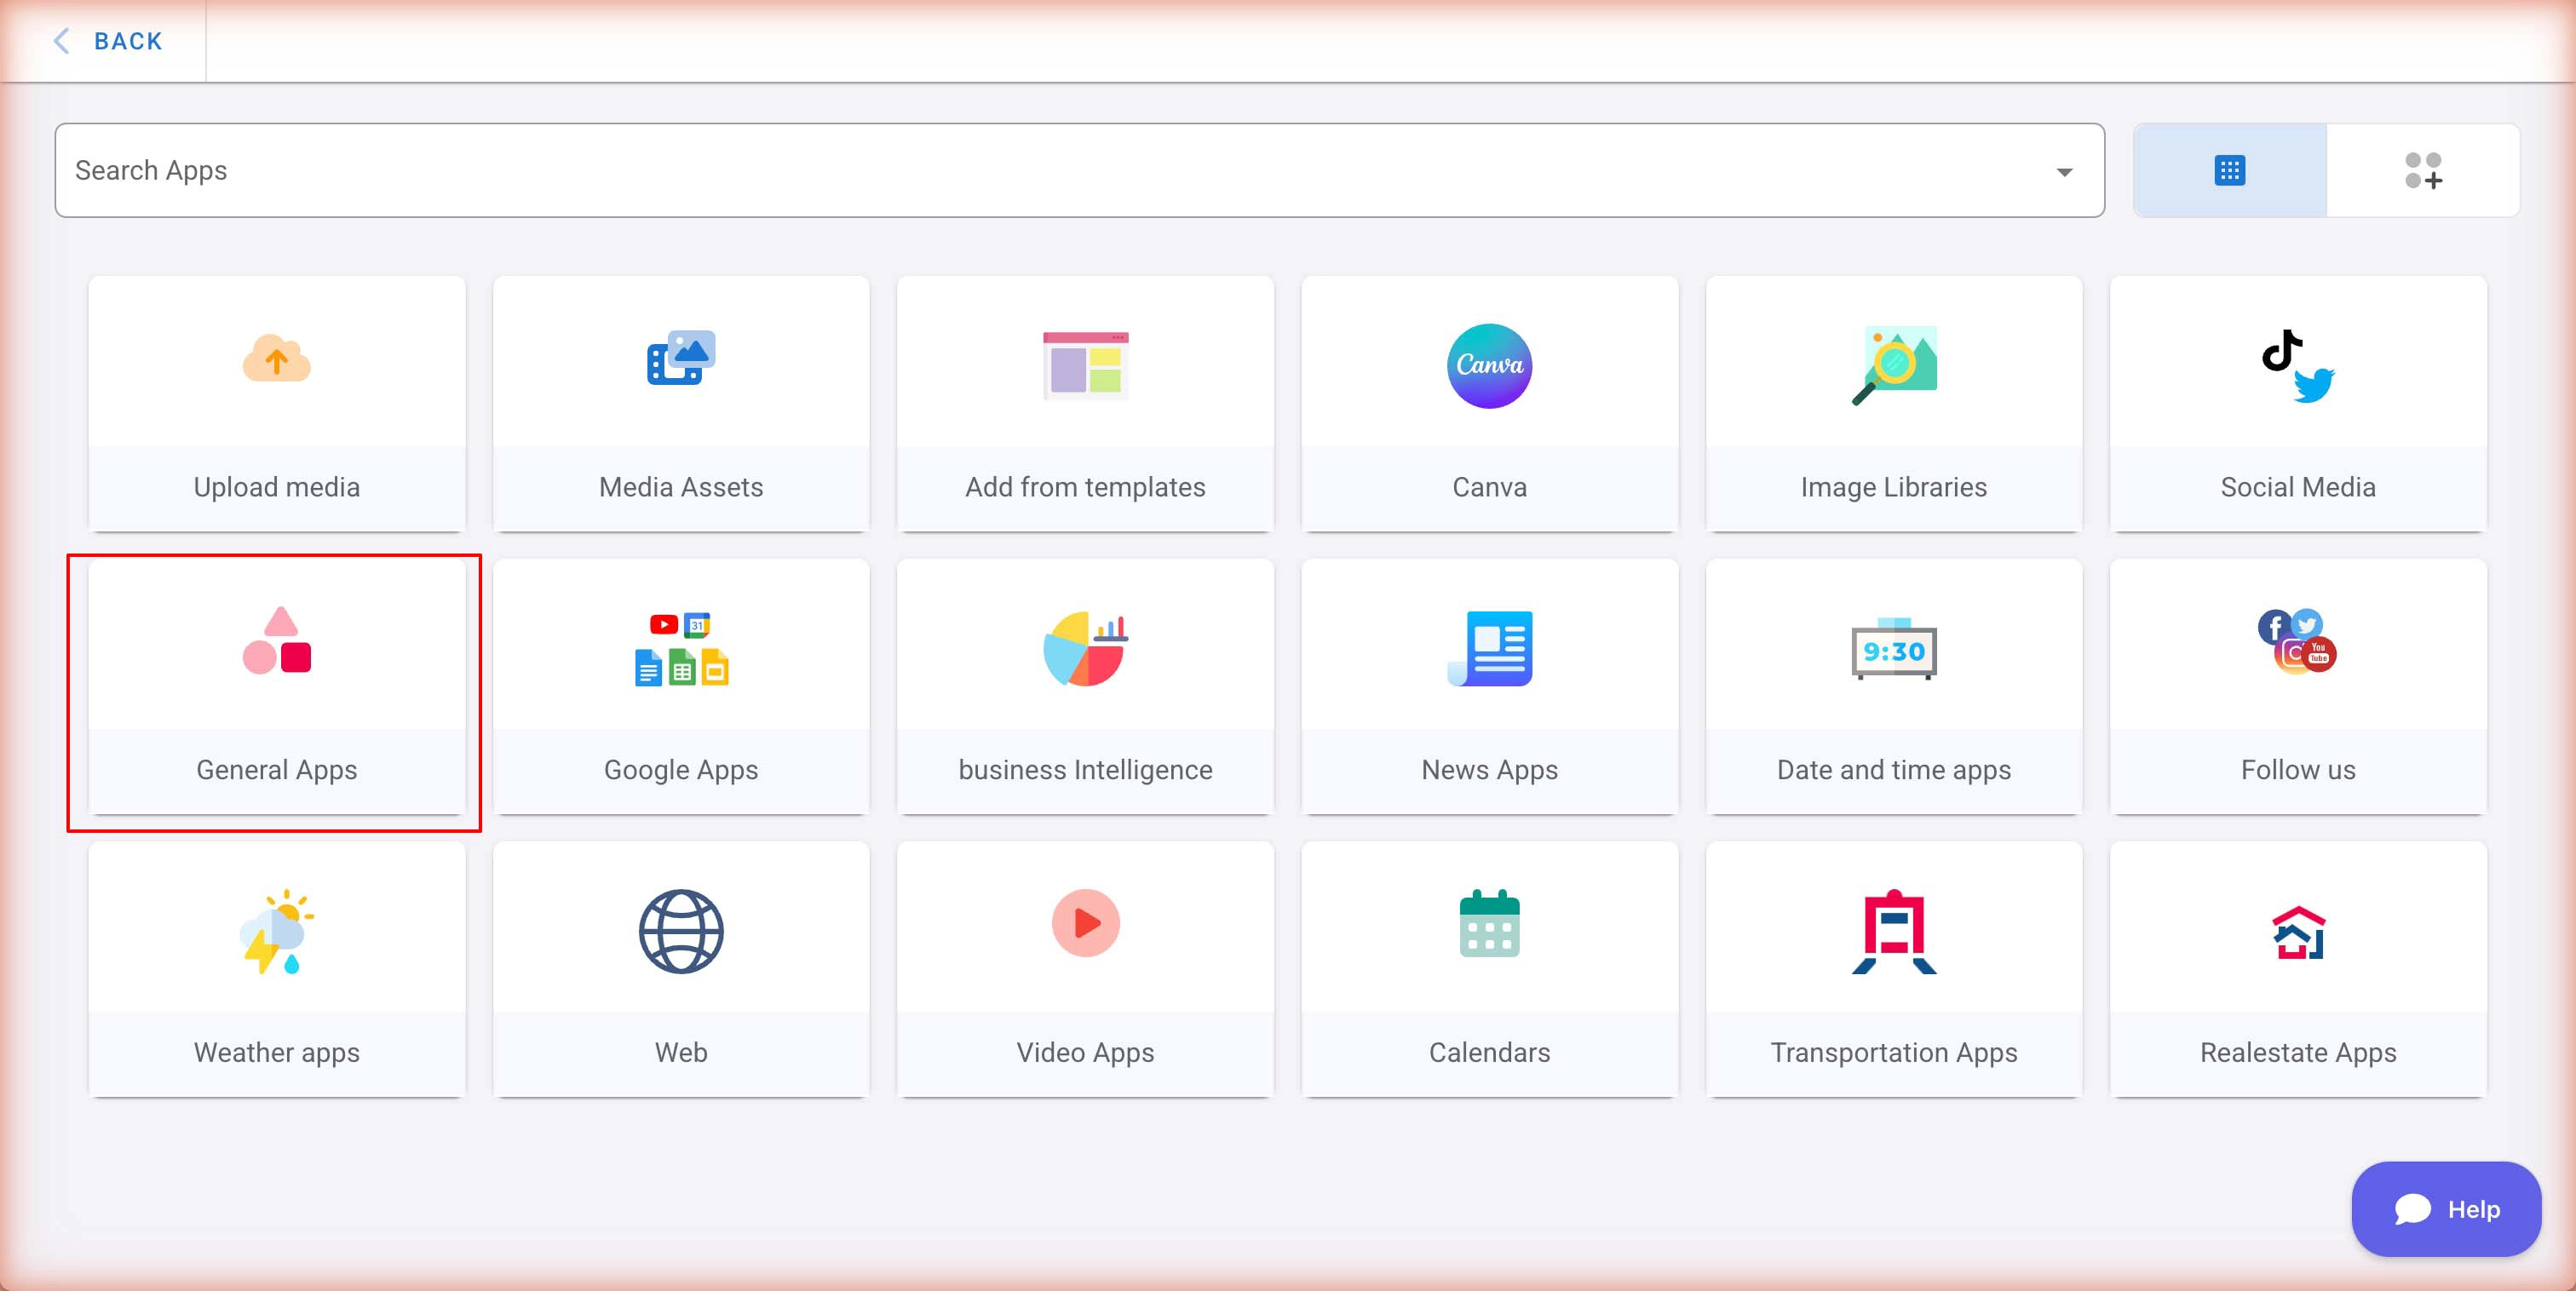
- Find General Apps and click on it.
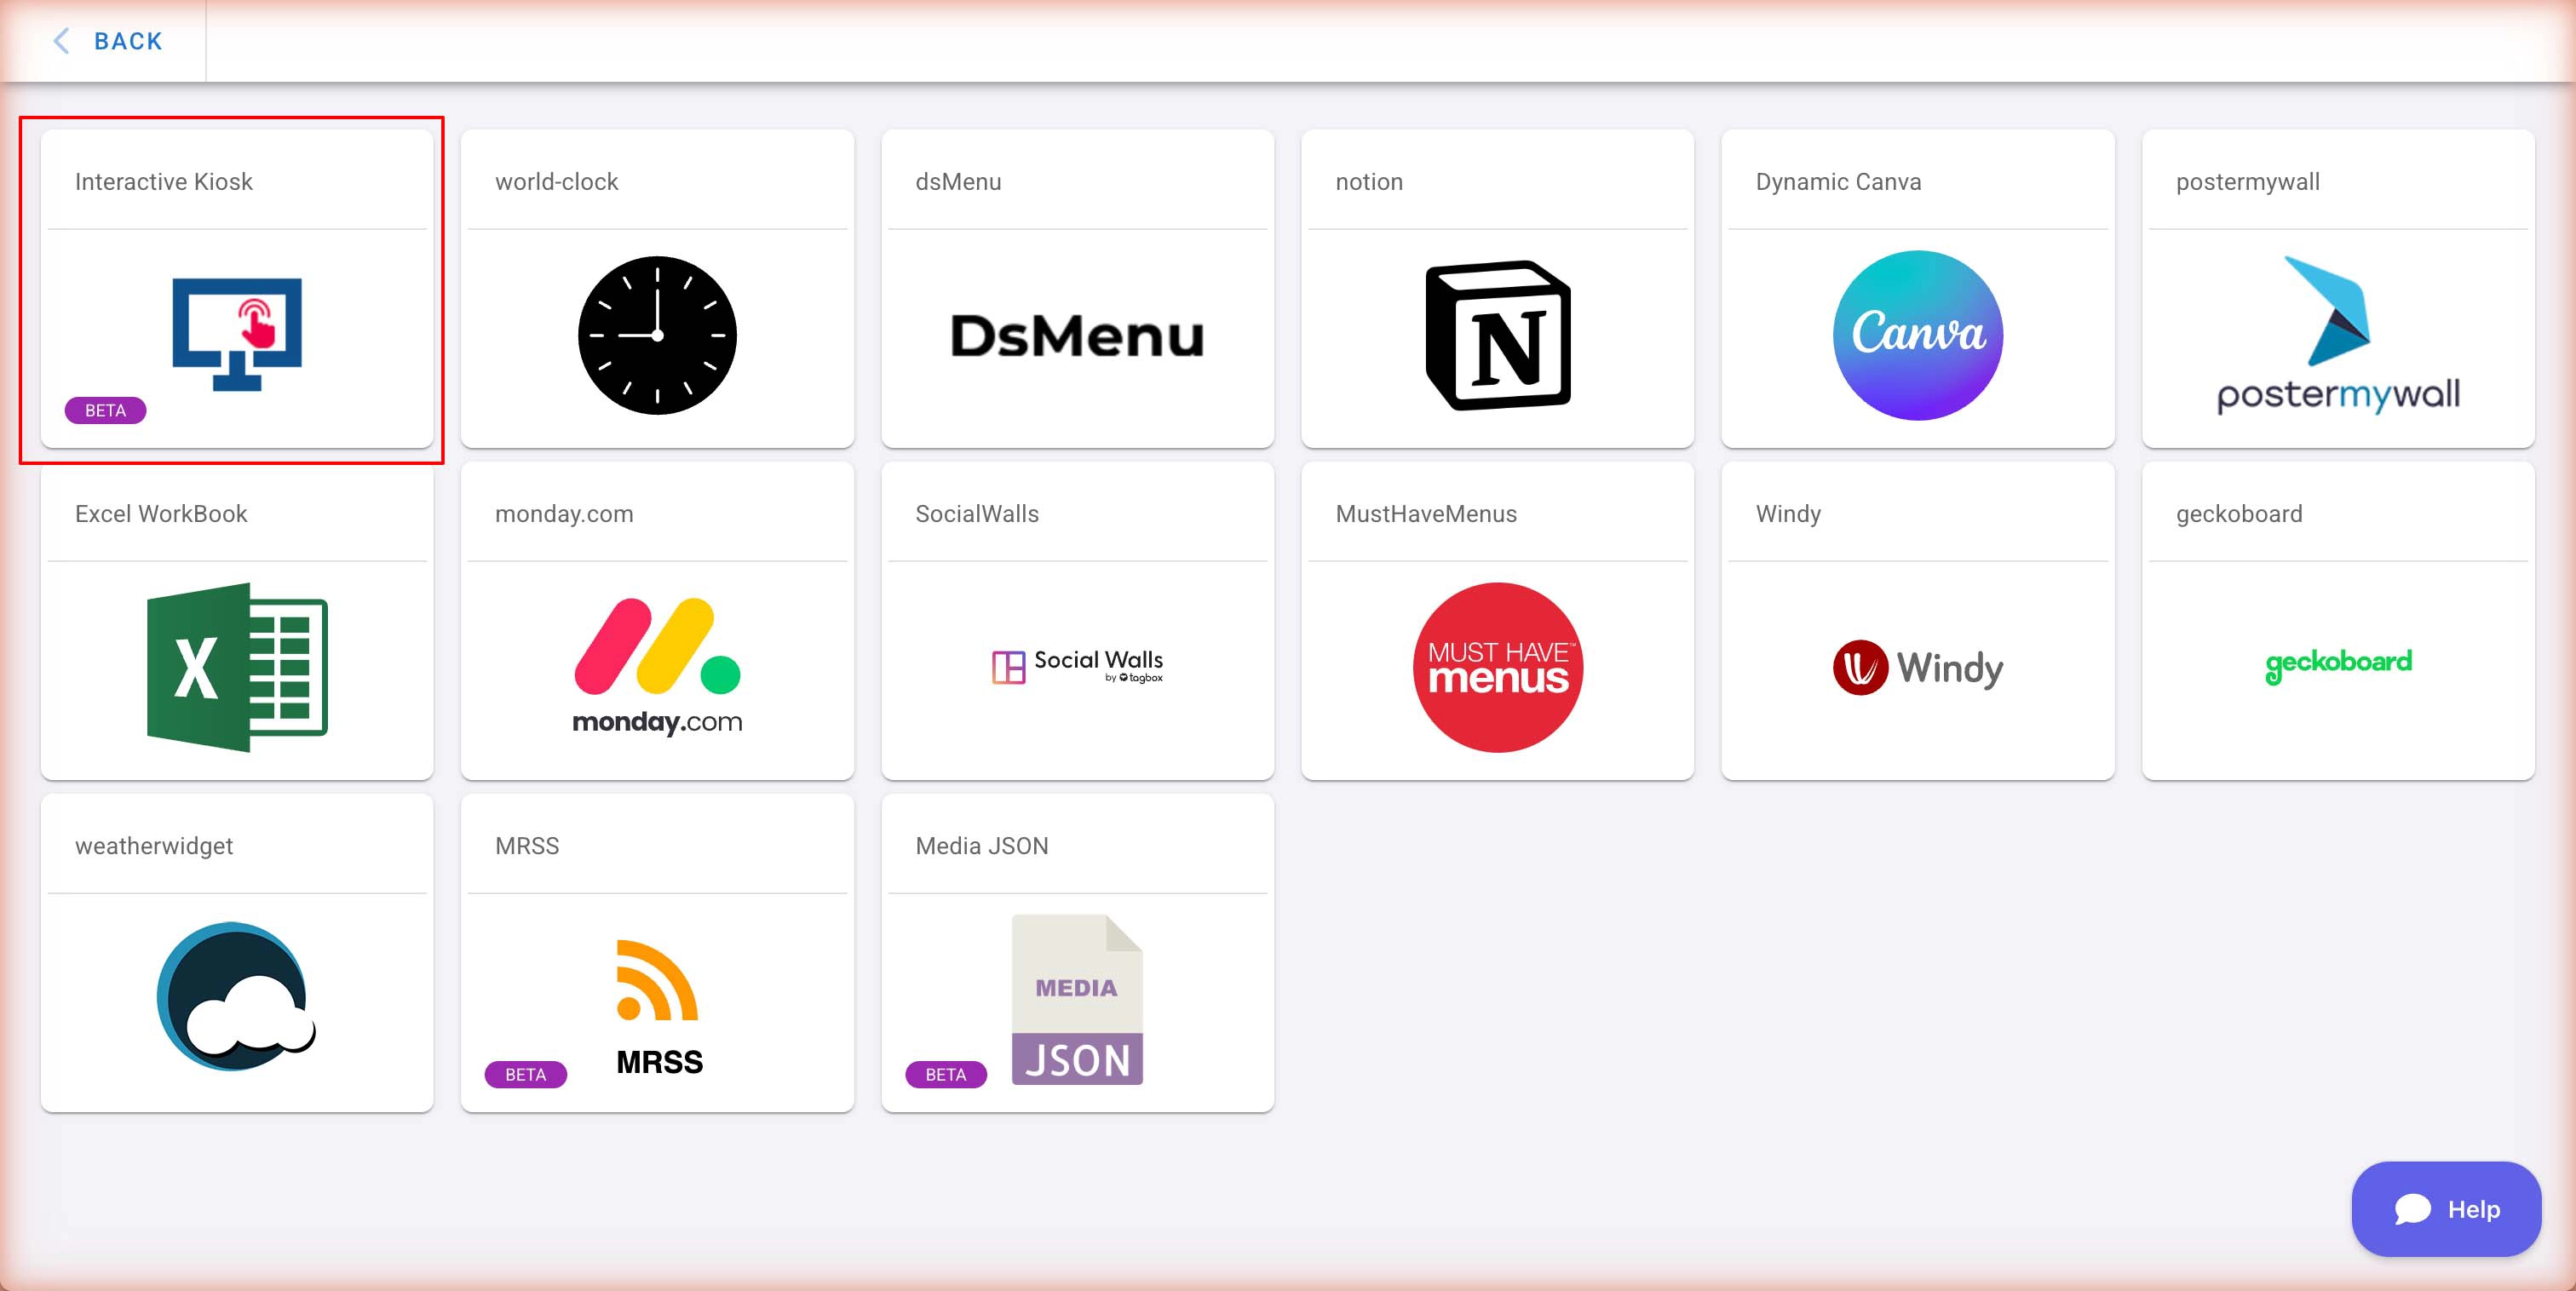
- Select Interactive Kiosk from the General Apps list.
- The Interactive Sites dialog will open. If you have no sites yet, click + Add New Site to create one.
Creating a New Interactive Site
- Click the + Add New Site button in the Interactive Sites dialog.
- Enter a name for your site (e.g., “Product Catalog” or “Visitor Guide”).
- Click Save.
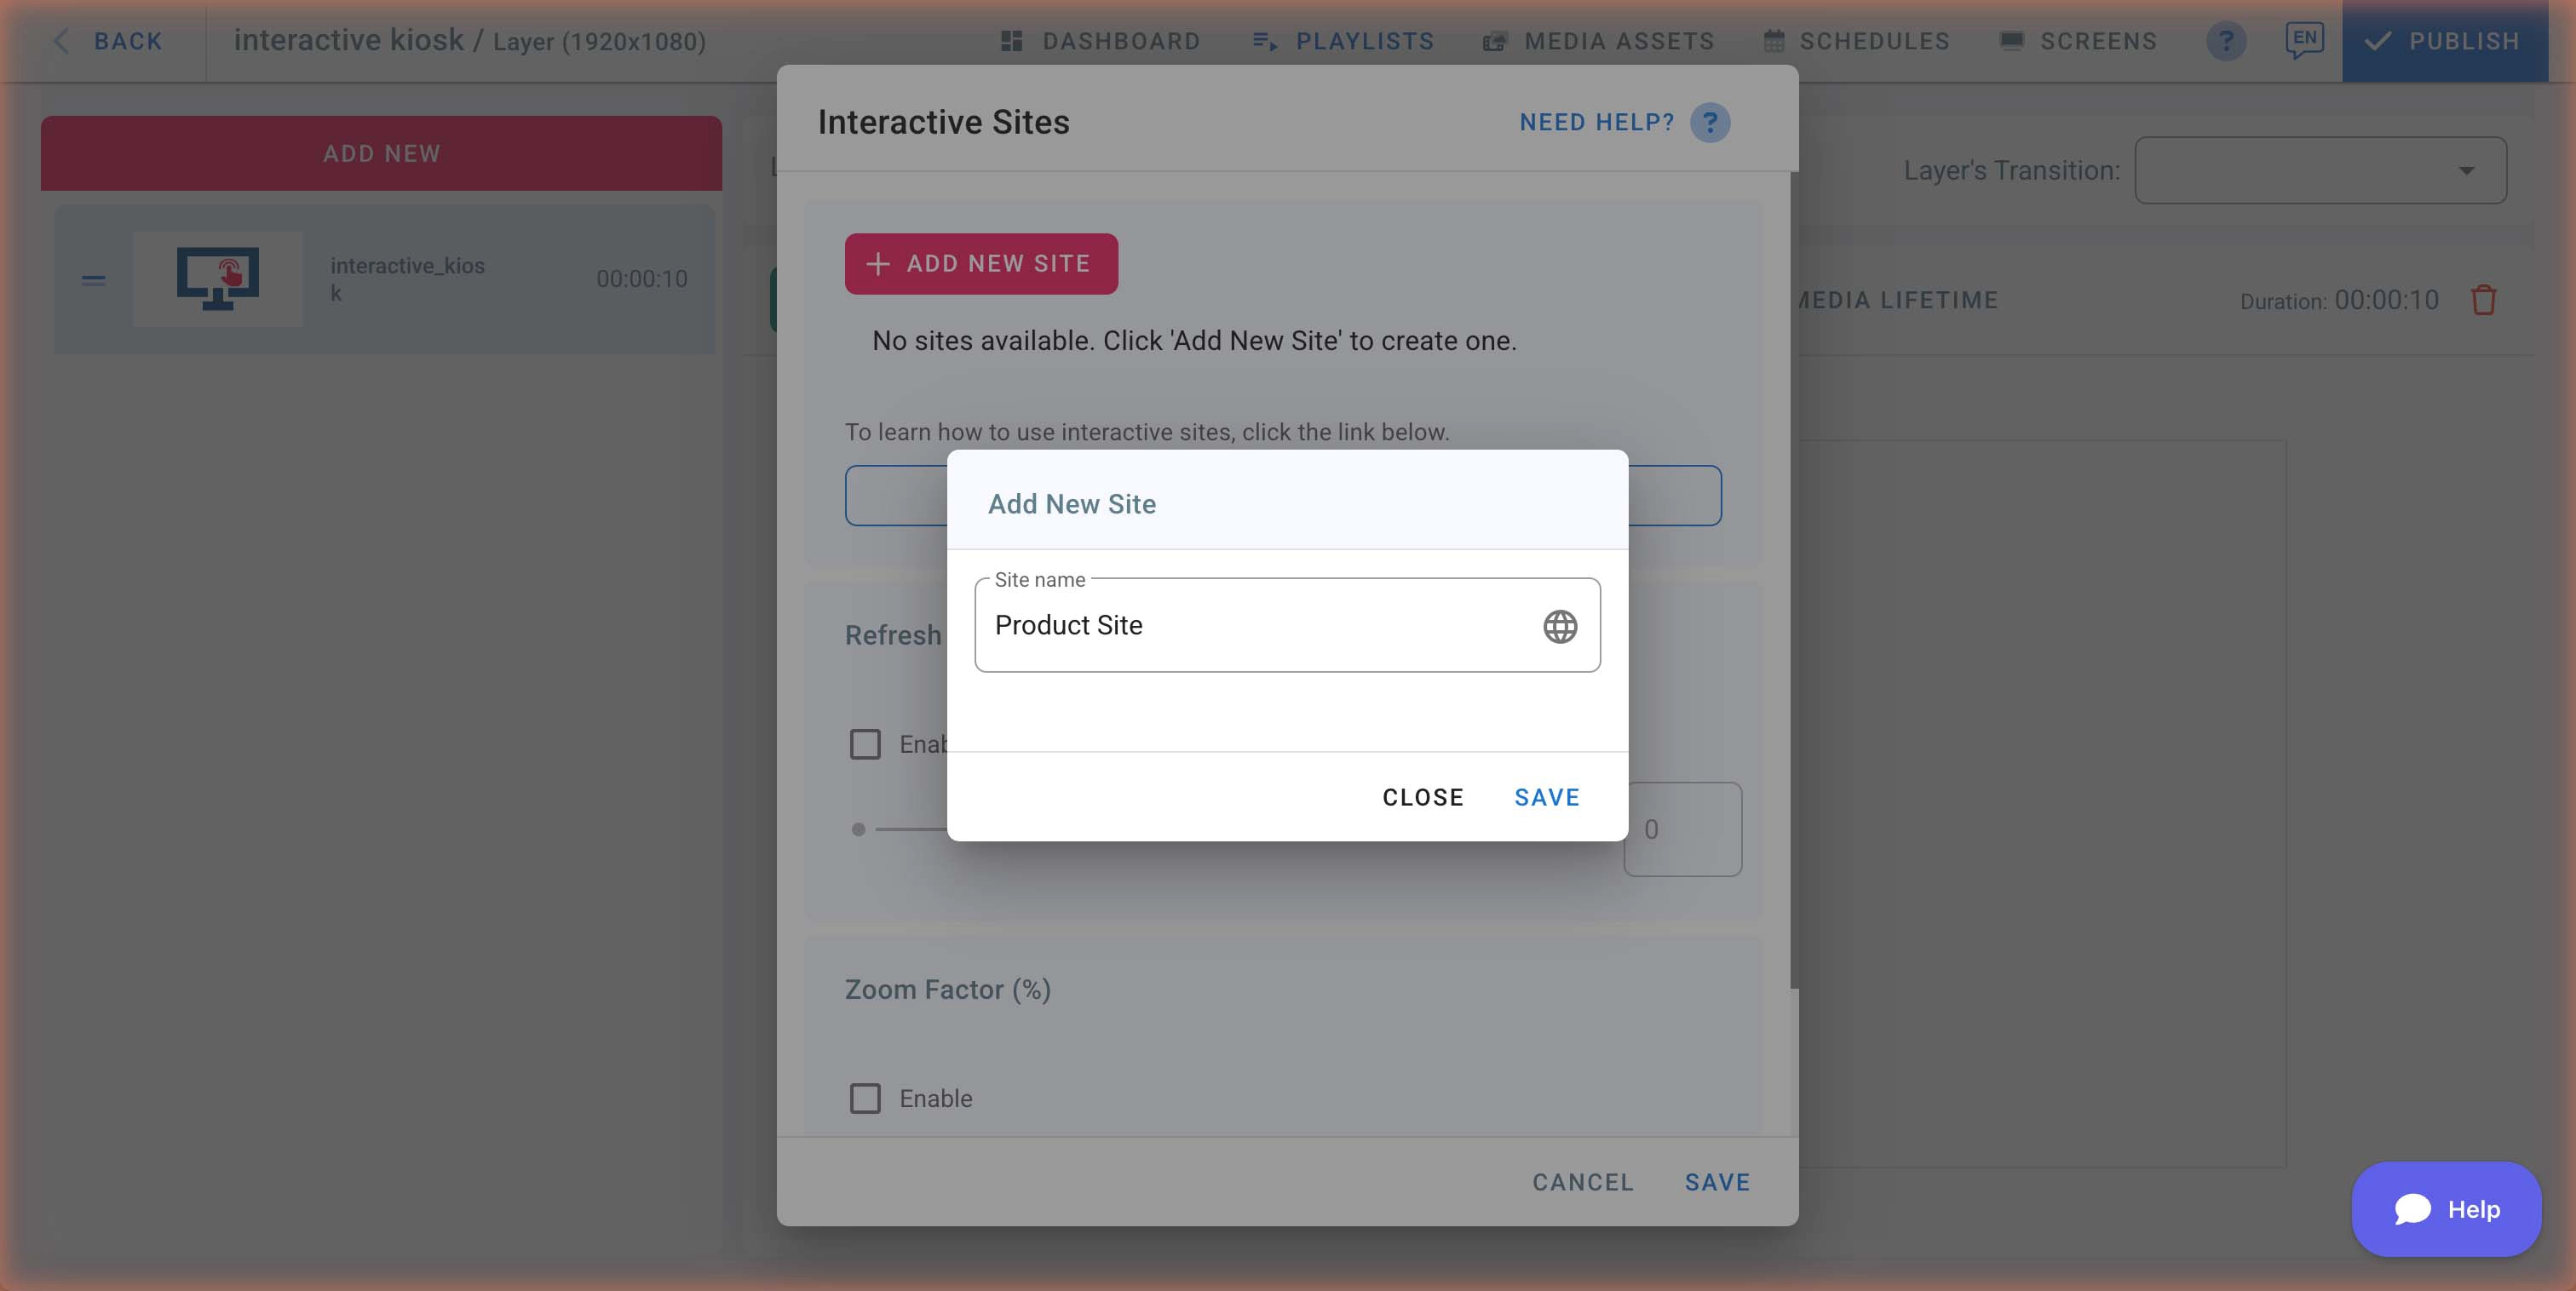
- The site editor will open, allowing you to build your interactive pages.
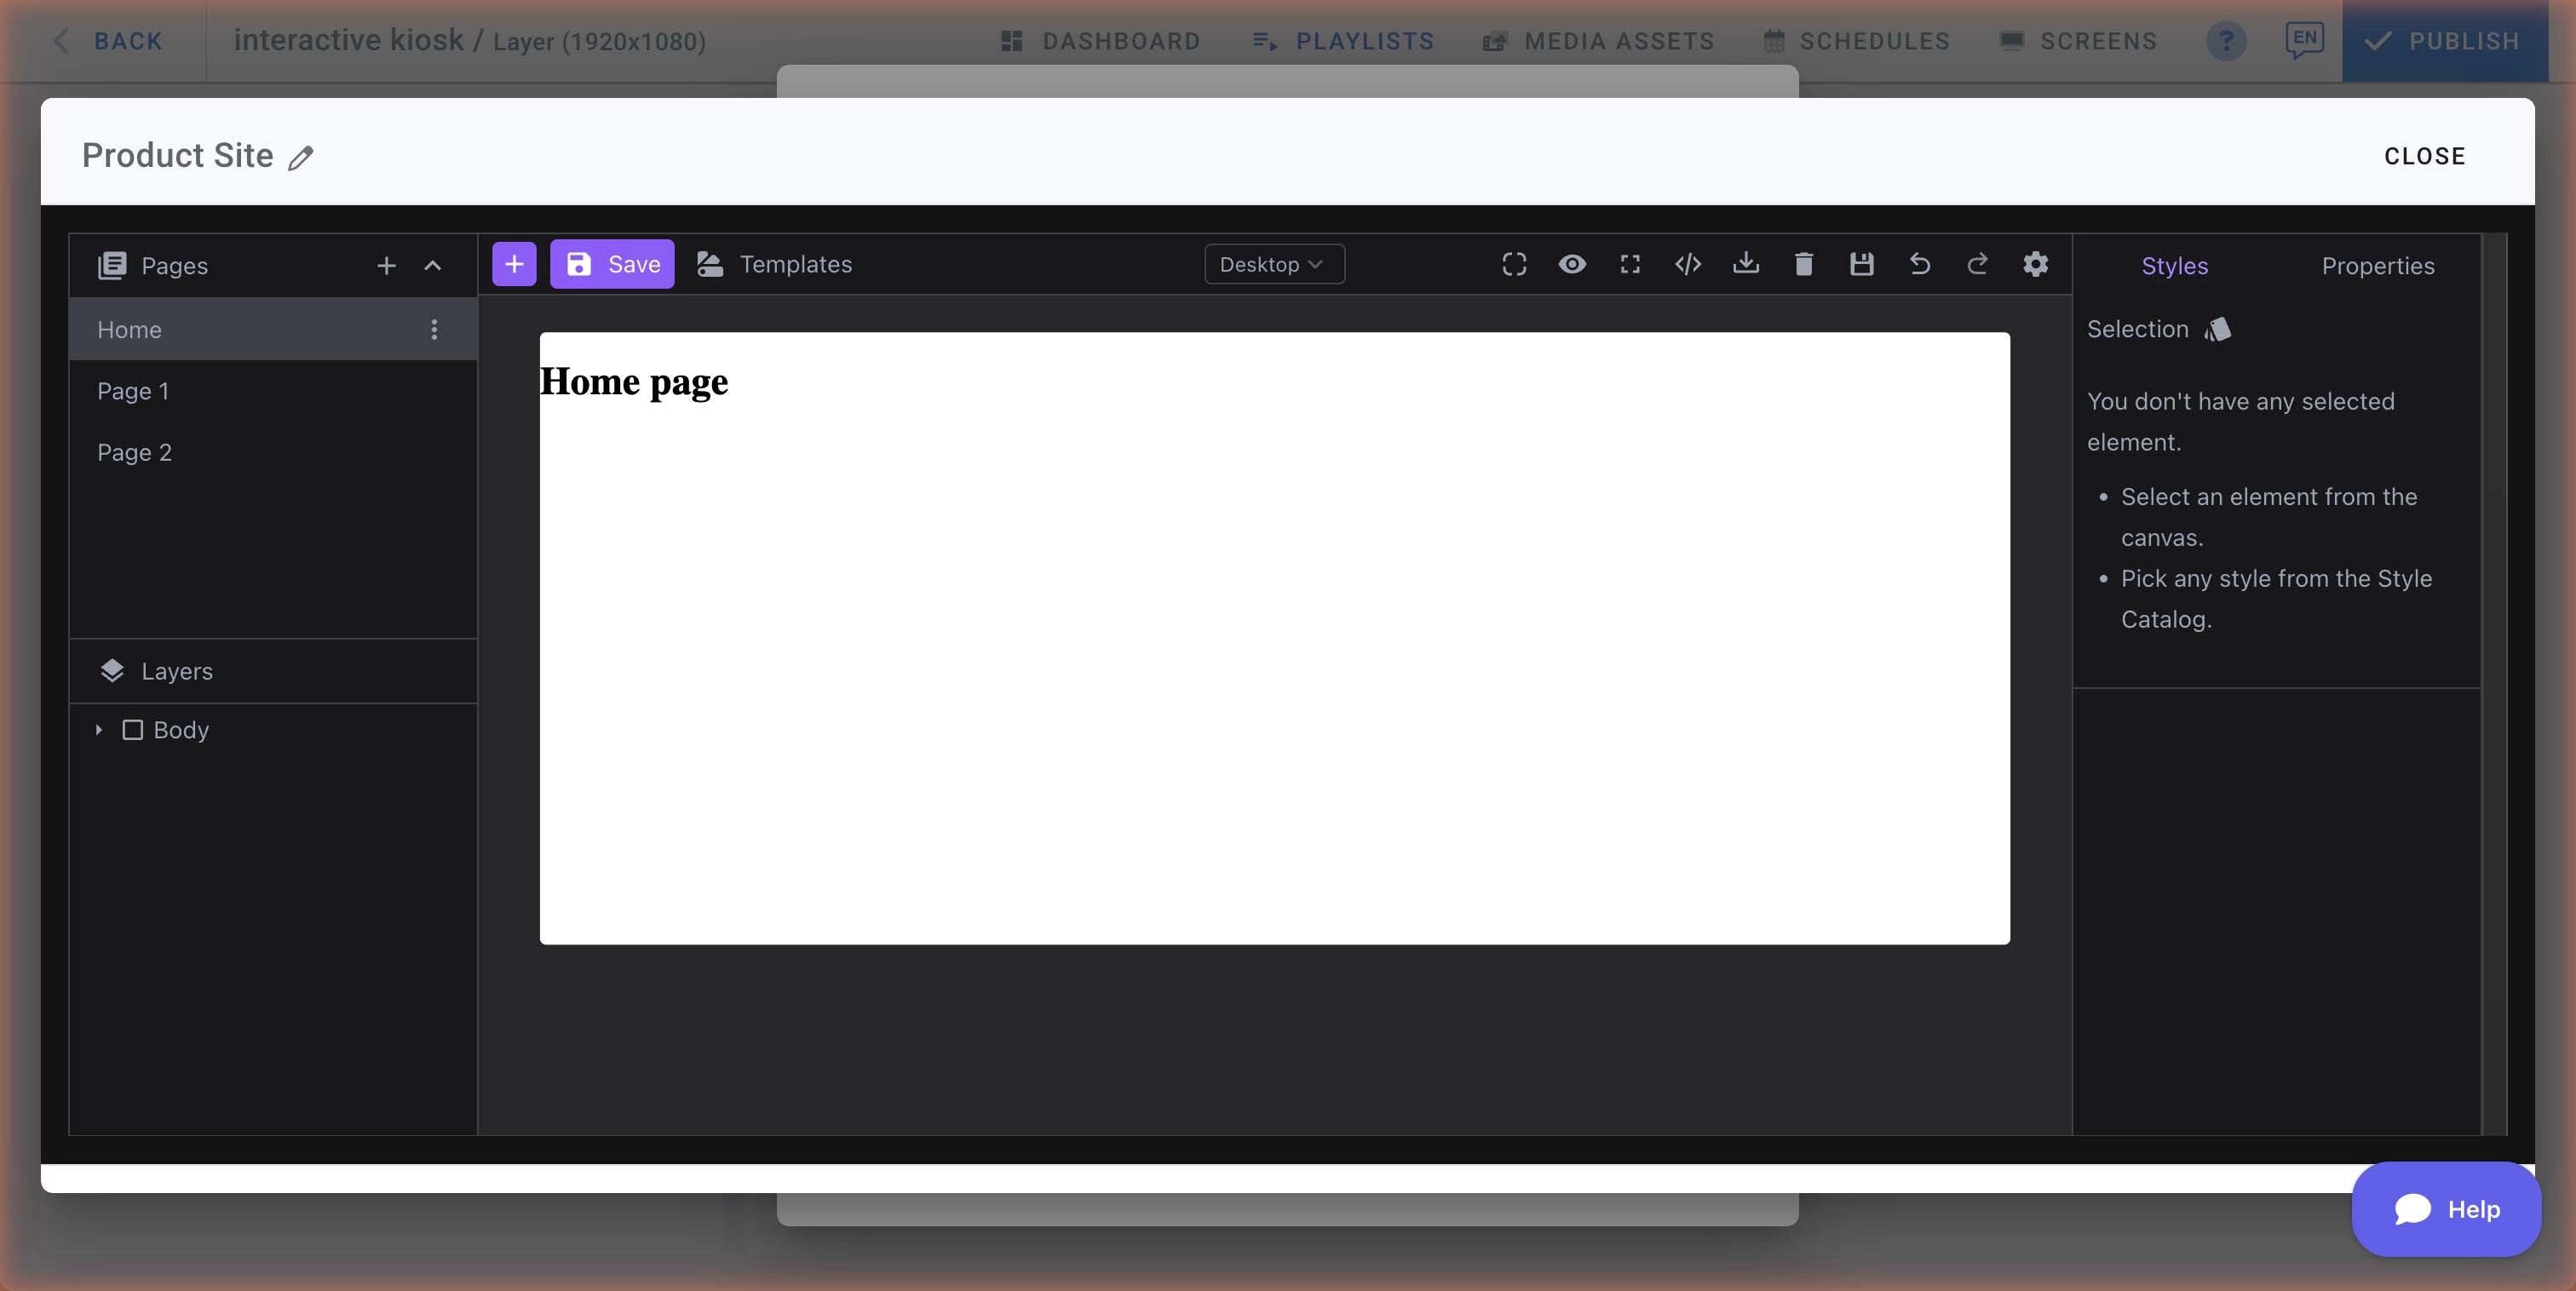
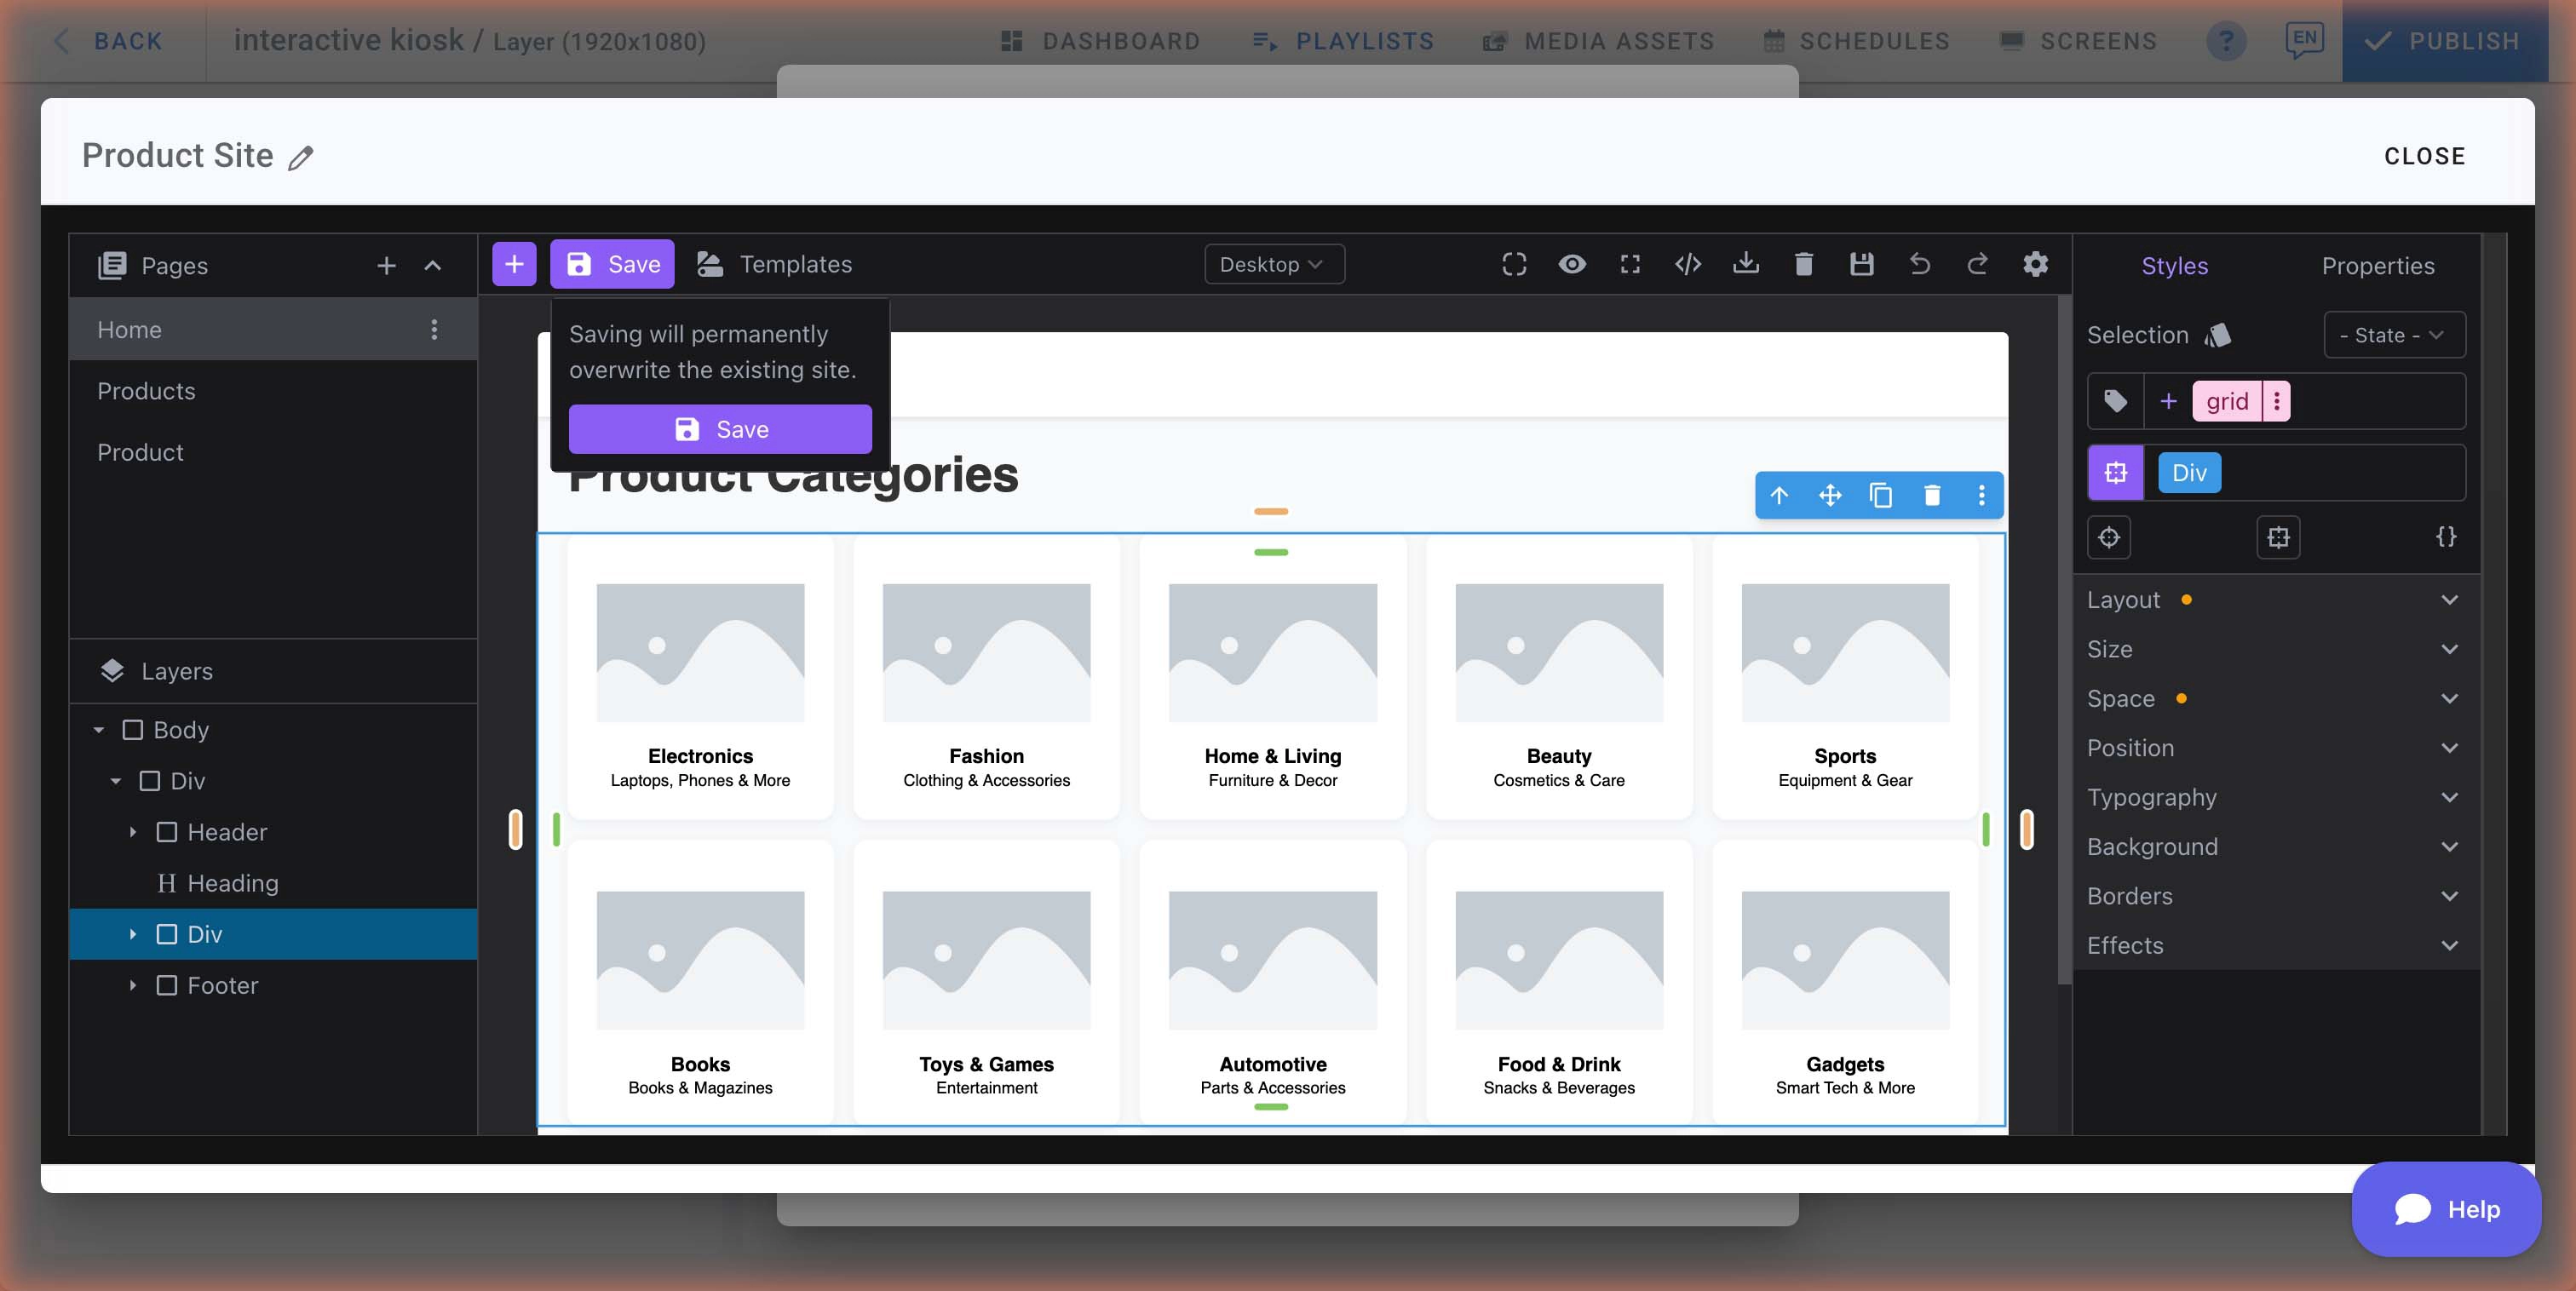
The Site Editor
The site editor is where you design your interactive pages. It includes:
- Pages panel (left): Lists all pages in your site (e.g., Home, Page 1, Page 2). Click a page to switch to it.
- Canvas (center): The main design area where you build your page content.
- Styles & Properties panel (right): Style and configure selected elements.
- Layers panel (bottom-left): View and manage the layer hierarchy of your page elements.
- Toolbar (top): Access blocks, save, templates, preview, code editor, and more.
Using Templates
Click Templates in the toolbar to choose from pre-built kiosk templates. Templates give you a ready-made starting point with multiple pages already designed.
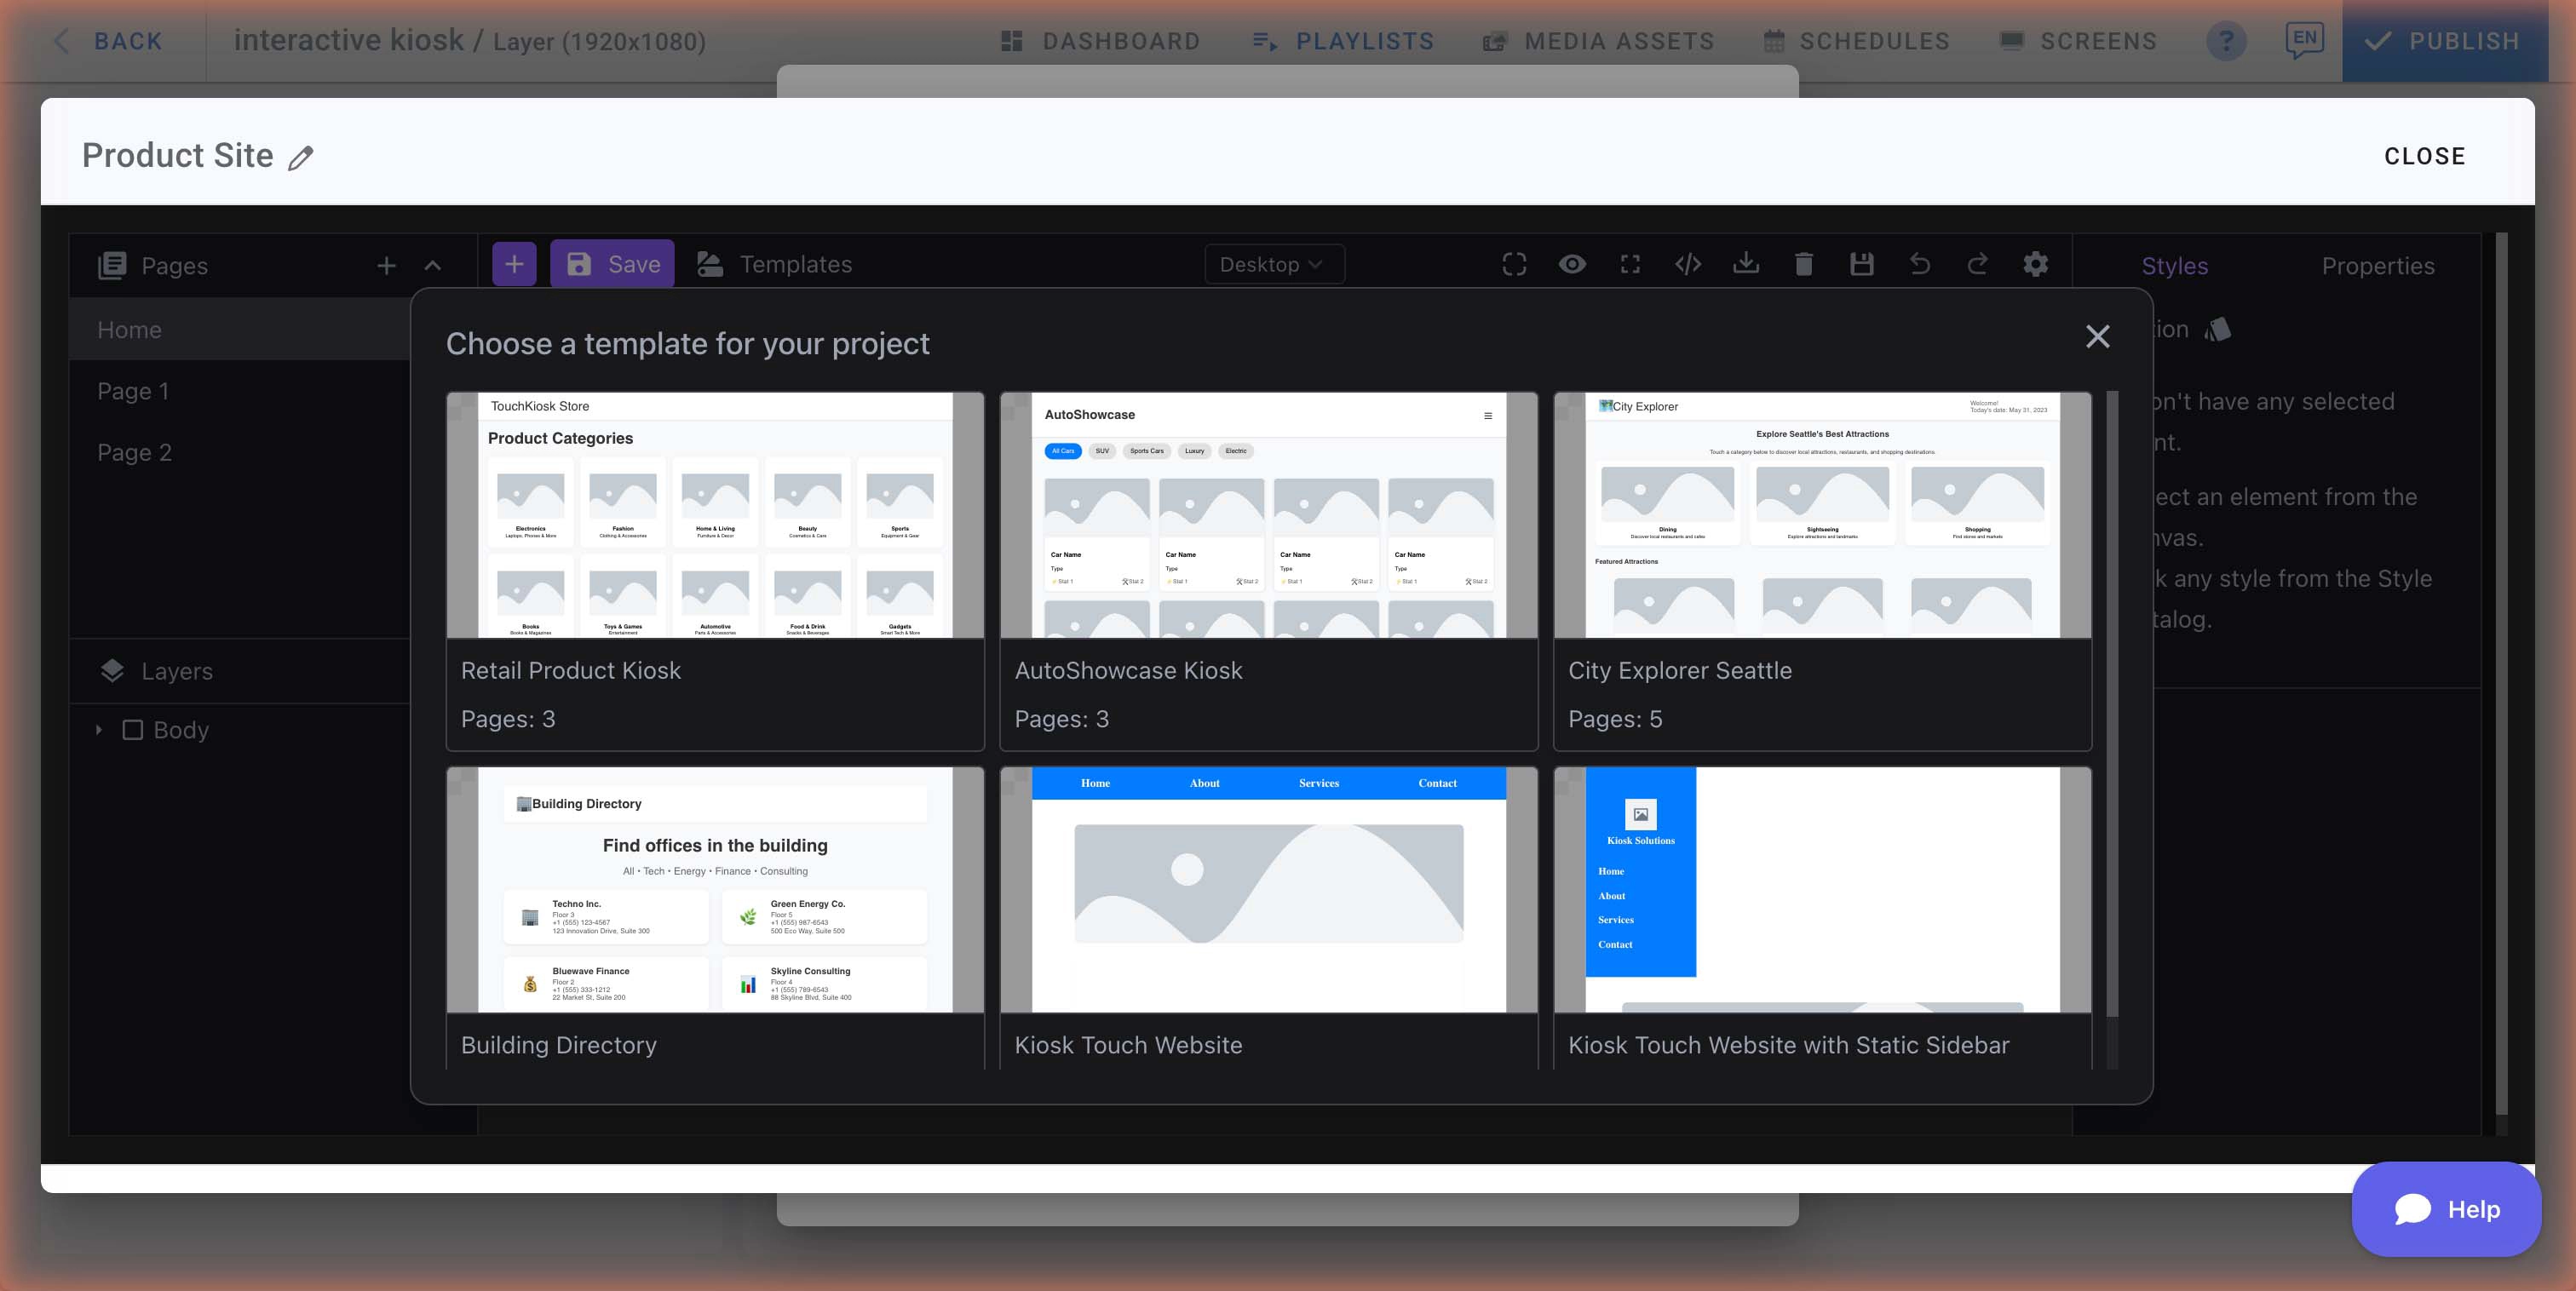
Available templates include:
- Retail Product Kiosk (3 pages)
- AutoShowcase Kiosk (3 pages)
- City Explorer (5 pages)
- Building Directory (2 pages)
- Kiosk Touch Website (4 pages)
- Kiosk Touch Website with Static Sidebar (4 pages)
Once you select a template, the editor loads it with all pages and elements ready to customize.
Important: Click the purple Save button in the toolbar before navigating away or closing the editor to save your changes.
Managing Pages
Use the Pages panel on the left to manage your site’s pages:
- Click the + button next to “Pages” to add a new page.
- Click the three-dot menu (⋮) next to a page name to access page options:
- Rename — Change the page name.
- Duplicate — Create a copy of the page.
- Delete — Remove the page.
How to Assign a Site to Your Kiosk
Once you have created a site, it will appear in the Interactive Sites list. Click Use This Site to assign it to your kiosk, then click Save.
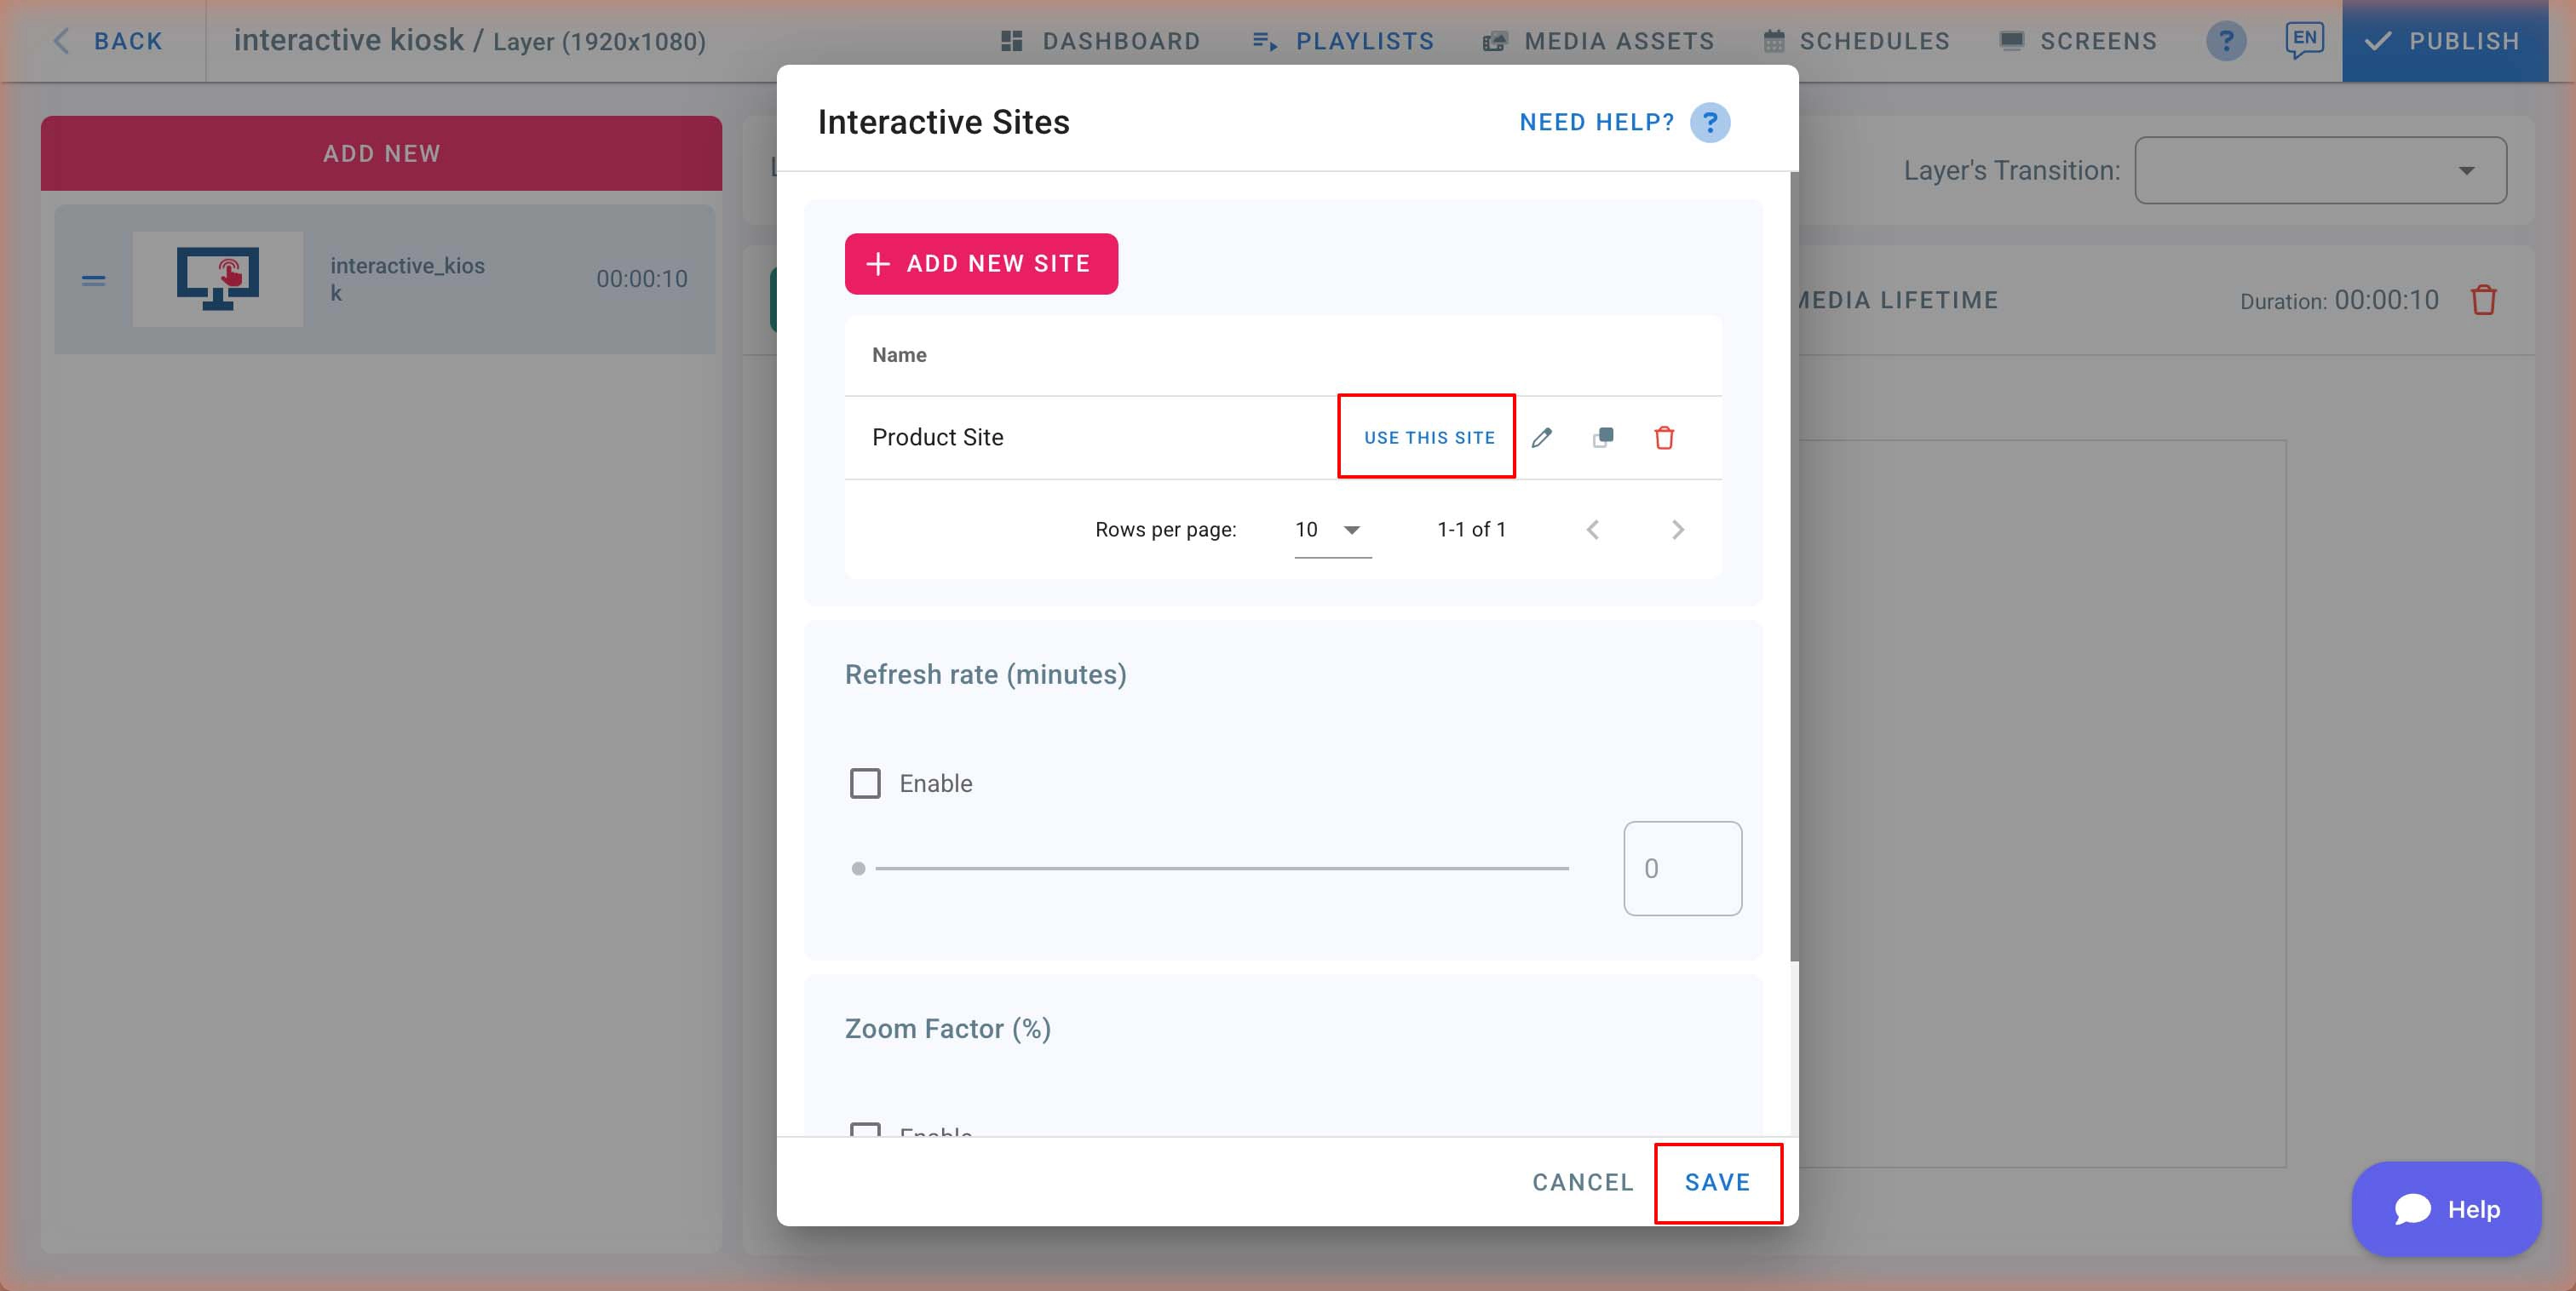
The kiosk preview will update to show the site content in your playlist layer.
How to Edit Your Interactive Site
- From the Interactive Sites dialog, click the Edit (pencil icon) button next to the site you want to modify.
- The editor opens in a full-screen view where you can design your interactive pages.
- Click Save in the toolbar when done. You will be prompted to confirm before overwriting the existing site.
- You can rename the site by clicking the pencil icon next to the site name in the editor title bar.
Cloning and Deleting Sites
- Clone: Click the clone (duplicate) button next to a site to create an exact copy. This is useful when you want to create a variation of an existing site.
- Delete: Click the delete (trash) button to remove a site. You will be asked to confirm before the site is permanently deleted.
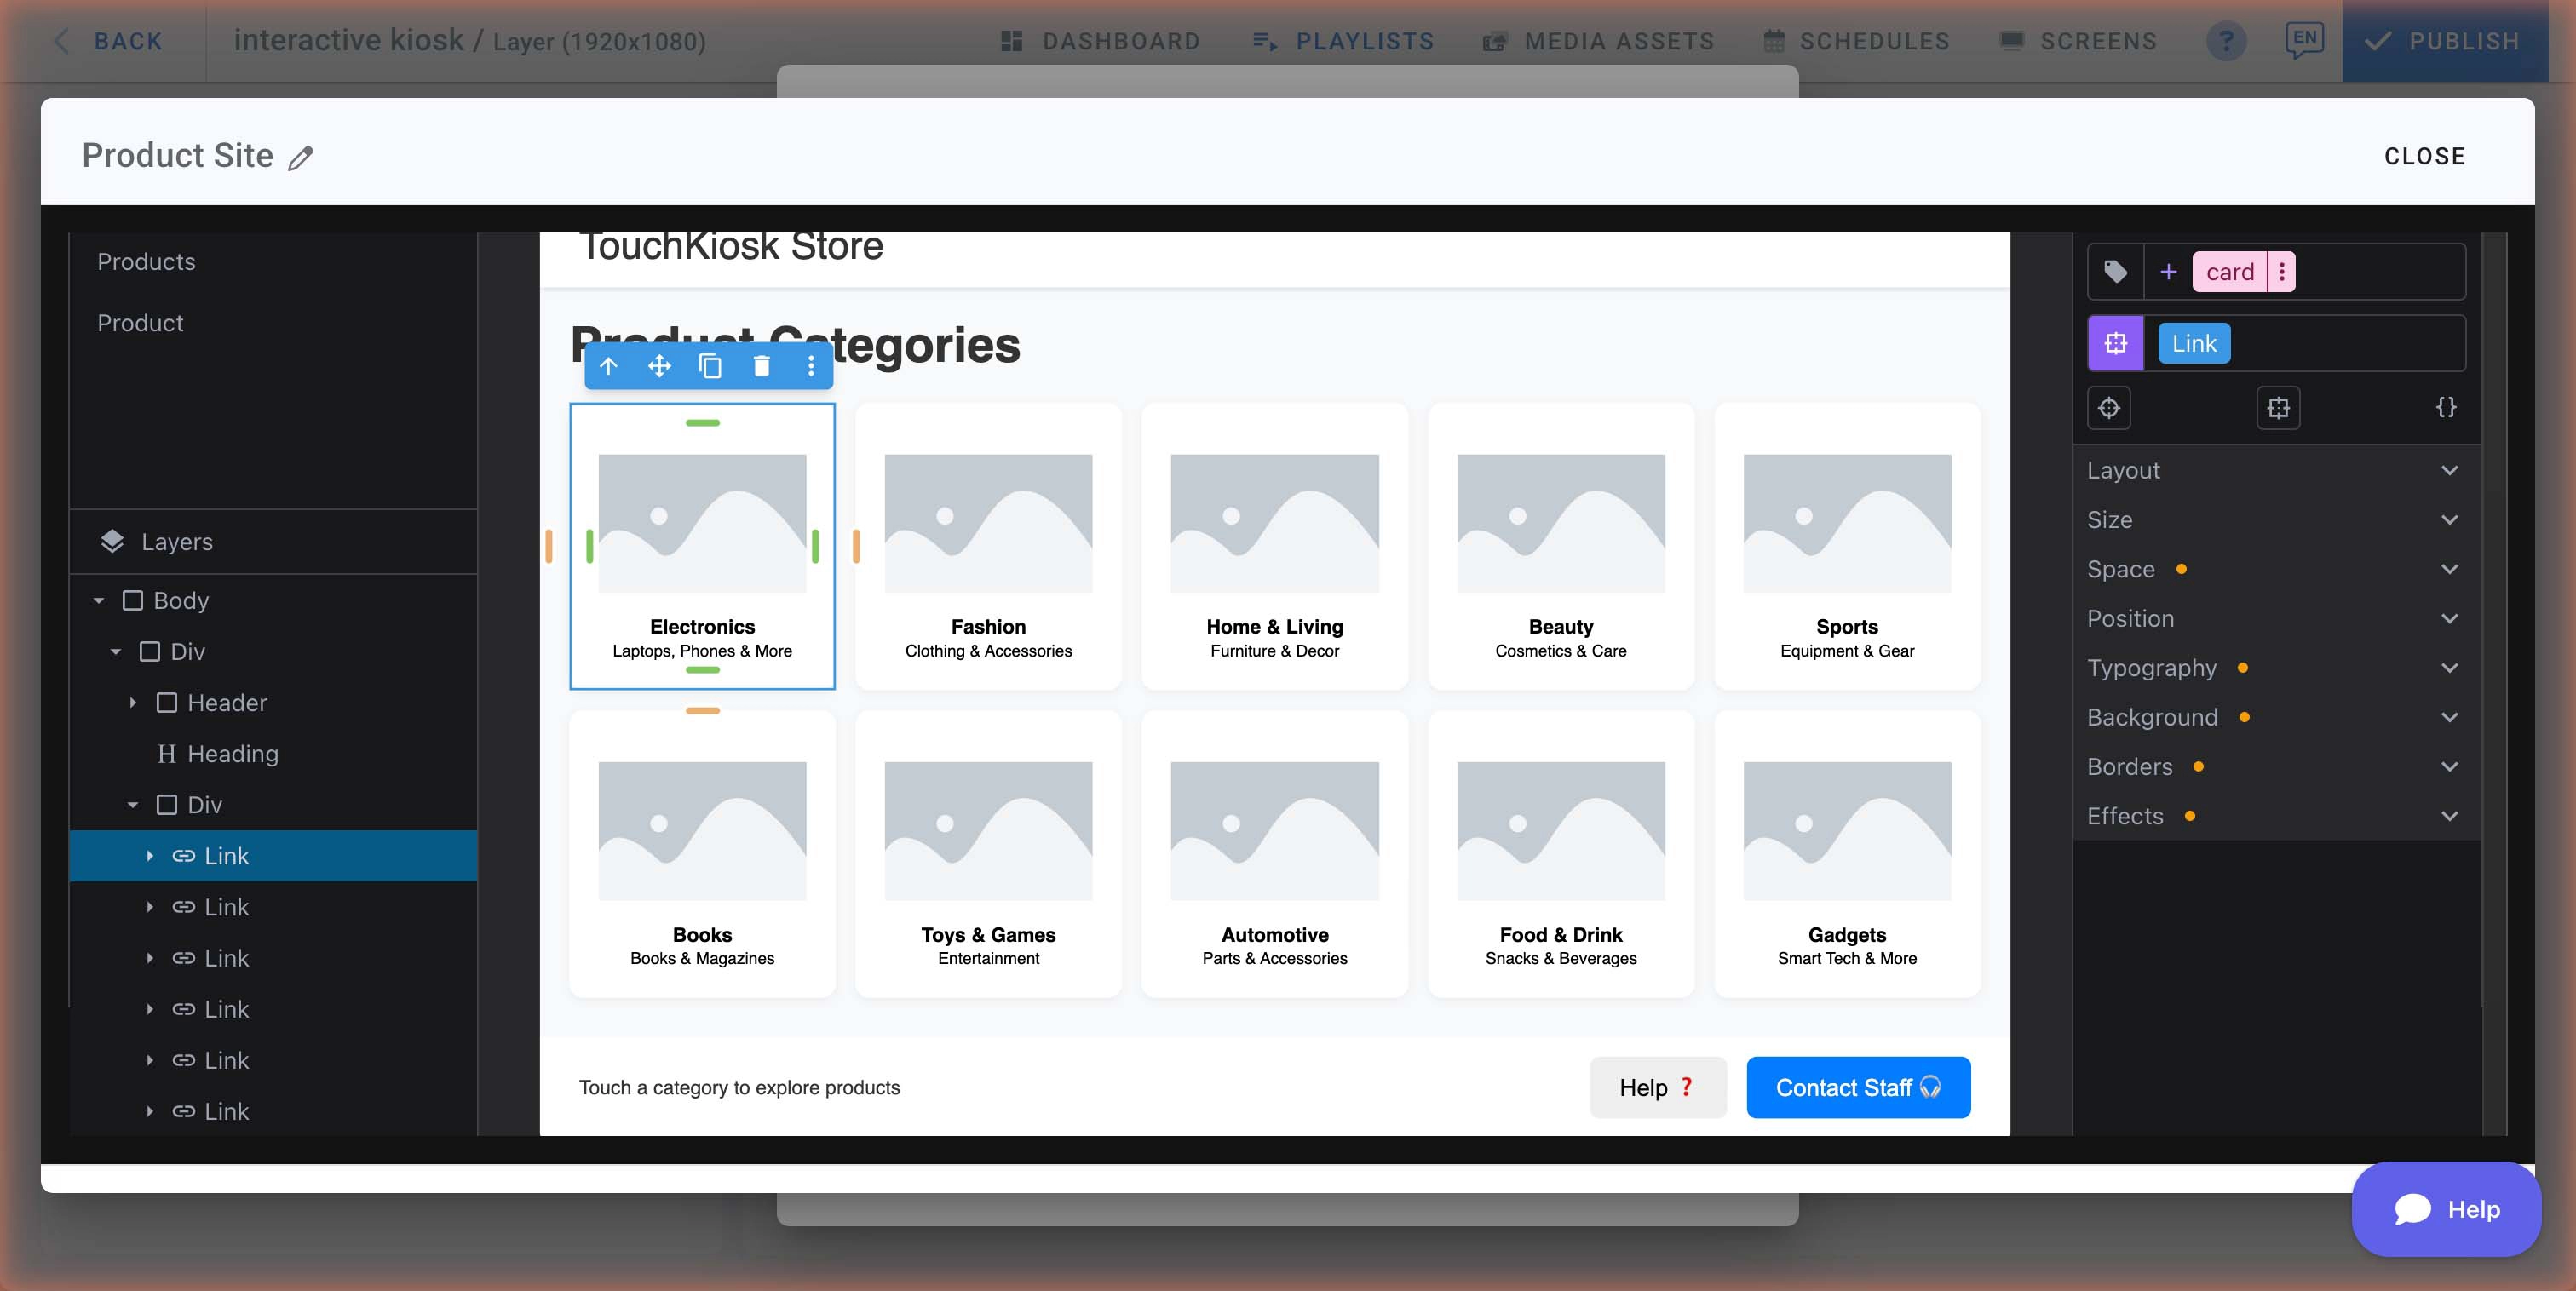
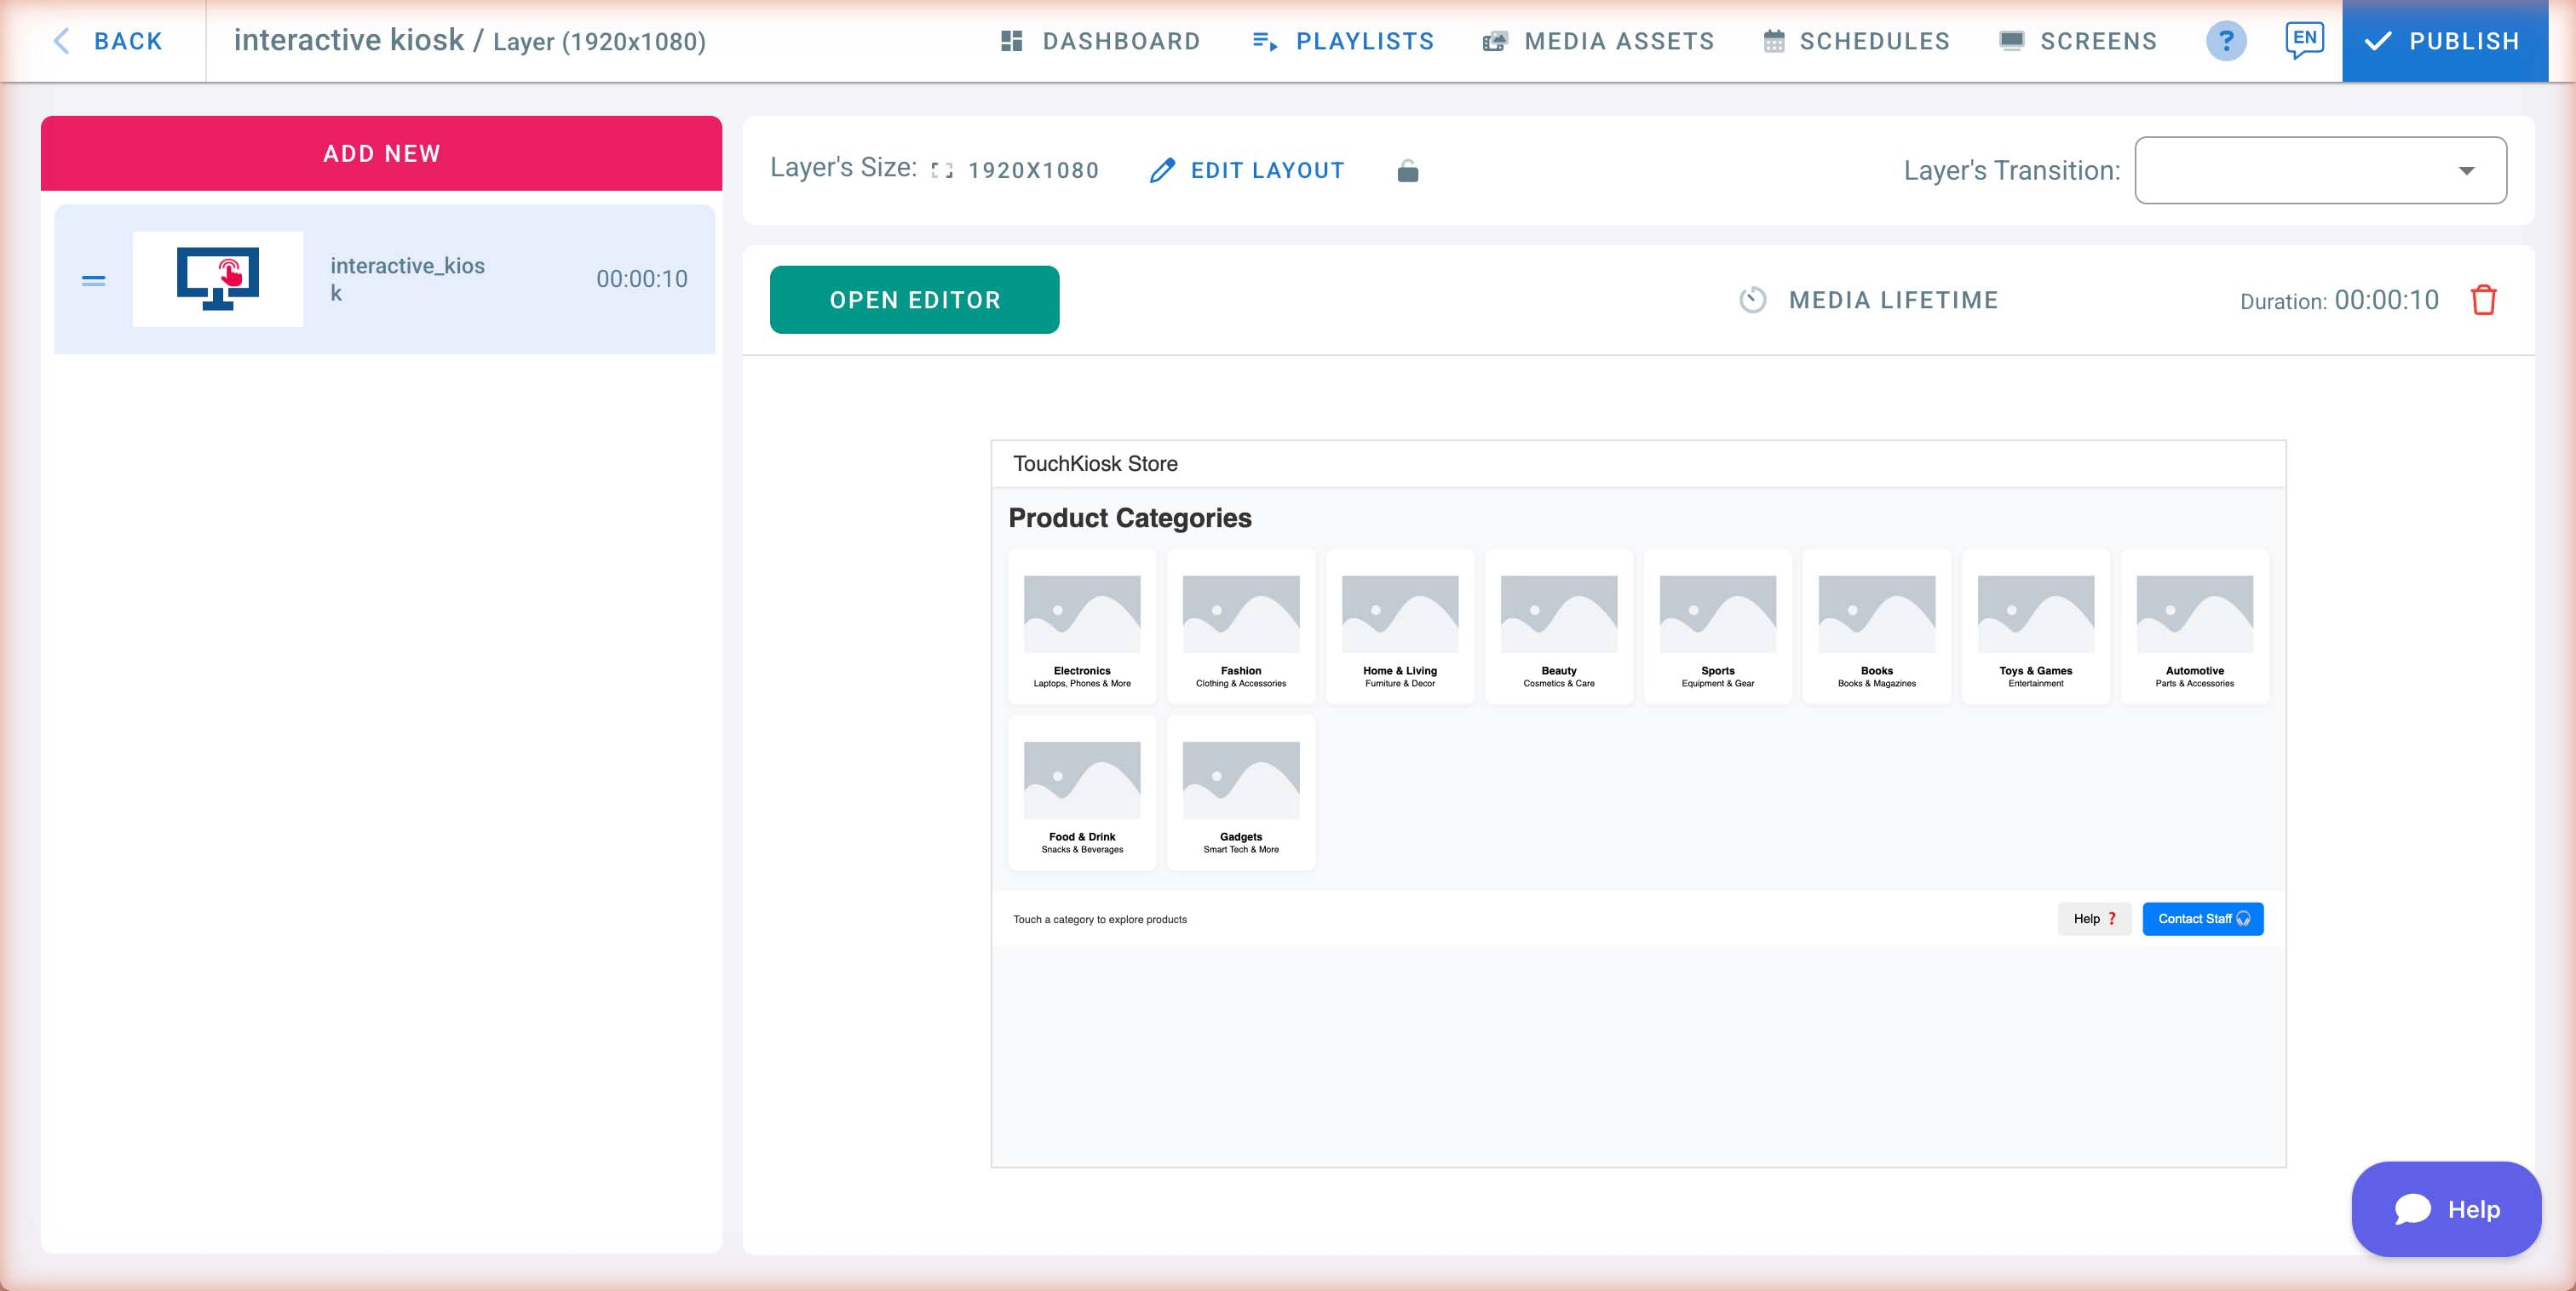
Adding Links to Images
A common pattern in interactive kiosks is making images tappable — for example, a product category image that takes the user to a details page.
Example: linking a category image to another page
- Click on an image in the canvas to select it.
- In the Layers panel, right-click the element and wrap it in a Link block, or drag a Link block from the blocks panel around the image.
- With the Link selected, open the Properties panel on the right.
- Set the Href to the page you want to navigate to — use the page name or number (e.g.,
#page-2). - Save your site.
When a viewer taps the image on the touchscreen, they will be taken to the linked page.
Tip: The templates (e.g., Retail Product Kiosk) already include linked images as examples — open one to see how links are structured.
Display Settings
After adding an interactive kiosk to your playlist, you can configure additional display settings in the Interactive Sites dialog:
Refresh Rate
Check the Enable checkbox to allow the kiosk to auto-reload every X minutes. Use the slider or enter a value to set the refresh interval. Set to 0 to disable auto-refresh.
Zoom Factor
Adjust the zoom level (0–200%) to scale the kiosk content on your screen. This is useful when you need to fit content to different screen sizes or resolutions.
Touchscreen Setup
To make the most of the Interactive Kiosk app, ensure your screen supports touch input. For detailed instructions on configuring touchscreen features such as manual control, screensavers, navigation arrows, and tap-to-start, see the Touch Screen Features guide.
Tips
- Use high-quality images and clear navigation to make your kiosk easy to use.
- Keep the number of pages manageable so users can find what they need quickly.
- Test your kiosk on the actual screen to verify touch responsiveness and content layout.
- Assign a screensaver playlist to display content when the kiosk is idle.
- Use templates to get started quickly, then customize to fit your needs.
- The Interactive Kiosk app requires an internet connection to load content on the screen.