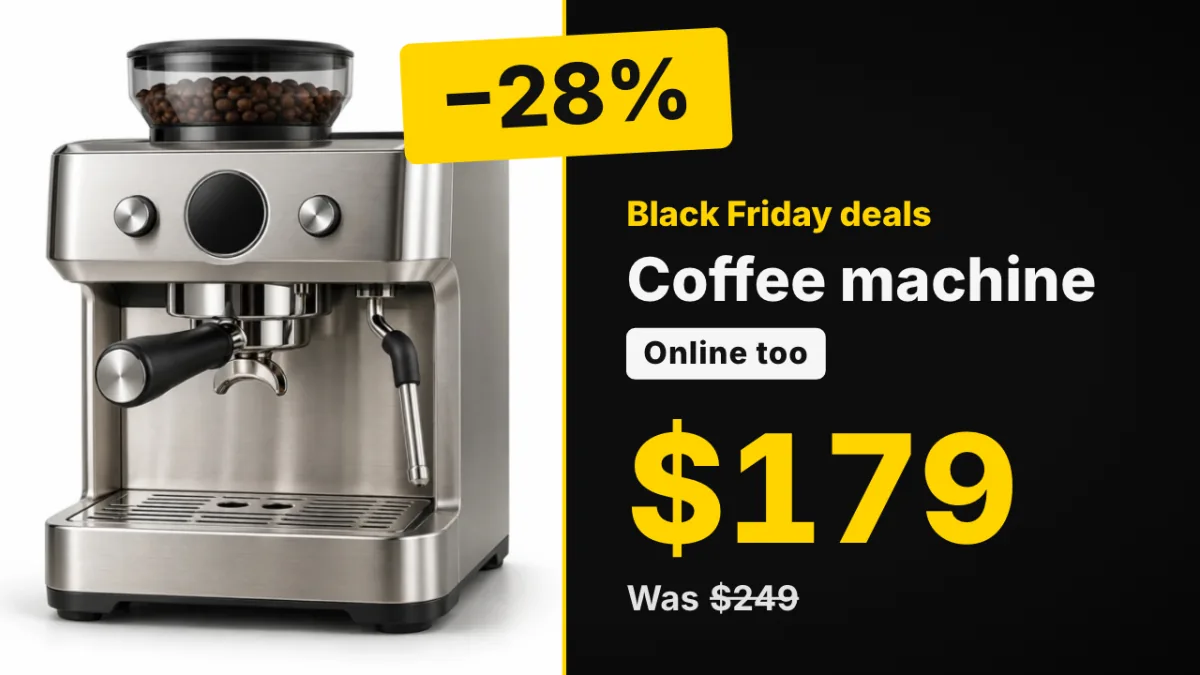
The Black Friday Deals app shows your Black Friday deals on your screens. You type each product with its old and new price, and the app works out the saving, such as “−35%” or “Save $250”. Add a product photo to a deal and the photo leads the deal on screen.
The app runs on the screen without an internet connection, in landscape and portrait, and in any layer size. It has no sale dates: schedule the playlist item for the days of your sale.
Note: The Black Friday Deals app isn’t offered in video wall playlists.
Add the Black Friday Deals app
- Open the playlist, then click the layer. See Playlist Media Management.
- If the layer is empty, the content apps open. If it already has media, click Add New.
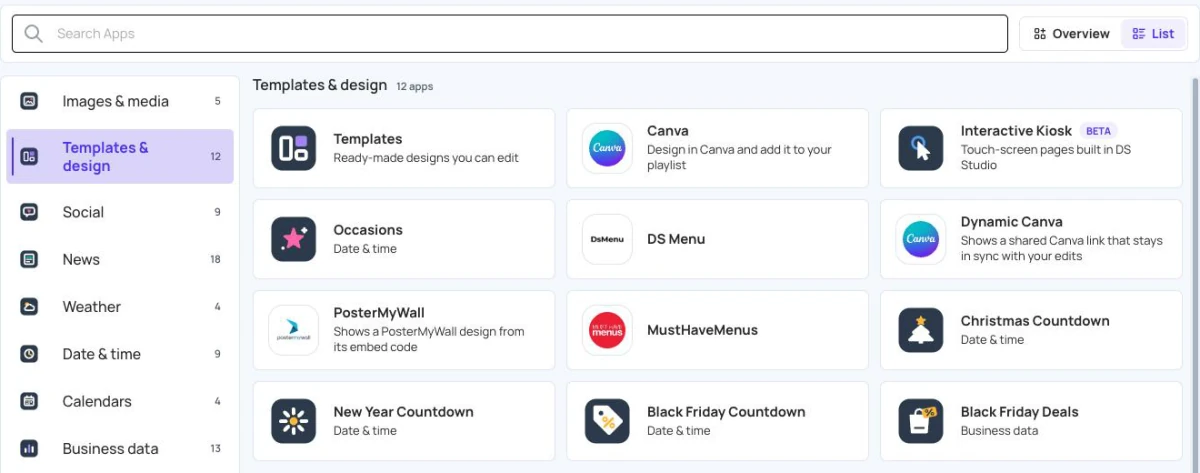
- Click Seasonal & events or Business data, then Black Friday Deals. You can also type its name in Search Apps.
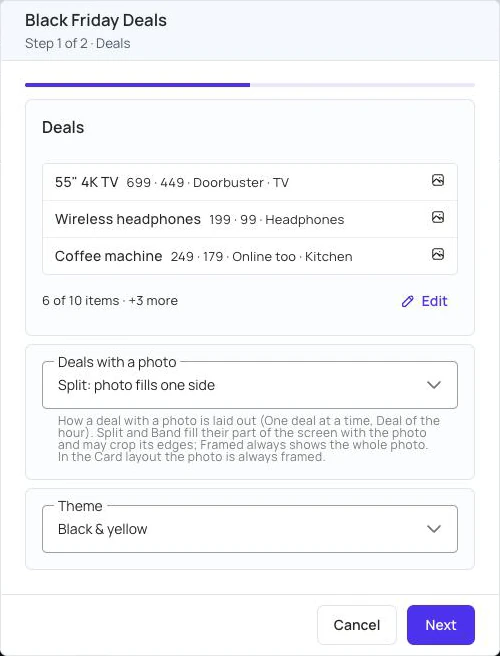
- On the Deals page, edit the deals and choose Deals with a photo and Theme. See Edit your deals. Click Next.
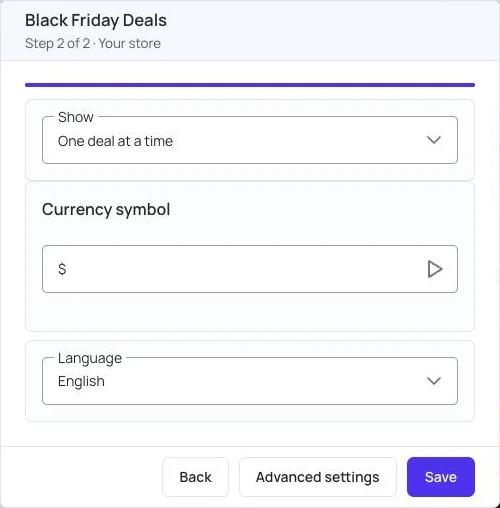
- On the Your store page, choose Show, Currency symbol and Language.
- Click Save. To change more settings first, click Advanced settings instead. See Advanced settings.
- Click Publish changes of this playlist to send it to your screens.
Every setting has a ready-to-use default. The app starts with six sample deals, each with a product photo, so you can see how it looks before you type your own.
To change the settings later, click Edit next to the item in the layer. All settings are then on one page.
Edit your deals
- Under Deals, click Edit.
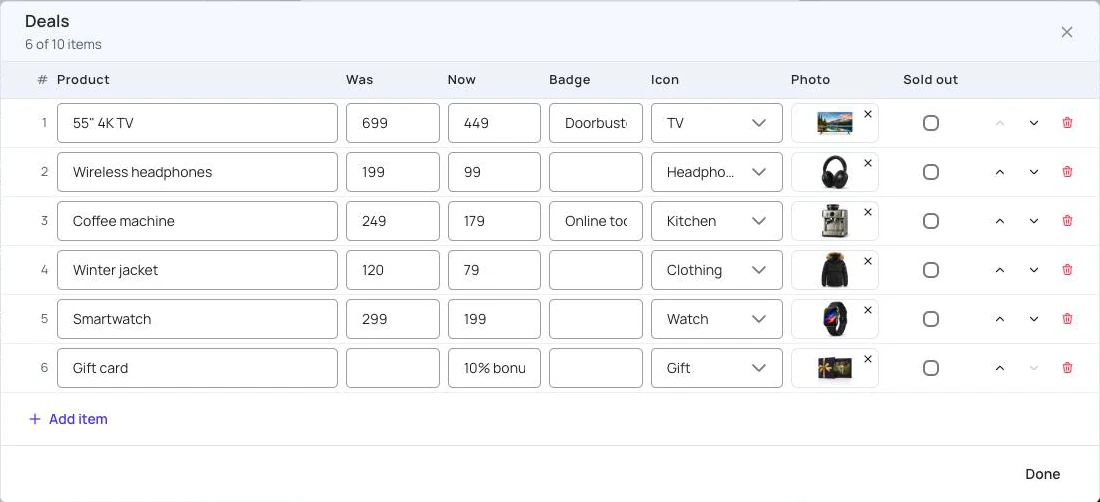
- Edit a row for each deal. You can add up to 10 deals.
- Product: the product name. Required.
- Was: the old price. Leave it empty if there is no old price.
- Now: the new price. Required.
- Badge: a short label, for example “Doorbuster” or “Online too”.
- Icon: a picture for the product, such as TV, Clothing or Gift. Choose No icon to show none.
- Photo: a product photo. See Add product photos.
- Sold out: shows “Sold out” in place of the saving.
- To add a deal, click Add item. To change the order, use the arrow buttons (Move up and Move down). To remove a deal, click the bin button (Delete).
- Click Done.
Tips for prices:
- Type prices as numbers, for example
449,449.00or1,299. The app shows them in the number format of the chosen Language, with your Currency symbol. - A currency symbol you type in a price is ignored, so every price on the screen uses the same symbol.
- The saving shows only when the old price is higher than the new price. The percent is rounded down, so the screen never shows more than the real saving.
- You can type text instead of a price, for example “Free gift” or “2 for 1”. It shows as text, with no saving.
Note: In the EU, a “was” price must be the lowest price of the previous 30 days. The app can’t check this. To show different wording, change Old price label in the advanced settings, for example to “Lowest 30-day price”.
Add product photos
A photo replaces the deal’s icon on screen.
- In the deals list, click the Photo cell of a deal.
- Choose a photo from Media Assets, or click Upload new to upload one. You can use JPG, PNG, WEBP or GIF files.
- To remove a photo, click the × on the corner of the cell (Remove photo). The deal shows its icon again.
The sample deals come with their own photos. Choosing your own photo replaces the sample.
After you save, the item in the layer shows Preparing app… while your photos are added to the app. The screens then show the photos without downloading anything else.
If the item shows Photos missing, the photos couldn’t be added, and the app plays without them. Save the item again to try once more.
Choose how the deals show
Show sets how the deals play:
- One deal at a time: one deal fills the layer, with the new price largest. The next deal appears every Seconds per deal or page. Best for screens that people walk past.
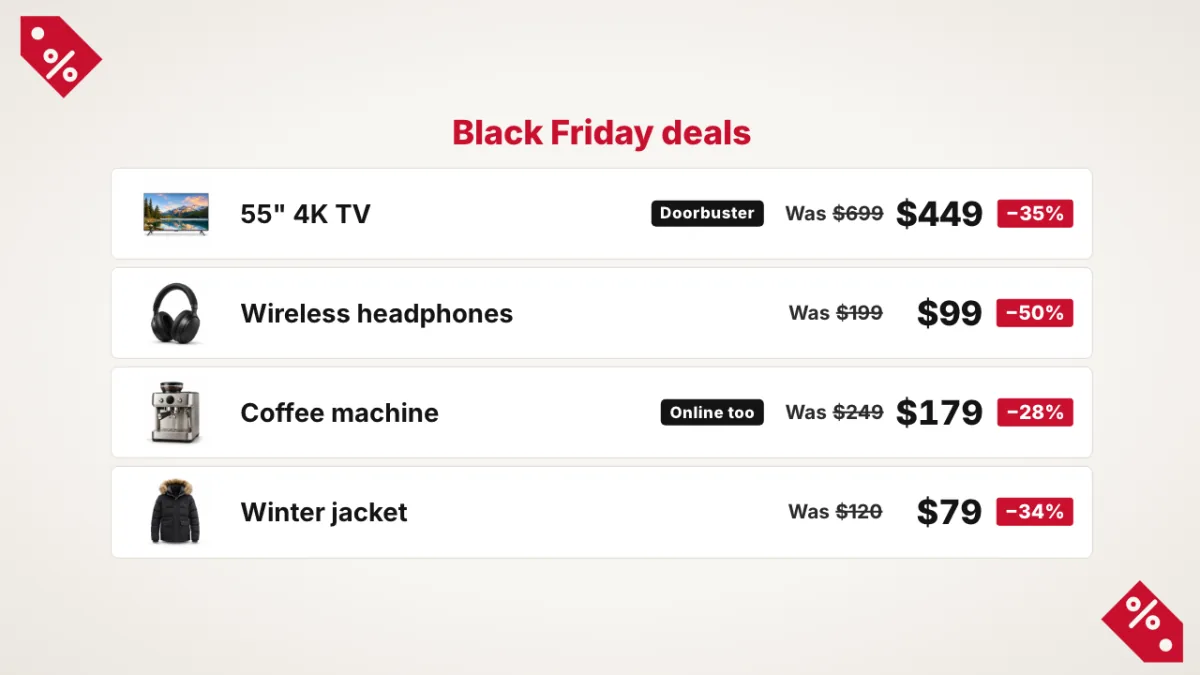
- A list of deals: several deals on one page, for counters and departments. The next page appears every Seconds per deal or page.
- Deal of the hour: one deal for each hour of the day, by the screen’s clock, with the time left until the next deal.
The app works out the current deal from the clock. When the item comes back in the playlist, it continues the list instead of starting again, and screens that play the same playlist show the same deal.
Deals with a photo sets how a deal with a photo is laid out, for One deal at a time and Deal of the hour:
- Split: photo fills one side: the photo fills one side of the layer, or the top half in portrait. The saving sits between the photo and the text.
- Framed: whole photo in a frame: the whole photo in a frame, with the text beside it. Best for product photos on a white background.
- Band: photo on top, price below: the photo across the top of the layer, with the product name and price in a strip below. The saving sits in the top corner of the photo.
Split and Band fill their part of the layer with the photo and may crop its edges. Framed always shows the whole photo.
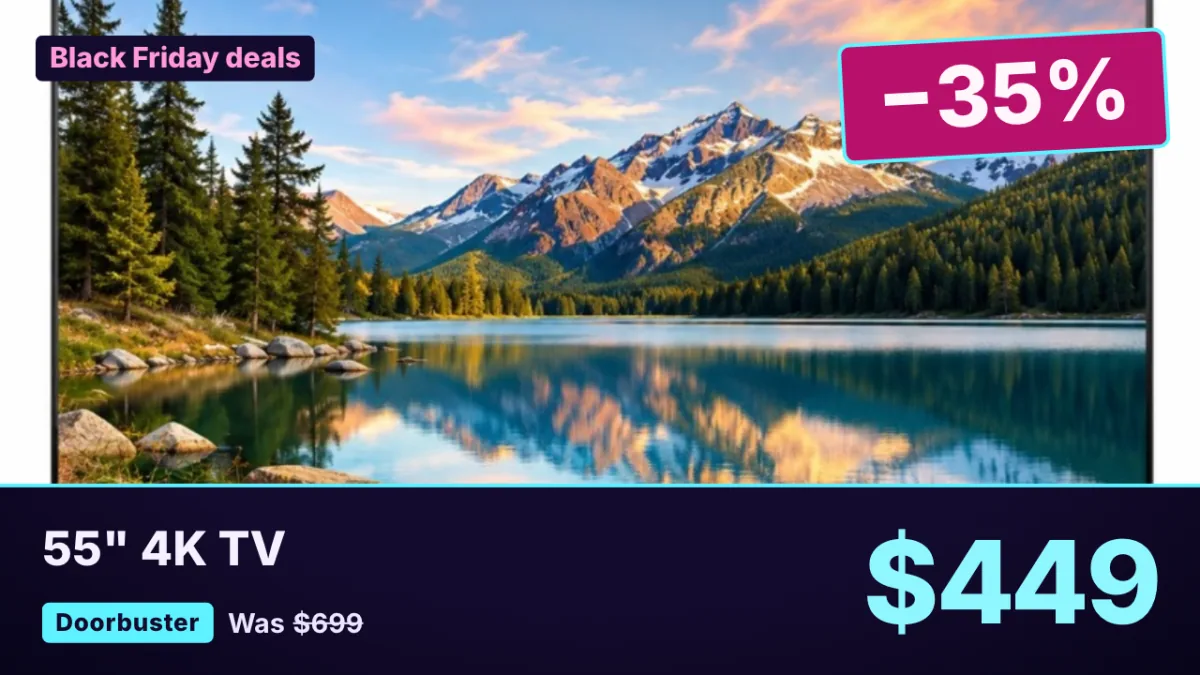
Theme sets the look: Black & yellow (with tape bands), Neon, Clean (warm white and red, for bright shop windows) or Minimal (no decorations).
Advanced settings
You can change these settings in Advanced settings when you add the app, or later when you edit the item.
Font & headline
- Font: the typeface for all text. The fonts are part of the app, so they work offline. Cairo also has Arabic letters. Characters a font lacks, such as Chinese, Japanese or Korean, show in the screen’s own font.
- Headline: the line above the deals. Leave it empty to show “Black Friday deals” in the chosen language.
Display
- Seconds per deal or page: how long each deal or list page shows, from 3 to 20 seconds.
- Hide sold-out deals: hides deals marked Sold out instead of showing them.
- Numerals: 0123 (Western digits) or ٠١٢٣ (Arabic-Indic digits).
Prices
- Saving: Percent off, Amount saved, Both or Hidden.
- Currency position: As usual for the language, Before the price or After the price.
- Old price label: the word before the old price. Leave it empty to show “Was” in the chosen language.
Style
- Animation: each part of a deal comes in one after another, and the saving sticker sways gently. When it’s off, deals fade in.
- Entrance: how each part comes in: Pop, Breathe, Baseline, Drift, Tectonic or Tumble. Needs Animation on.
- Layout:
- Full screen: fills the whole layer.
- Card: a panel in the layer. Photos are always framed.
- Strip: one deal on one line, for a footer or ticker layer.
- Badge: a small block for a corner, with the product, price and saving.
- Position: where a card, strip or badge sits in the layer: Center, Top, Bottom or one of the four corners.
Background
- Background: Style background (the theme’s colours), Solid color (pick it in Background Color) or Transparent (the layers underneath show through).
- Background opacity (%): below 100%, the layers underneath show through. Prices and stickers stay solid.
- Readability on a transparent background: with a transparent background, adds a Text shadow, Text outline or Panel behind the text so it stays readable. Panel opacity (%) sets how solid the panel is.
Colors & size
- Use my own colors: replaces the theme’s colours with your Text Color and Accent color (the headline, prices, saving sticker and icons). If a colour would be hard to read, the app makes it lighter or darker.
- Size (%): makes everything larger or smaller, from 60% to 140%.
Note: In a small or very thin layer, such as a footer strip, the app chooses a compact view by itself and leaves out parts that wouldn’t be readable.