Access Restrictions allow you to secure your account by limiting who can log in based on specific criteria. Once enabled, only users who meet the defined rules will be able to access and manage this account.
You can restrict access using the following methods:
- IP Access Restrictions: Allow only specific IP addresses to log in.
- Country Access Restrictions: Allow only users from specific countries
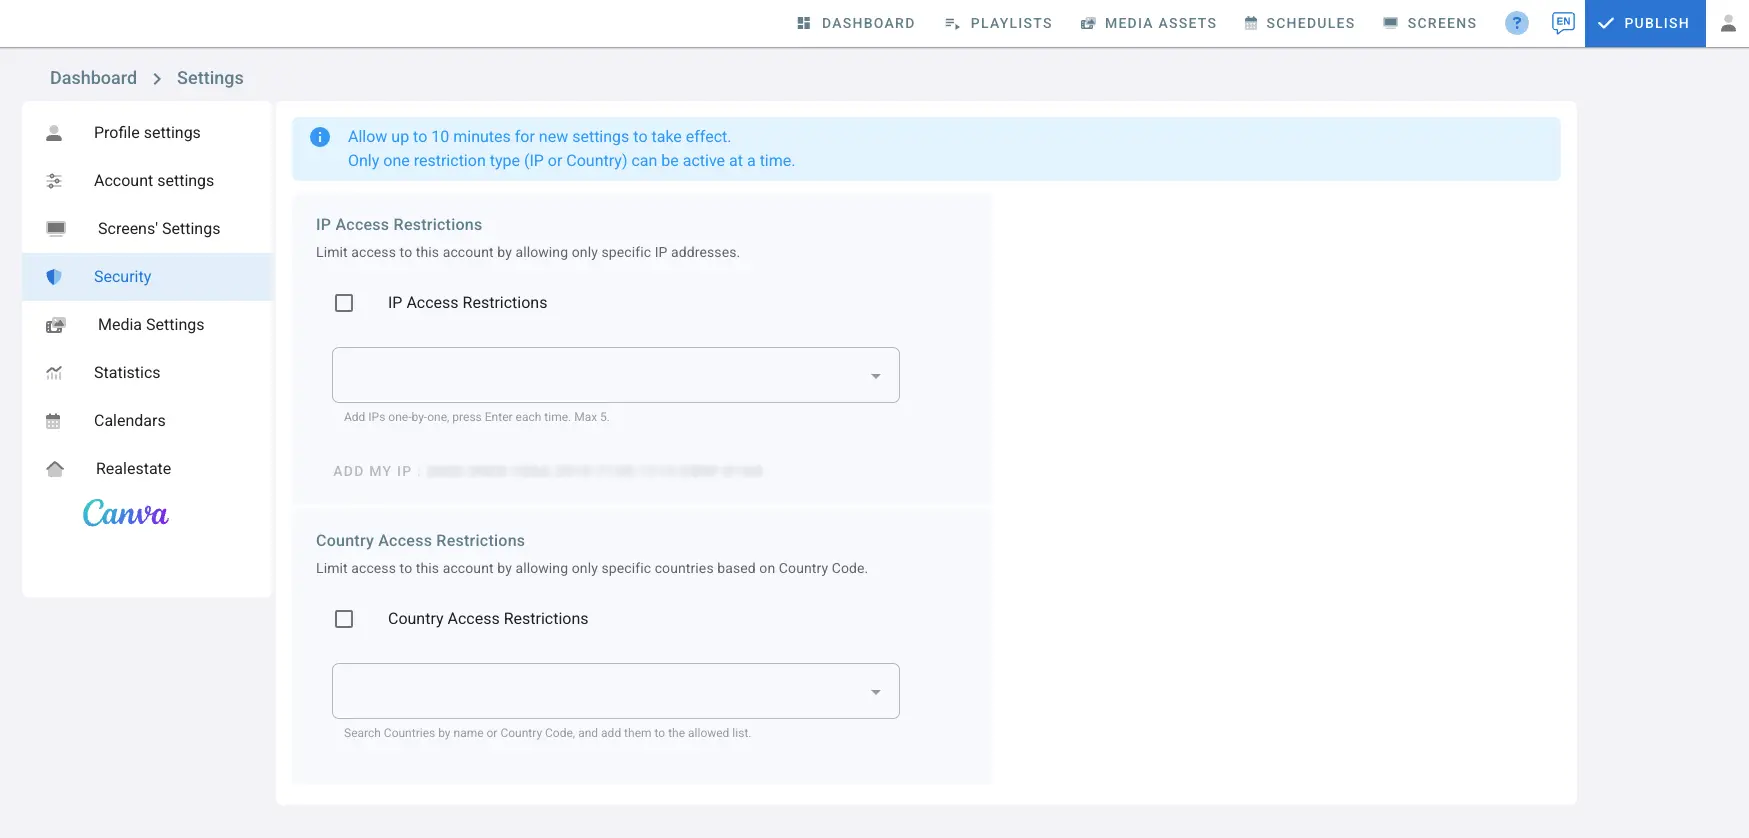
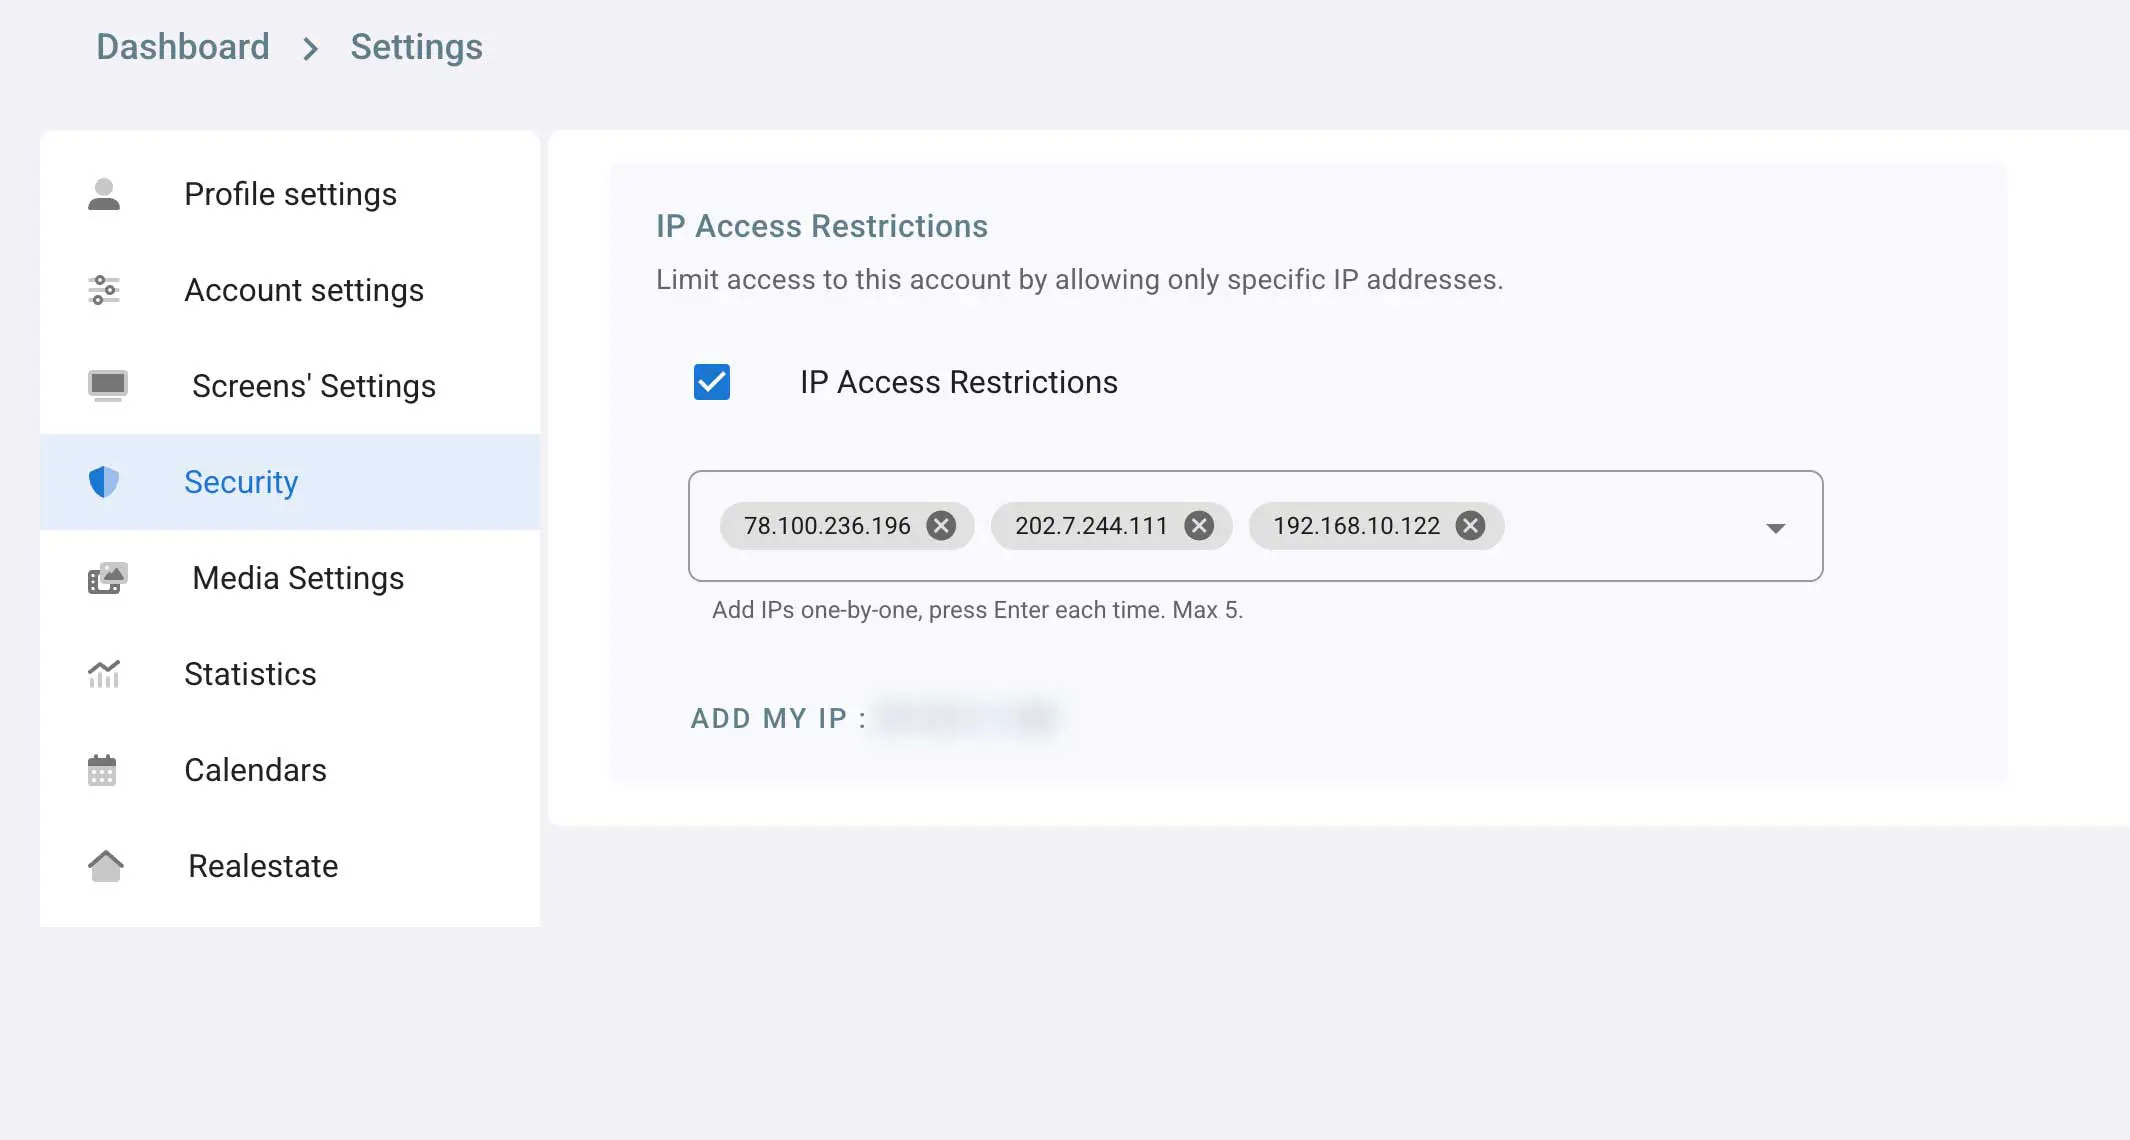
IP Access Restrictions
IP Access Restrictions allow you to secure your account by limiting access to specific IP addresses only. Once enabled, only the IPs added to the list will be able to log in and manage this account.
Any login attempt from an IP address that is not listed will be blocked.
- Click on the profile icon on the top right corner
- Click on Settings → Security
- Locate the IP Access Restrictions section
- Check the IP Access Restrictions checkbox to enable the feature
Adding Allowed IP Addresses
- Enter an IP address in the input field
- Press Enter to add the IP
- Add IPs one by one
- You can add up to 5 IP addresses
- Each added IP will appear as a tag inside the field
Add My IP
- Click Add My IP to automatically add your current public IP address
- This is recommended before enabling IP restrictions to avoid locking yourself out
Notes & Best Practices
- Only IPv4 addresses are supported
- Make sure to add all required IPs (office networks, VPNs, admin users) before enabling the restriction
- If your internet provider uses dynamic IP addresses, you may need to update the list when your IP changes
- IP Access Restrictions apply to account access via the CMS
- Screen playback, content delivery, and player communication are not affected
Important
If IP Access Restrictions are enabled and your current IP address is not included in the allowed list, you will be logged out and denied access.
Always ensure at least one trusted IP address is added before saving changes.
Country Access Restrictions
Country Access Restrictions allow you to secure your account by limiting access to specific countries only. Once enabled, only users from the countries added to the list will be able to log in and manage this account.
Any login attempt from a country that is not listed will be blocked.
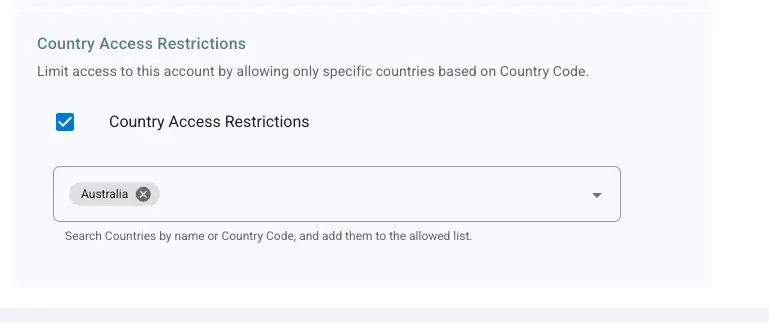
- Check the Country Access Restrictions checkbox to enable the feature.
- Enter a country name in the input field
Important
Note that if no countries are added after checking the box, all countries will be blocked and no access to this account will be enabled. Make sure to add at least one country (including the user’s country) to allow access or disable restriction.