How to Use Raspberry Pi as a Digital Signage Player

Have you ever looked at your trusty Raspberry Pi and thought, “Could this little wonder be more than just a tinkering toy?” Well, the answer is a resounding “Yes!”
This guide will take you through the installation and customisation process, providing everything you need to turn your Raspberry Pi into a powerful tool for your business or organisation with EasySignage.
What is Raspberry Pi?
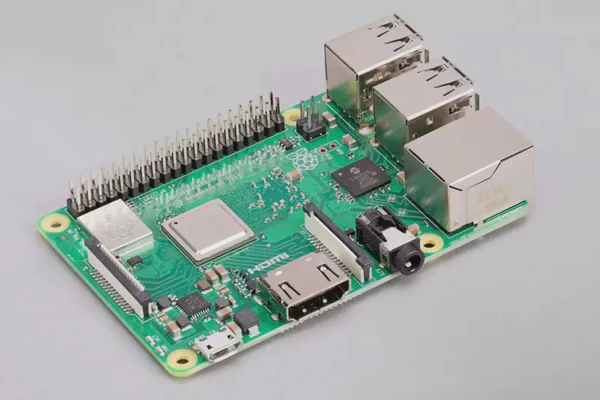
Let’s start with the basics. Raspberry Pi is a credit-card-sized computer, but it’s incredibly powerful. This versatile, affordable, and energy-efficient single-board computer has captured the hearts of tech enthusiasts and DIYers worldwide.
Whether you own the Raspberry Pi 3 or the more advanced Raspberry Pi 5, we’re here to help you make the most of it.
First, let’s take a quick look at the Raspberry Pi models supported by EasySignage:
- Raspberry Pi 5 :
The Raspberry Pi 5 Model B is the latest and most advanced addition to the Raspberry Pi lineup. Boasting a powerful quad-core ARM Cortex-A76 processor running at 2.4GHz, up to 16GB of LPDDR5 RAM, and support for dual 4K displays with higher refresh rates, the Raspberry Pi 5 is designed to tackle even the most demanding tasks.
Equipped with faster PCIe connectivity, native support for M.2 NVMe storage, and enhanced USB 3.0 ports, it delivers exceptional speed and versatility. Its upgraded GPU offers superior multimedia capabilities, making it ideal for high-performance digital signage, AI edge processing, and multitasking workloads with rich, dynamic content.
- Raspberry Pi 4 Model B:
The Raspberry Pi 4 Model B is the most powerful member of the Raspberry Pi family. With a faster 1.5GHz quad-core 64-bit ARM Cortex-A72 processor, up to 8GB of RAM, and support for dual 4K displays, this tiny computer is a real powerhouse.
Its Gigabit Ethernet and USB 3.0 ports provide lightning-fast connectivity, and it’s perfect for demanding digital signage applications that require high-performance processing, multi-tasking capabilities, and rich multimedia content.
- Raspberry Pi 3 Model A+:
For a more compact solution, the Raspberry Pi 3 Model A+ offers energy efficiency and enough power to handle basic signage tasks with ease.
This model features a 1.4GHz quad-core processor, 512MB of RAM, and built-in wireless LAN and Bluetooth connectivity, making it an excellent choice for projects where space and power efficiency are essential. It’s an ideal option for smaller-scale digital signage setups, delivering reliable performance while keeping a small footprint.
- Raspberry Pi 3 Model B+:
And don’t forget the Raspberry Pi 3 Model B+, offering a balance of performance and energy efficiency, making it an excellent choice for various signage needs. It features a 1.4GHz quad-core processor, 1GB of RAM, and improved networking capabilities with wired and wireless connectivity options.
So, whether you’re going big with the Pi 5 or keeping it simple with the Pi 4 or 3, there’s a Raspberry Pi model to suit your digital signage needs.
Now, let’s dive into the fun part – turning your Raspberry Pi into a digital signage powerhouse.
Why Raspberry Pi for Digital Signage?
Before we dive into the “how,” let’s address the “why.” Why should you convert your Raspberry Pi into a digital signage player? Well, because it opens up a world of possibilities. Plus, it’s an excellent fit for various applications, from menu boards and information displays to interactive kiosks.
Advantages of using Raspberry Pi for digital signage:
Cost-Effective Solution:
Are you working with a tight budget? Using a Raspberry Pi as a signage player is incredibly cost-effective. You don’t need to invest in expensive hardware when you can repurpose what you already have. It’s a significant advantage for small businesses or personal projects.
Compact and Space-Saving:
Raspberry Pi is compact and won’t take up much space. Perfect for situations where real estate is a concern. Think about it, a powerful digital signage solution without bulky equipment.
Energy Efficient:
Concerned about your energy bill? Raspberry Pi consumes very little power compared to traditional signage players. It’s eco-friendly and budget-friendly at the same time!
Endless Customisation:
Want to stand out? With Raspberry Pi, the customisation possibilities are endless. You can tailor your digital signage to your brand, message, and audience.
So, why invest in expensive digital signage players when you can achieve stunning results with your Raspberry Pi? Let’s get started with the conversion.
How to Convert Your Raspberry Pi into a Digital Signage Player?
Here’s a step-by-step guide to converting your Raspberry Pi into digital signage in no time.
1. Gather Your Gear
Before we begin, you’ll need to gather a few essentials:
- A Raspberry Pi board (we recommend a Raspberry Pi 4 or 5)
- A microSD card (32GB or larger recommended) for storing the operating system.
- A power supply for your Raspberry Pi. Ensure you have a reliable power source.
- HDMI Cable.
- A reliable internet connection (Wi-Fi or Ethernet).
- Display Screen.
2. Installing EasySignage on Raspberry Pi
There are two ways to get EasySignage up and running on your Raspberry Pi, and the right choice depends on your setup:
Option 1: Flash EasySignage Custom Android 15 Image (Recommended).
The fastest and most reliable method. This custom image is optimized for Raspberry Pi 4 and 5, comes with the EasySignage app pre-installed, and delivers top performance and stability.Option 2: Install EasySignage on Raspberry Pi OS.
Prefer to stick with Raspberry Pi OS? No problem. You can install the EasySignage app directly and still enjoy all its features.
Choose the option that fits your needs and follow the guide below.
Option 1: Flash EasySignage Custom Android 15 Image
Using the EasySignage Custom Android 15 image is the simplest way to transform your Raspberry Pi into a dedicated digital signage player.
Why use the custom image?
- Optimized for smooth performance
- Operating system locked down to run only EasySignage
- EasySignage app comes pre-installed
- Full support for every EasySignage feature
- Quick and straightforward installation for Raspberry Pi 4 & 5
Step 1: Download the Image
For Raspberry Pi 4, download: rpi4-aosp15-ez-v1.img.zip
For Raspberry Pi 5, download: rpi5-aosp15-ez-v1.img.zip
Step 2: Flash the Image to an SD Card
Insert a microSD card (32GB or larger) into your computer.
Download and install the Raspberry Pi Imager from raspberrypi.com/software.
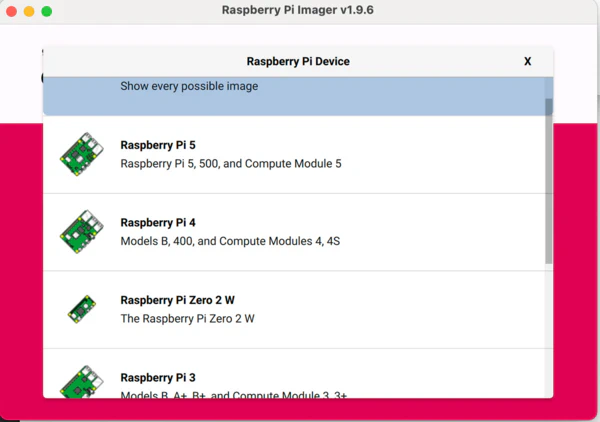
Open Raspberry Pi Imager and:
- Click Choose Device → Select your Raspberry Pi model.
- Click Choose OS → Select Use Custom
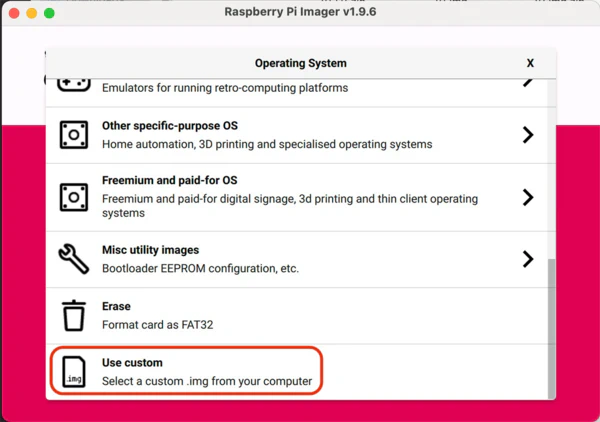
pick the downloaded image file (.img.zip).
Click Choose Storage → Select your SD card.
Click Next. When asked about OS customization, select NO.
Confirm with YES when prompted to continue.
Click Write. The tool will flash and verify the image (this may take a few minutes).
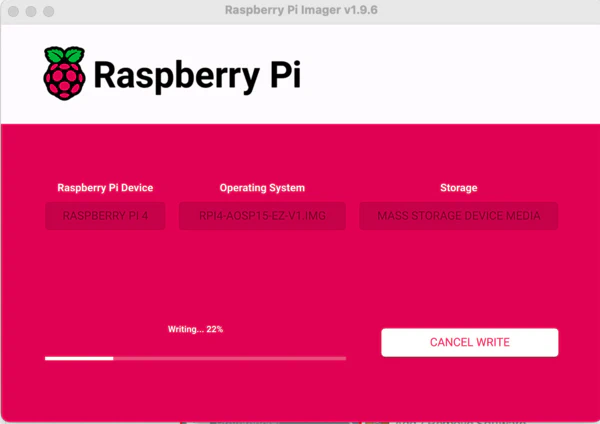
Once you see “Write Successful”, your SD card is ready.
Step 3: Boot Your Raspberry Pi
Insert the microSD card into the Raspberry Pi.
Connect power, HDMI display, and (optional) USB keyboard/mouse.
The Pi will boot directly into EasySignage Android 15.
Connecting to Wi-Fi
To get online, you’ll need to open Android Settings. You can do this in two ways:
- Option A: With a Keyboard
- Plug in a USB keyboard.
- Press ALT + M.
- Enter the default password: 1122.
- Select Open Settings.
- Go to Network & Internet → Wi-Fi and connect to your network.
- Restart the player once connected.
- Option B: With a Mouse
- Plug in a USB mouse.
- Press and hold a left-click on the top-left corner of the screen for 5 seconds.
- Enter the default password: 1122.
- Select Open Settings.
- Go to Network & Internet → Wi-Fi and connect.
- Restart the player once connected.
🎉 That’s it! Your Raspberry Pi is now running EasySignage Android 15 and ready to display your content.
Option 2: Install EasySignage on Raspberry Pi OS
If you’d rather continue using Raspberry Pi OS, you can still install EasySignage directly. This option is great for users who prefer the flexibility of Raspberry Pi OS while running the EasySignage app alongside other applications.
Step 1: Pre installation - Set Up Your Raspberry Pi
Install Raspberry Pi: Start by downloading and installing Raspberry Pi OS on your device. Follow the official Raspberry Pi installation to guide you through the process.
Make sure Chromium browser is installed on your display. EasySignage runs inside a web-based environment, so you’ll need Chromium.
Disable Screen Blanking:
- On the main Raspberry Pi menu, click on Raspberry Pi Configuration under Preferences.

- Click on the “Display”
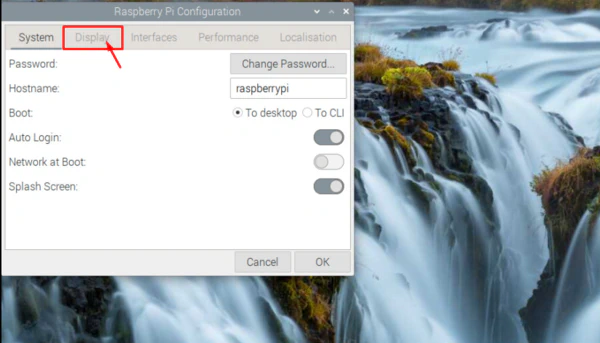
- Disable the “Screen Blanking”

Step 2: Install EasySignage App
You’re almost there! With your Raspberry Pi primed and ready, it’s time to install the EasySignage app. Here’s how you can do it:
- Open the terminal window on your Raspberry Pi as the image below.
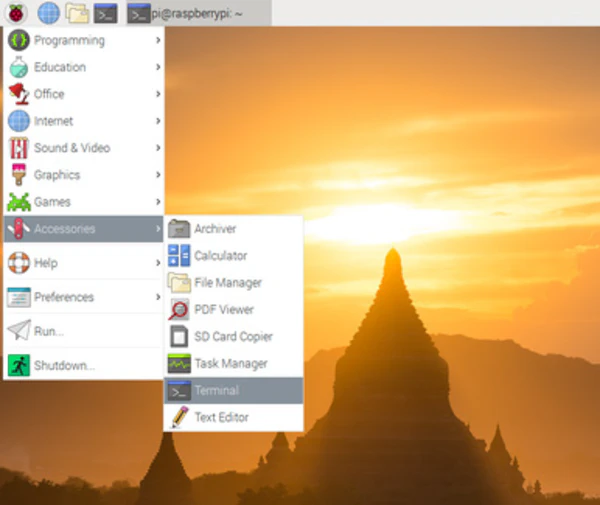
- Enter the following commands into the terminal to download and install the EasySignage package for Raspberry Pi OS:
For Raspberry Pi OS (64-bit):
/bin/bash -c "$(curl -fsSL https://appds.io/rpi64.sh)"For Raspberry Pi OS (32-bit):
/bin/bash -c "$(curl -fsSL https://appds.io/rpi32.sh)"
This script will create a folder under your home directory called “digital-signage” and download the player binary, then set up a startup script to start the app on boot time.
- Restart your device by writing “reboot” in the terminal.
Step 3: Connect to Wi-Fi (if not already connected)
Make sure your Raspberry Pi is connected to the internet via Wi-Fi or Ethernet. If you’re using Wi-Fi, you can connect from the Raspberry Pi OS network settings in the taskbar.
Congratulations, you’ve successfully converted your Raspberry Pi into a digital signage player with EasySignage!
For more details on how to install EasySignage on Raspberry Pi, please check the Raspberry pi installation page.
Setting Up EasySignage Content Management
Let’s get down to business. Now that your Raspberry Pi is up and running as a digital signage player, it’s time to create and manage your content. One great option is to use a cloud-based digital signage platform like EasySignage. It offers an intuitive interface and the flexibility to schedule and update content remotely.
Use the EasySignage platform to design stunning visuals, schedule content, and add interactive elements to engage your audience.
- Go to EasySignage management console
- Sign up for an EasySignage account. It’s quick, and you can get started for free.
- Go to the Screen tab, and add a new screen for your Raspberry Pi display.
- Enter the ID displayed on your display.
- Now, it’s time to get creative. Create playlists and design your Raspberry Pi digital signage display to suit your business needs. You can add images, videos, and text, and even schedule when and where your content should play.
For more information on how to set up your EasySignage account , check our Help guide.
Benefits of Using EasySignage with Raspberry Pi
User-Friendly Interface: EasySignage offers an intuitive interface, making it easy for anyone to create stunning digital signage content.
Remote Management: You can update your content and manage your displays remotely, saving time and effort.
Versatility: Whether you’re using it for advertising, information sharing, or as an interactive display, EasySignage can do it.
Cost-Effective: No need to invest in expensive hardware or software. Your Raspberry Pi and EasySignage subscription provide a cost-efficient solution. You’ve repurposed your existing Raspberry Pi, saving money on new hardware.
Conclusion
Turning your Raspberry Pi into a digital signage player isn’t just about repurposing a small computer; it’s about unlocking a world of possibilities. Whether you’re a small business owner looking to make a big impact, an educator, or simply a tech enthusiast, the combination of Raspberry Pi and EasySignage is a game-changer.
Are you ready to take the leap into the world of digital signage with your Raspberry Pi? With Easysignage by your side, it’s a breeze.
So, why wait? Give it a try. Get started on your transformation today and experience the magic of Raspberry Pi-powered digital signage. Your audience will thank you, and your wallet will too!
If you have any questions, don’t hesitate to contact us at EasySignage. We’re here to help you maximise your digital signage journey.