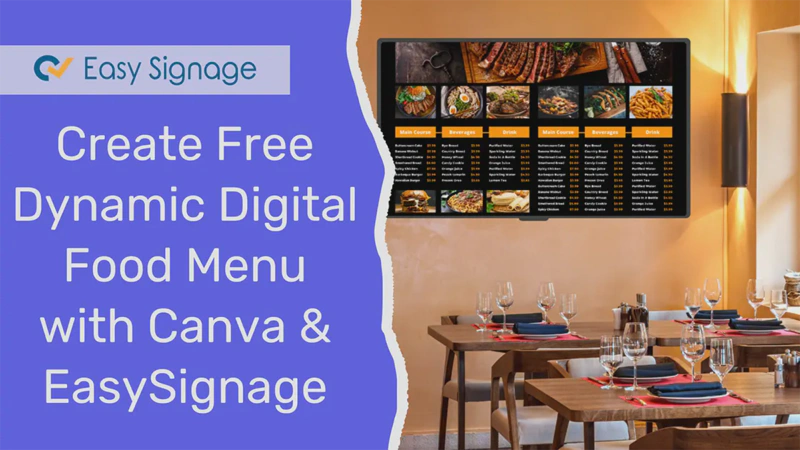
Create a Dynamic Digital Food Menu for Free With Canva and EasySignage
Welcome to our easy and informative guide on how to create a free dynamic digital food menu. If you’re looking for a free and visually appetising way to showcase your mouthwatering menu items, you’ve come to the right spot! Today, we’re diving into the world of dynamic digital food menus, and we’ll show you how you can easily create your own using the winning combo of Canva and EasySignage .
We get it; you’re passionate about food, not tech . That’s why we’re keeping things as simple as a well-made cheeseburger. By the end of this blog post, you’ll be ready to serve up a stunning digital menu without breaking a sweat and will leave your customers hungry for more. Let’s get started!
What’s a Dynamic Digital Food Menu, Anyway?
Before we jump into the fun stuff, let’s clear up what we mean by a “dynamic digital food menu” . It’s a modern, eye-catching, easy-to-update way to display your restaurant’s offerings on digital screens. Whether for your dine-in customers or your online audience, this digital menu is a game-changer.
Imagine saying goodbye to those old, static, and outdated printed menus. With a dynamic digital menu, you can make changes on the fly, showcase daily specials, and add tantalising images of your dishes, all in real-time. It’s like having a personal graphic designer for your restaurant but without the hefty price tag.
Why Canva and EasySignage?
You might wonder why these two tools are in particular. Well, the answer is simple:
Canva - It’s the go-to graphic design tool for people who aren’t graphic designers. Canva makes creating stunning visuals a breeze, even if you’ve never touched Photoshop. And the best part? It’s free! So, you can kiss expensive design software goodbye.
EasySignage - The user-friendly digital signage platform that brings your creations to life on screen. It is designed for people like you – restaurant owners who want an easy way to manage and display digital menus. It’s efficient, cost-effective, and doesn’t require you to be a tech wizard.
Why Go Digital with Your Food Menu?
So, what’s the big deal about switching to a dynamic digital menu with Canva and EasySignage? Here are some tasty advantages:
Instant Updates: No more printing and reprinting menus every time you add a new dish or change a price. Update your menu in seconds, and your customers will always see what’s on offer.
Better Visualization: High-quality images of your dishes make them irresistible. Your customers can practically taste the food through the screen!
Savings on Printing Costs: No need for endless reprints of paper menus. Your wallet will thank you.
Upselling Made Easy: Dynamic menus can provide a more interactive experience. You Can showcase daily specials and combos prominently, add nutritional information, and even incorporate customer reviews to boost your sales.
- Environmental Friendliness: Say goodbye to paper waste and embrace a greener way to operate your restaurant.
Let’s Get Cooking: Create Your Dynamic Digital Menu
Now that you’re convinced, let’s jump to the fun part. Follow these simple steps, and you’ll be well on your way to serving a drool-worthy digital menu:
Step1: Plan Your Menu
What are your restaurant’s signature dishes? What kind of visuals will best represent your brand? Before you dive into the design process, take some time to plan your digital menu. Think about what dishes or categories you want to feature prominently. Highlight your signature dishes, daily specials, or seasonal items. This will be the blueprint for your digital menu’s layout.
Step 2: Sign Up for Canva
Now that you have a plan, it’s time to let your creative juices flow. Canva is the perfect playground for this step. First, head over to Canva and sign up for a free account. It’s as simple as making a reservation at your favourite restaurant. Go ahead; we’ll wait here!
Step 3: Sign Up for EasySignage
Head over to EasySignage and create an account if you haven’t already. The process is quick and straightforward, and there’s even a free plan to get you started.
Step 4: Create a playlist
Once you’re into EasySignage, you’ll create a “playlist” to display your menu. It’s as easy as selecting ‘ADD PLAYLIST’ and giving it a catchy name, like “Today’s Delights”.
- Choose a layout for your playlist.
- From the Apps, choose Canva.
Step 5: Choose a Template
Now that you’re all set up with Canva, it’s time to design. Let’s pick a template to make your life easier. Canva offers a wide range of templates and design tools, but we recommend starting with a menu template. Just type “menu” into the search bar, and you’ll find a buffet of options.
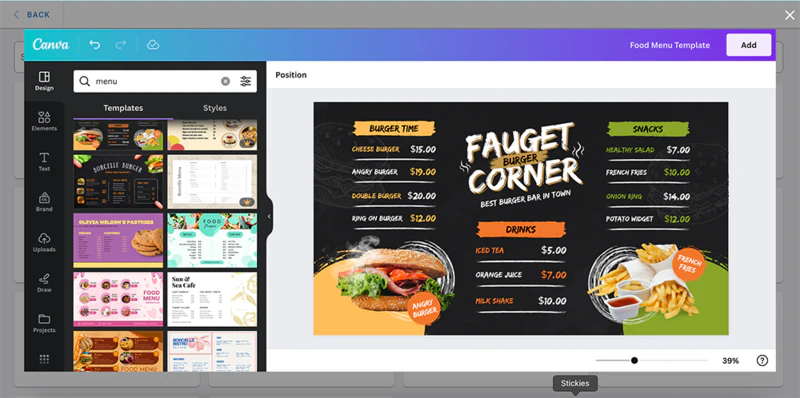
Step 6: Customize to Your Heart’s Content
Once you’ve found a menu template that tickles your taste buds, it’s time to make it your own. Feel free to change colours and fonts and upload images of your delicious dishes. Don’t be shy; the more you personalise, the more it’ll represent your unique restaurant.
Step 7: Add Your Canva Design
With your menu looking just the way you want, it’s time to save it. Hit that ‘Add’ button on the top right corner, and your design will now be imported to the playlist. That was a breeze, wasn’t it? Piece of cake!
Step 8: Customize Display Settings
This is where the magic happens. You can choose how long you want your menu to display, the transition effects, and even the order in which it appears. EasySignage gives you the flexibility to ensure your digital menu looks just right.
Step 9: Assign Your Playlist to a Screen
Now that your playlist is ready, it’s time to assign it to a screen. If you have multiple screens in your restaurant, you can choose which ones will showcase your digital menu. Start by setting up a new screen for your digital menu. You can customise the screen size and orientation to fit your restaurant’s layout.
- Go to the SCREENS tab.
- Click on “Add Screen”.
- The Player App should be installed on your device. For more information about installing the player app on your device, check Installation .
- After installation, a Hash ID should be shown on your display, which is used to add your screen.
- Enter the ID from your display.
- Enter the name and location of your screen.
- Click Add Screen.
- Now your screen is ready to display your playlist.
- Click on “Set Screen Content” from the Media Source column.
- Choose the Playlist you created.
- Click “Publish” on the top right corner of your management console.
Step 10: Schedule Your Content
Decide when you want your menu to play. You can schedule it for different times of the day or particular days of the week. Want to feature breakfast items in the morning and switch to lunch and dinner later? EasySignage’s got you covered.
- Go to the Playlists.
- Choose your menu playlist.
- Click on Media Lifetime.
- Assing a Start date, End Date, Start Time, and End Time to your playlist.
- Click Save.
- The layer in your playlist will now run on your display within the lifetime assigned to it.
Step 11: Watch Your Digital Menu Shine
Sit back and watch the magic unfold. Your digital menu will now play on your chosen screens, dazzling your customers and making your restaurant even more appealing.
Bonus Tips for a Delicious Digital Menu
Creating your digital food menu is just the beginning. To keep it fresh and engaging, regular updates are key. Ask yourself: How often will you refresh your digital menu? Will you introduce seasonal items or monthly specials?
To make it even more appetising, consider these bonus tips :
- Seasonal Specials - Change your menu seasonally to keep things fresh and exciting.
Engage Your Customers - Add QR codes to your digital menu that link to your website, allowing customers to explore more about your restaurant.
Take High-Quality Photos - Good visuals are everything. Invest time in capturing your dishes at their most tempting angles.
Keep It Simple - A clean and straightforward design makes your menu easier to read and navigate.
Test and Adapt - Pay attention to what works and doesn’t. Use your digital menu’s flexibility to make improvements.
In Conclusion
Creating a dynamic digital food menu with Canva and EasySignage is a recipe for success in today’s competitive restaurant industry. It’s user-friendly, budget-friendly, and customer-friendly. Your delicious dishes deserve to shine, and this dynamic duo helps you do just that.
So, what are you waiting for? It’s your turn to put this knowledge into action. Start designing your digital menu with Canva, and bring it to life with EasySignage. Get creative, and give your restaurant the modern edge it deserves! Your customers will thank you, and your competitors will wonder how you did it.
So, whether you’re running a restaurant, cafe’, or food truck, remember that a digital menu can be the secret ingredient to your success. Visit the EasySignage website to learn more about the fantastic platform and get started on your journey.
Give it a try, and you’ll soon see the positive impact it can have on your business and your customers’ dining experiences. Bon appétit!